ثبت داده در بانک اطلاعاتی با استفاده از jQuery و JSON توسط WebMethod
دوشنبه 4 خرداد 1394در این مقاله می خواهیم ثبت کردن داده در بانک اطلاعاتی توسط فراخوانی WebMethod با استفاده از jQuery و JSON

در مرحله اول باید بانک اطلاعاتی را ایجاد کنیم:
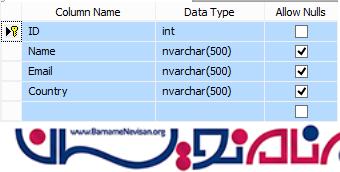
در صورتی که حال ساختن بانک رو ندارید اسکریپت زیر را روی اس کیوال اجرا کنید.
1.	<%@ Page Language="C#" AutoEventWireup="true" CodeBehind="Default.aspx.cs" Inherits="jQueryWebMethodInsertData.Default" %>
2.	<!DOCTYPE html>
3.	<html
4.	    xmlns="http://www.w3.org/1999/xhtml">
5.	    <head runat="server">
6.	        <title></title>
7.	        <script type="text/javascript" src="http://ajax.googleapis.com/ajax/libs/jquery/1.8.3/jquery.min.js"></script>
8.	        <script type="text/javascript" src="http://cdn.jsdelivr.net/json2/0.1/json2.js"></script>
9.	        <script type="text/javascript">
10.	$(function () {
11.	$("[id*=btnSave]").bind("click", function () {
12.	var employee = {};
13.	employee.Name = $("[id*=txtName]").val();
14.	employee.Email = $("[id*=txtEmail]").val();
15.	employee.Country = $("[id*=txtCountry]").val();
16.	$.ajax({
17.	type: "POST",
18.	url: "Default.aspx/SaveUser",
19.	data: '{employee: ' + JSON.stringify(employee) + '}',
20.	contentType: "application/json; charset=utf-8",
21.	dataType: "json",
22.	success: function (response) {
23.	alert("Employee has been added successfully.");
24.	window.location.reload();
25.	}
26.	});
27.	return false;
28.	});
29.	});
30.	</script>
31.	    </head>
32.	    <body>
33.	        <form id="form1" runat="server">
34.	            <table border="0" cellpadding="5" cellspacing="5" style="border: solid 2px Red; background-color: skyblue; width:100%;">
35.	                <tr>
36.	                    <td colspan="2" style="background-color: #f00; color: white; font-weight: bold; font-size: 12pt; text-align: center; font-family: Verdana;">Saving Data In SQL Server By Calling WEB Method using jQuery & JSON</td>
37.	                </tr>
38.	                <tr>
39.	                    <td style="text-align: left; vertical-align: top; width: 300px;">
40.	                        <table border="0" cellpadding="5" cellspacing="5" style="border: solid 2px Green;">
41.	                            <tr>
42.	                                <td colspan="2" style="background-color: red; color: white; font-weight: bold; font-size: 12pt; text-align: center; font-family: Verdana;">Enter Employee Information</td>
43.	                            </tr>
44.	                            <tr>
45.	                                <td>Name:
46.	</td>
47.	                                <td>
48.	                                    <asp:TextBox ID="txtName" runat="server" Text="" />
49.	                                </td>
50.	                            </tr>
51.	                            <tr>
52.	                                <td>Email:
53.	</td>
54.	                                <td>
55.	                                    <asp:TextBox ID="txtEmail" runat="server" />
56.	                                </td>
57.	                            </tr>
58.	                            <tr>
59.	                                <td>Country:
60.	</td>
61.	                                <td>
62.	                                    <asp:TextBox ID="txtCountry" runat="server" />
63.	                                </td>
64.	                            </tr>
65.	                            <tr>
66.	                                <td></td>
67.	                                <td>
68.	                                    <asp:Button ID="btnSave" Text="Save" runat="server" />
69.	                                </td>
70.	                            </tr>
71.	                        </table>
72.	                    </td>
73.	                    <td>
74.	                        <table>
75.	                            <tr>
76.	                                <td>
77.	                                    <asp:GridView ID="gvEmployee" runat="server" AutoGenerateColumns="False" HeaderStyle-BackColor="#3AC0F2"
78.	HeaderStyle-ForeColor="White" RowStyle-BackColor="#A1DCF2" CellPadding="4" ForeColor="#333333" GridLines="None">
79.	                                        <AlternatingRowStyle BackColor="SkyBlue" ForeColor="#284775" />
80.	                                        <Columns>
81.	                                            <asp:BoundField DataField="Id" HeaderText="ID" ItemStyle-Font-Names="Verdana" ItemStyle-Width="40px" HeaderStyle-HorizontalAlign="Center" />
82.	                                            <asp:BoundField DataField="Name" HeaderText="Name" ItemStyle-Font-Names="Verdana" ItemStyle-Width="180px" HeaderStyle-HorizontalAlign="Center" />
83.	                                            <asp:BoundField DataField="Email" HeaderText="Email" ItemStyle-Font-Names="Verdana" ItemStyle-Width="250px" HeaderStyle-HorizontalAlign="Center" />
84.	                                            <asp:BoundField DataField="Country" HeaderText="Country" ItemStyle-Font-Names="Verdana" />
85.	                                        </Columns>
86.	                                        <EditRowStyle BackColor="#999999" />
87.	                                        <FooterStyle BackColor="#5D7B9D" Font-Bold="True" ForeColor="White" />
88.	                                        <HeaderStyle BackColor="#5D7B9D" ForeColor="White" Font-Bold="True" HorizontalAlign="Center"></HeaderStyle>
89.	                                        <PagerStyle BackColor="#284775" ForeColor="White" HorizontalAlign="Center" />
90.	                                        <RowStyle BackColor="#F7F6F3" ForeColor="#333333"></RowStyle>
91.	                                        <SelectedRowStyle BackColor="#E2DED6" Font-Bold="True" ForeColor="#333333" />
92.	                                        <SortedAscendingCellStyle BackColor="#E9E7E2" />
93.	                                        <SortedAscendingHeaderStyle BackColor="#506C8C" />
94.	                                        <SortedDescendingCellStyle BackColor="#FFFDF8" />
95.	                                        <SortedDescendingHeaderStyle BackColor="#6F8DAE" />
96.	                                    </asp:GridView>
97.	                                </td>
98.	                            </tr>
99.	                        </table>
100.	                    </td>
101.	                </tr>
102.	            </table>
103.	        </form>
104.	    </body>
105.	</html>
در ادامه می توانید کد های زیر را مشاهده نمایید:
1.	using System;
2.	using System.Collections.Generic;
3.	using System.Linq;
4.	using System.Web;
5.	using System.Web.UI;
6.	using System.Web.UI.WebControls;
7.	using System.Data;
8.	using System.Data.SqlClient;
9.	using System.Configuration;
10.	using System.Web.Services;
11.	using System.Web.Script.Services;
12.	namespace jQueryWebMethodInsertData
13.	{
14.	    public partial class Default: System.Web.UI.Page
15.	    {
16.	        protected void Page_Load(object sender, EventArgs e) {
17.	            if (!this.IsPostBack)
18.	            {
19.	                BindEmployees();
20.	            }
21.	        }
22.	        private void BindEmployees()
23.	        {
24.	            string constr = ConfigurationManager.ConnectionStrings["RConnection"].ConnectionString;
25.	            using(SqlConnection con = new SqlConnection(constr)) {
26.	                using(SqlCommand cmd = new SqlCommand("SELECT * FROM Employee ORDER BY ID")) {
27.	                    using(SqlDataAdapter da = new SqlDataAdapter()) {
28.	                        DataTable dt = new DataTable();
29.	                        cmd.CommandType = CommandType.Text;
30.	                        cmd.Connection = con;
31.	                        da.SelectCommand = cmd;
32.	                        da.Fill(dt);
33.	                        gvEmployee.DataSource = dt;
34.	                        gvEmployee.DataBind();
35.	                    }
36.	                }
37.	            }
38.	        }
39.	        [WebMethod]
40.	        [ScriptMethod]
41.	        public static void SaveUser(Employee employee)
42.	        {
43.	            string constr = ConfigurationManager.ConnectionStrings["RConnection"].ConnectionString;
44.	            using(SqlConnection con = new SqlConnection(constr)) {
45.	                using(SqlCommand cmd = new SqlCommand("INSERT INTO Employee VALUES(@Name, @Email, @Country)")) {
46.	                    cmd.CommandType = CommandType.Text;
47.	                    cmd.Parameters.AddWithValue("@Name", employee.Name);
48.	                    cmd.Parameters.AddWithValue("@Email", employee.Email);
49.	                    cmd.Parameters.AddWithValue("@Country", employee.Country);
50.	                    cmd.Connection = con;
51.	                    con.Open();
52.	                    cmd.ExecuteNonQuery();
53.	                    con.Close();
54.	                }
55.	            }
56.	        }
57.	    }
58.	}
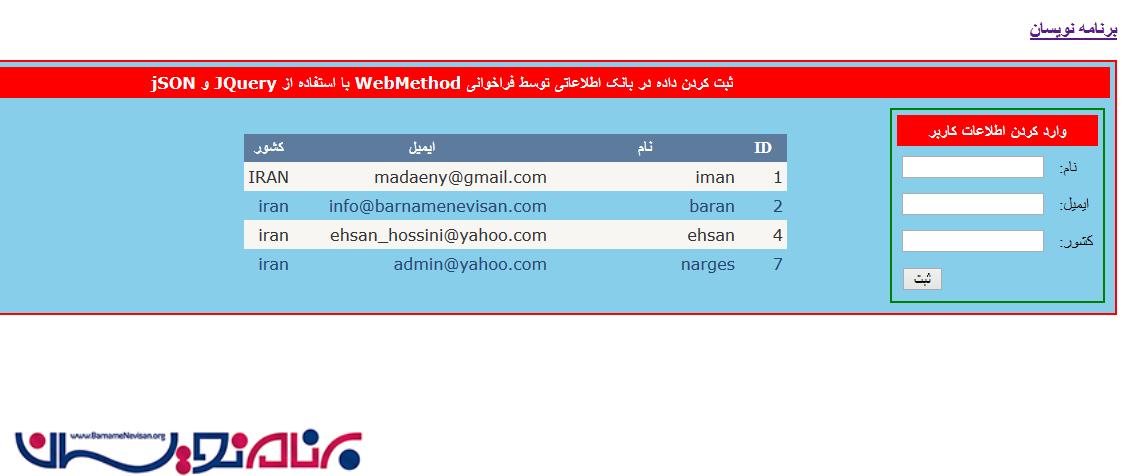
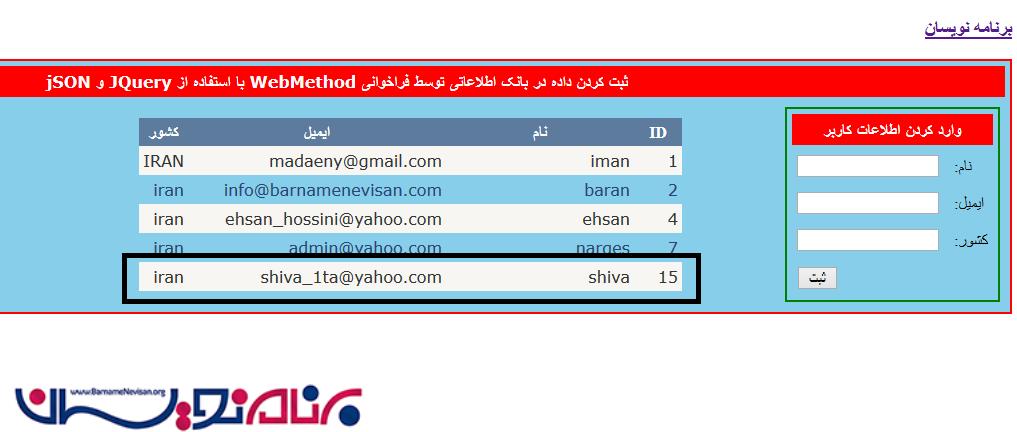
در مرحله بعد برنامه را اجرا کنید و صفحه زیر را مشاهده نمایید:
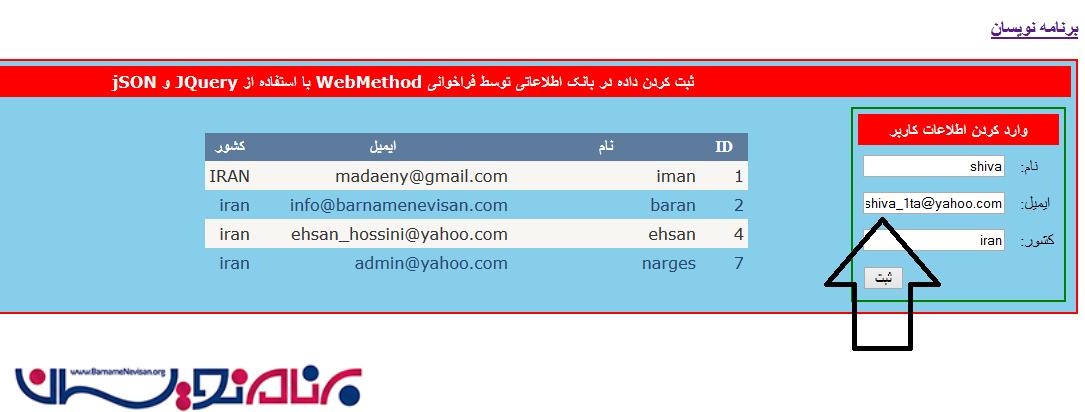
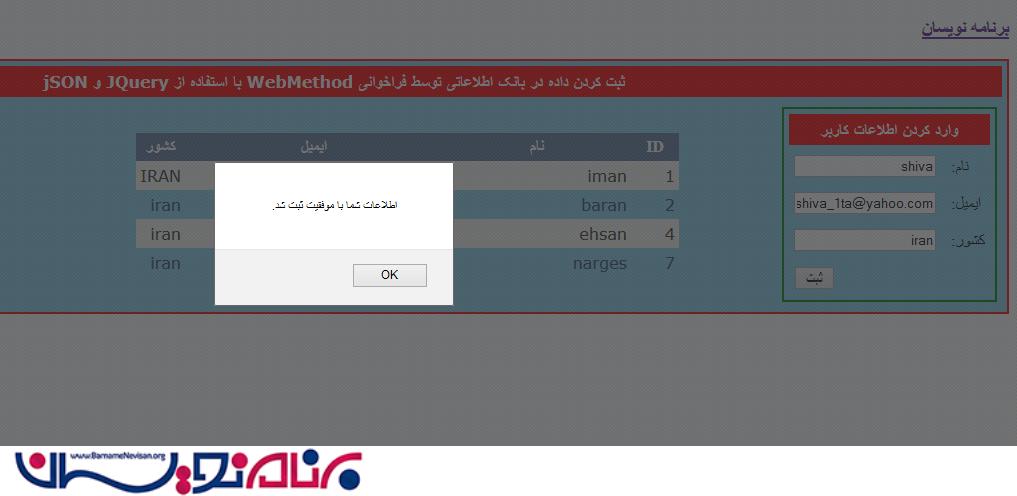
 در این مرحله بعد از وارد کردن اطلاعات ثبت میکنیم :

- Jquery
- 3k بازدید
- 5 تشکر