نمایش طرفداران شما در شبکه های اجتماعی
یکشنبه 18 مرداد 1394در این آموزش ما قصد داریم تا به شما یک پلاگین ساده رو آموزش بدیم که میتونید با استفاده از این تعداد طرفداران خود را در شبکه های اجتماعی را مشاهده کنید.

در این آموزش ما قصد داریم تا به شما نحوه ایجاد یک پلاگین با استفاده از PHP و Jquery و YQL رو بدهیم.
YQL یک وب سرویس رایگان یاهو می باشد که به ما این امکان را می دهد که با استفاده از کدهای شبیه زبان SQL با API گوناگونی ارتباط برقرا بکنیم.این سرویس گذرگاه اصلی سایت بین شما و آن API ها است.
در زیر مهمترین API های YQL را که در این آموزش استفاده خواهیم کرد برای شما آوردیم:
۱-RSS
۲-Twitter که برای نمایش دنبال کنندگان شما در توییتر به کار بسته می شود.
۳-Facebook که برای نمایش دوستان شما در فیسبوک به کار گرفته خواهد شد.
اگر این APIها برای YQL نبودند کار ما برای نوشتن این پلاگین بسیار کند پیش می رفت
    class SubscriberStats{
        public	$twitter,$rss,$facebook;
        public	$services = array();
        public function __construct($arr){
            $this->services = $arr;
            $yqlQueries = array();
            // Forming the Feedburner Awaraness API URL from the passed feed URL:
            $feedBurnerAwarenessAPI = 'http://feedburner.google.com/api/awareness'.
            '/۱.۰/GetFeedData?uri='.end(split('/',trim($arr['feedBurnerURL'],'/')));
            // Building an array with queries:
            if($arr['feedBurnerURL'])
                $yqlQueries[] = '
                    SELECT * FROM xml
                    WHERE url=\''.$feedBurnerAwarenessAPI.'\'
                ';
            if($arr['twitterName'])
                $yqlQueries[] = '
                    SELECT * FROM twitter.user.profile
                    WHERE id=\''.$arr['twitterName'].'\'
                ';
            if($arr['facebookFanPageURL'])
                $yqlQueries[] = '
                SELECT likes FROM facebook.graph
                WHERE id=\''.end(split('/',trim($arr['facebookFanPageURL'],'/'))).'\'
                ';
            // Combing them into a YQL multiquery:
            $multiQuery =
            'SELECT * FROM query.multi WHERE queries = "'.join(';',$yqlQueries).'"';
            // Executing the query:
            $result = json_decode(
                file_get_contents('http://query.yahooapis.com/v1/public/yql?q='.
                urlencode($multiQuery).'&format=json&diagnostics=false&'
                'amp;env=store%3A%2F%2Fdatatables.org%2Falltableswithkeys')
            )->query->results->results;
            // The results from the queries are accessible in the $results array:
            $this->rss = $result[0]->rsp->feed->entry->circulation;
            $this->twitter = $result[1]->item->meta[5]->content;
            $this->facebook = $result[2]->json->fan_count;
        }
        public function generate(){
            $total = number_format($this->rss+$this->twitter+$this->facebook);
            echo '
                <div class="subscriberStats">
                    <div class="subscriberCount"
                    title="'.$total.'+ Total Social Media Followers">'.$total.'</div>
                    <div class="socialIcon"
                    title="'.number_format($this->rss).' RSS Subscribers">
                        <a href="'.$this->services['feedBurnerURL'].'">
                        <img src="img/rss.png" alt="RSS" /></a>
                    </div>
                    <div class="socialIcon"
                    title="'.number_format($this->facebook).' Fans on Facebook">
                        <a href="'.$this->services['facebookFanPageURL'].'">
                        <img src="img/facebook.png" alt="Facebook" /></a>
                    </div>
                    <div class="socialIcon"
                    title="'.number_format($this->twitter).' Twitter Followers">
                    <a href="http://twitter.com/'.$this->services['twitterName'].'">
                        <img src="img/twitter.png" alt="Twitter" /></a>
                    </div>
                </div>
            ';
        }
    }
وقتی که ما آبجکت های کلاس را ایجاد می کنیم،متد های آن فراخوانی شده و یک کوئری YQL ایجاد شده و اجرا می شود.برای درخواست داده از سرورYQL،ما فقط از ()file_get_contents با آدرس مورد نظر استفاده خواهیم کرد.این یک آبجکت JSON بر میگرداند که ما میتوانیم آن را به یک آرایه در PHP تبدیل کنیم که این کار را تابع ()json_decode انجام می دهد.نتیجه این پرس و جو به صورت محلی ذخیره شده و در متد ()generate که کار تولید تمام نشانه گذاری ها را بر عهده دارد استفاده میشود.
خوب اجازه دهید به شما نحوه استفاده کلاس را نشان بدهیم:
    require "includes/subscriber_stats.class.php";
    $cacheFileName = "cache.txt";
    // IMPORTANT: after making changes to this file (or the SubscriberStats class)
    // remeber to delete cache.txt from your server, otherwise you wont see your changes.
    // If a cache file exists and it is less than 6*60*60 seconds (6 hours) old, use it:
    if(file_exists($cacheFileName) && time() - filemtime($cacheFileName) > 6*60*60)
    {
        $stats = unserialize(file_get_contents($cacheFileName));
    }
    if(!$stats)
    {
        // If no cache was found, fetch the subscriber stats and create a new cache:
        $stats = new SubscriberStats(array(
            'facebookFanPageURL'	=> 'http://www.facebook.com/smashmag',
            'feedBurnerURL'			=> 'http://feeds.feedburner.com/Tutorialzine',
            'twitterName'			=> 'Tutorialzine'
        ));
        // Serialize turns the object into a string,
        // which can later be restored with unserialize():
        file_put_contents($cacheFileName,serialize($stats));
    }
    //	You can access the individual stats like this:
    //	$stats->twitter;
    //	$stats->facebook;
    //	$stats->rss;
    //	Output the markup for the stats:
    $stats->generate();
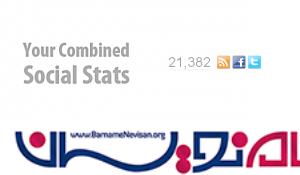
نتیجه به صورت زیر نمایش داده خواهد شد

در بخش کدهای PHP گفتیم که متد ()generate کار تبدیل تمام نشانه گذاری موجود در کدHTML را انجام می دهد.در نحوه انجام این کار نشان داده شده است.
    <div class="subscriberStats">
        <div class="subscriberCount"  title="25,382+ Total Social Media Followers>25,382</div>
        <div class="socialIcon" title="5,921 RSS Subscribers">
            <a href="http://feeds.feedburner.com/Tutorialzine">
            <img alt="RSS" src="img/rss.png" /></a>
        </div>
        <div class="socialIcon" title="16,813 Fans on Facebook">
            <a href="http://www.facebook.com/smashmag">
            <img alt="Facebook" src="img/facebook.png" /></a>
        </div>
        <div class="socialIcon" title="2,648 Twitter Followers">
            <a href="http://twitter.com/Tutorialzine">
            <img alt="Twitter" src="img/twitter.png" /></a>
        </div>
    </div>
این کد توسط کدهای AJAX برداشته شده و در صفحه نمایش داده میشوند.در ضمن با استفاده از کدهای JQuery و ویژگی توضیحات(tooltip) توضیح کوتاهی در مورد هر بخش داده میشود.
CSS
کدهای CSS بسیار ساده و مشخص هستند و نیاز به توضیح ندارند.
    .subscriberStats{
        height:35px;
        padding:5px;
        width:220px;
    }
    .socialIcon{
        float:left;
        height:32px;
        width:32px;
    }
    a img{
        border:none;
    }
    .subscriberCount{
        border-bottom:1px dotted #CCCCCC;
        color:#999999;
        float:left;
        font-size:28px;
        line-height:32px;
        margin-right:10px;
    }
    #main{
        height:100px;
        margin:140px auto 50px;
        position:relative;
        width:200px;
    }
بسته به نیاز خود میتوانید چیدمان را از راست یا از چپ تنظیم کنید که کلا از چپ تنظیم کردیم.
JQuery
بعد از وارد کردن کتابخانه Jquery به صفحه ما فقط منتظر ایونت document).ready)$ خواهیم بود تا تمام نشانه گذاری های موجود در صفحه را برای ما استخراج کند.
    $(document).ready(function(){
        // Using the load AJAX method to fetch the subscriber markup
        // from subscriber_count.php:
        $('#main').load('subscriber_count.php',function(){
            // Once loaded, convert the title attributes to tooltips
            // with the tipTip jQuery plugin:
            $('.subscriberStats div').tipTip({defaultPosition:'top'});
        })
    });
منبع : 8np.ir
- HTML
- 1k بازدید
- 1 تشکر
