ایجاد OpenGL در Xamarin
سه شنبه 17 آذر 1394در این مقاله قصد داریم در مورد opengl در mono for android یک نمونه بزاریم.این نمونه به صورت یک مربع که هفت رنگ است و در حال چرخیدن است را نمایش می دهد.

از visual 2010 به بعد کتابخانه opengl را می توان کار کرد، که برای کار کردن آن نیاز به sdk، mono for android دارد.
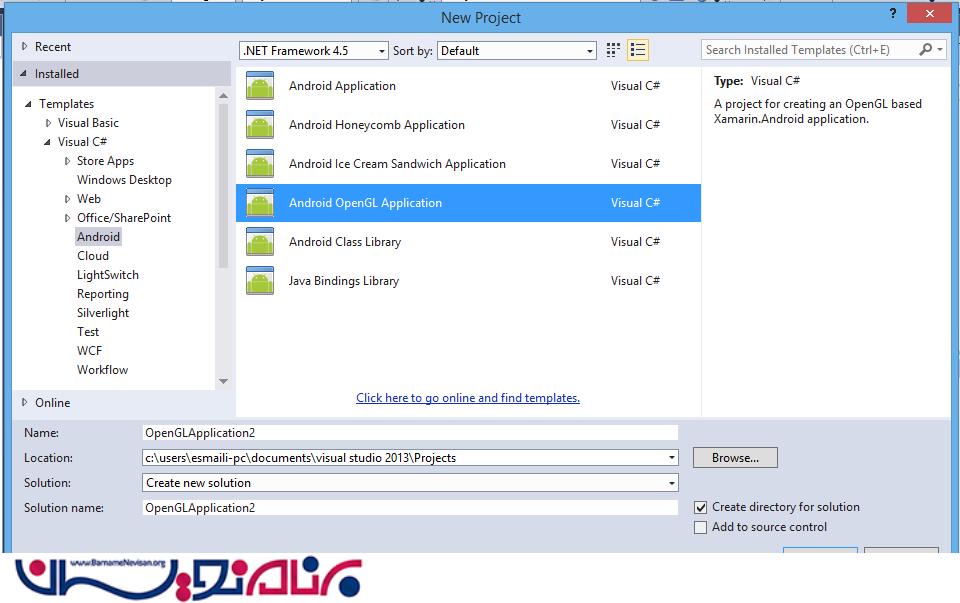
اول پروژه ی خود را باز نمایید و یک پروژه از نوع opengl ایجاد نمایید، به صورت زیر:
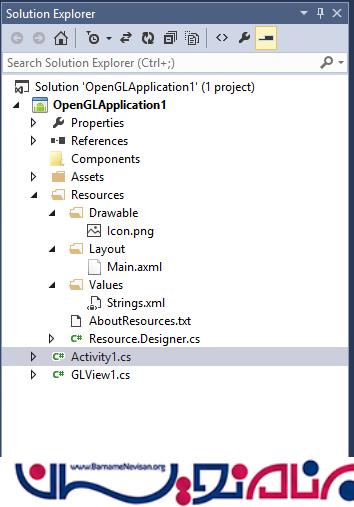
بعد از ایجاد به صورت زیر خواهد شد:
داخل فایل Main قطعه کد زیر را قرار دهید:
<LinearLayout xmlns:android="http://schemas.android.com/apk/res/android"
    android:orientation="vertical"
    android:layout_width="fill_parent"
    android:layout_height="fill_parent">
</LinearLayout>
در فایل xml که در پوشه ی value قرار دارد می توانید نام پروژه ی خود را تغییر دهید:
<?xml version="1.0" encoding="utf-8"?>
<resources>
    <string name="Hello">Hello World, Click Me!</string>
    <string name="ApplicationName">OpenGLApplication1</string>
</resources>
برای هر متغییر کنترل و رشته یک منبع منحصر به فرد وجود دارد، و برای هر منبعی یک شناسه منحصر به فرد وجود دارد.
namespace OpenGLApplication1
{
    public partial class Resource
    {
         public partial class Attribute
         {
                private Attribute()
                {
                }
         }

         public partial class Drawable
         {
                // aapt resource value: 0x7f020000
                public const int Icon = 2130837504;

                private Drawable()
                {
                }
         }

         public partial class Layout
         {
                // aapt resource value: 0x7f030000
                public const int Main = 2130903040;

                private Layout()
                {
                }
         }

         public partial class String
         {
                // aapt resource value: 0x7f040001
                public const int ApplicationName = 2130968577;

                // aapt resource value: 0x7f040000
                public const int Hello = 2130968576;

                private String()
                {
                }
          }
     }
}
داخل کلاس activity قطعه کد زیر را بنویسید:
using System;
using Android.App;
using Android.Content;
using Android.Runtime;
using Android.Views;
using Android.Widget;
using Android.OS;

namespace OpenGLApplication1
{
    [Activity(Label = "OpenGLApplication1", MainLauncher = true, Icon = "@drawable/icon")]

    public class Activity1 : Activity
    {
        protected override void OnCreate(Bundle bundle)
        {
            base.OnCreate(bundle);

            // Create our OpenGL view, and display it
            GLView1 view = new GLView1(this);
            SetContentView(view);
        }
    }
}
کلاس Glview از کلاس AndroidGameView ارث بری شده است:
 class GLView1 : AndroidGameView
    {
        public GLView1(Context context)
            : base(context)
        {
        }

        // This gets called when the drawing surface is ready
        protected override void OnLoad(EventArgs e)
        {
            base.OnLoad(e);

            // Run the render loop
            Run();
        }

        // This gets called on each frame render
        protected override void OnRenderFrame(FrameEventArgs e)
        {
            base.OnRenderFrame(e);

            GL.MatrixMode(All.Projection);
            GL.LoadIdentity();
            GL.Ortho(-1.0f, 1.0f, -1.5f, 1.5f, -1.0f, 1.0f);
            GL.MatrixMode(All.Modelview);
            GL.Rotate(3.0f, 0.0f, 0.0f, 1.0f);

            GL.ClearColor(0.5f, 0.5f, 0.5f, 1.0f);
            GL.Clear((uint)All.ColorBufferBit);

            GL.VertexPointer(2, All.Float, 0, square_vertices);
            GL.EnableClientState(All.VertexArray);
            GL.ColorPointer(4, All.UnsignedByte, 0, square_colors);
            GL.EnableClientState(All.ColorArray);

            GL.DrawArrays(All.TriangleStrip, 0, 4);

            SwapBuffers();
        }

        float[] square_vertices = {
			-0.5f, -0.5f,
			0.5f, -0.5f,
			-0.5f, 0.5f,
			0.5f, 0.5f,
		};

        byte[] square_colors = {
			255, 255,   0, 255,
			0,   255, 255, 255,
			0,     0,    0,  0,
			255,   0,  255, 255,
		};
    }
این کلاس رنگ و چرخش اشیا و رسم اشکال را بر عهده دارد.
زمانی که پروژه را buildو اجرا کنید شبیه ساز ها و دستگاه هایی که متصل هستند را نمایش می دهد.
که شما یا گوشی و یا شبیه ساز خود را انتخاب می نمایید.
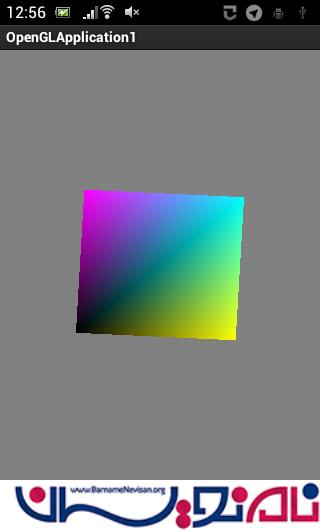
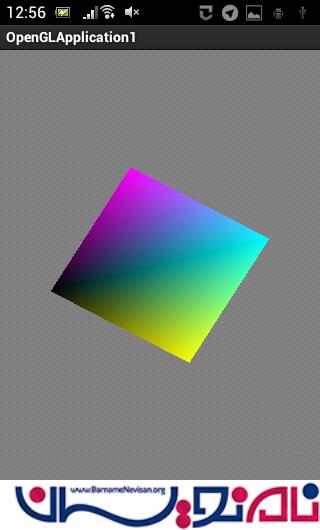
بعد از اجرا کردن بر روی گوشی خود خروجی به صورت زیر خواهد بود یک مربع که چند رنگ است و در حال چرخیدن است.
خروجی :
دوره های آموزشی زامارین
دوره برنامه نویسی اندروید با سی شارپ ( Xamarin )
آموزش متریال دیزاین در زامارین
آموزش Xamarin Forms
دوره Xamarin Form پیشرفته

- Xamarin
- 1k بازدید
- 2 تشکر