خاصیت Index با استفاده از Entity Framework
شنبه 9 خرداد 1394در این مقاله میخواهیم روش دسترسی به یک پایگاه داده SQL Server با Entity Framework Code First و روش ایجاد یک Index شرح دهیم.

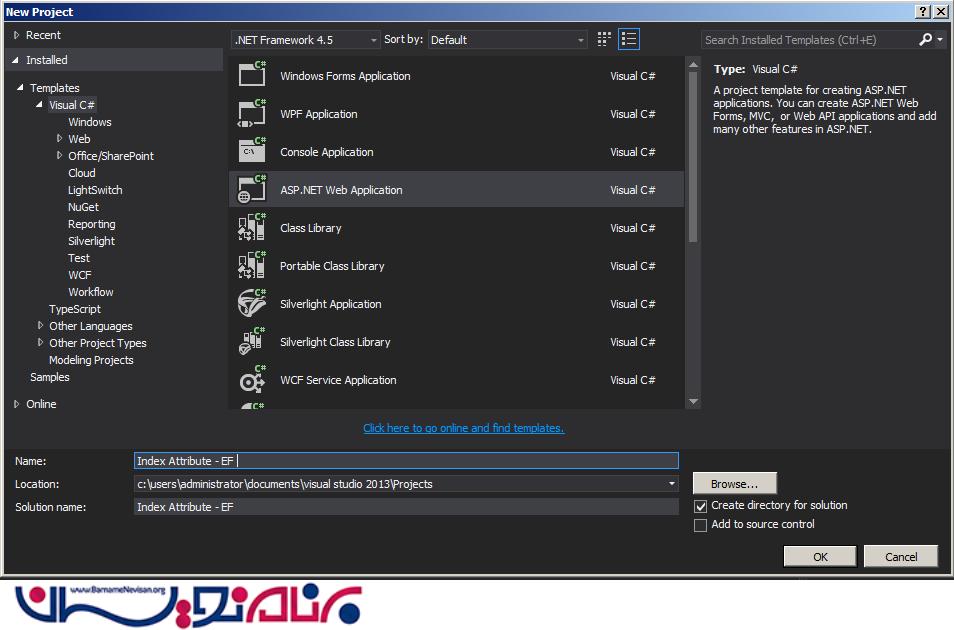
در مرحله اول یک Asp.Net در Web application ایجاد میکنیم:
حالا باید داخل پروژه جداول بانک را بنویسیم برای این کار ابتدا کلاس زبر را ایجاد کنید:
Emplpyee.cs
1. using System;
2. using System.Collections.Generic;
3. using System.ComponentModel.DataAnnotations;
4. using System.ComponentModel.DataAnnotations.Schema;
5. using System.Linq;
6. using System.Web;
7.
8. namespace Index_Attribute___EF
9. {
10. public class Employee
11. {
12. public Employee()
13. {
14. }
15.
16. [Key]
17. [DatabaseGenerated(DatabaseGeneratedOption.Identity)]
18. public int Id { get; set; }
19. public string FirstName { get; set; }
20.
21. [MaxLength(50)]
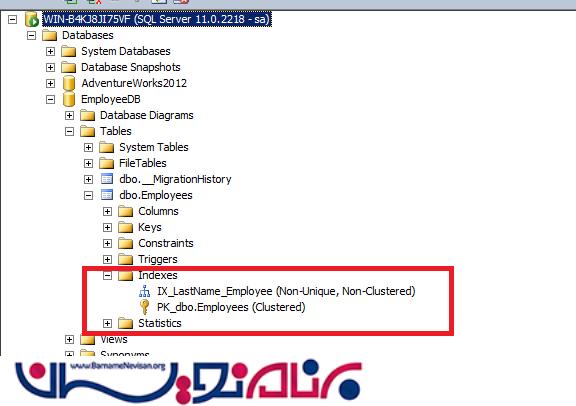
22. [Index("IX_LastName_Employee", IsClustered=false)]
23. public string LastName { get; set; }
24.
25. }
26. }
همان طور که مشاهده می کنید ما یک کلاس ایجاد کردیم و یک کلاس دیگه هم داریم که کار اصلی را برای ما انجام میدهدیعني وظيفه ارتباط بين کلاس ها و جداول بانک اطلاعاتي رو به عهده خواهد داشت. کد زیر را مشاهده نمایید :
کد Employeecontext.cs :
1.	using System;
2.	using System.Collections.Generic;
3.	using System.Data.Entity;
4.	using System.Linq;
5.	using System.Web;
6.
7.	namespace Index_Attribute___EF
8.	{
9.	    public class EmployeeContext : DbContext
10.	    {
11.	        public EmployeeContext()
12.	            : base("EmployeeConn")
13.	        {
14.	            Database.SetInitializer<EmployeeContext>(new CreateDatabaseIfNotExists<EmployeeContext>());
15.	        }
16.
17.	        public DbSet<Employee> Employees { get; set; }
18.	    }
19.
حالا بايد Connection String بانک رو براي کلاس Context تعريف کنيم. براي اين کار فايل Web.config را باز کرده و به صورت زير تغيير مي دهيم:
1.	<connectionStrings>
2.	    <add name="EmployeeConn"
3.	    connectionString="Data Source=WIN-B4KJ8JI75VF;Initial Catalog=EmployeeDB;Integrated Security=true"
4.	    providerName="System.Data.SqlClient"/>
5.	  </connectionStrings>
دقت کنيد که نام ConnectionString بايد با نام Context يکي باشد. کل کاري که بايد انجام مي داديم همين بود، حالا مي توانيم از اين کلاس ها داخل برنامه استفاده کنیم.
کلیه دستورات به همراه تگ های موجود در صفحه Webform1.aspxرا مشاهده نمایید:
1.	<%@ Page Language="C#" AutoEventWireup="true" CodeBehind="WebForm1.aspx.cs" Inherits="Index_Attribute___EF.WebForm1" %>
2.
3.	<!DOCTYPE html>
4.
5.	<html xmlns="http://www.w3.org/1999/xhtml">
6.	<head runat="server">
7.	    <title></title>
8.	</head>
9.	<body>
10.	    <form id="form1" runat="server">
11.	        <div>
12.	            <table>
13.	                <tr>
14.	                    <td>
15.	                        <asp:Label ID="Label1" runat="server" Text="Index Attribute" Font-Bold="true"></asp:Label>
16.	                    </td>
17.	                </tr>
18.	            </table>
19.	            <br />
20.	            <br />
21.	            <table>
22.	                <tr>
23.	                    <td>
24.	                        <asp:Label ID="Label2" runat="server" Text="Please Enter FirstName: " ForeColor="Brown"
25.	                            Font-Bold="true" Font-Italic="true"></asp:Label>
26.	                    </td>
27.	                    <td>
28.	                        <asp:TextBox ID="TextBox1" runat="server"></asp:TextBox>
29.	                    </td>
30.	                </tr>
31.	                <tr>
32.	                    <td>
33.	                        <asp:Label ID="Label3" runat="server" Text="Please Enter LastName: " ForeColor="Brown"
34.	                            Font-Bold="true" Font-Italic="true"></asp:Label>
35.	                    </td>
36.	                    <td>
37.	                        <asp:TextBox ID="TextBox2" runat="server"></asp:TextBox>
38.	                    </td>
39.	                </tr>
40.	                <tr>
41.	                    <td colspan="2">
42.	                        <asp:Button ID="Button1" runat="server" Text="Insert Data"
43.	                            BackColor="Orange" Font-Bold="true" OnClick="Button1_Click" />
44.	                        <br />
45.	                        <br />
46.	                    </td>
47.	                </tr>
48.	            </table>
49.	        </div>
50.	    </form>
51.	</body>
52.	</html>
در ادامه می توانید کدهای Webform1.aspx.cs را مشاهده نمایید:
1.	using System;
2.	using System.Collections.Generic;
3.	using System.Linq;
4.	using System.Web;
5.	using System.Web.UI;
6.	using System.Web.UI.WebControls;
7.
8.	namespace Index_Attribute___EF
9.	{
10.	    public partial class WebForm1 : System.Web.UI.Page
11.	    {
12.	        protected void Page_Load(object sender, EventArgs e)
13.	        {
14.
15.	        }
16.
17.	        protected void Button1_Click(object sender, EventArgs e)
18.	        {
19.	            EmployeeContext empContext = new EmployeeContext();
20.	            Employee emp = new Employee() { FirstName = TextBox1.Text, LastName = TextBox2.Text };
21.	            empContext.Employees.Add(emp);
22.	            empContext.SaveChanges();
23.
24.	        }
25.	    }
26.	}
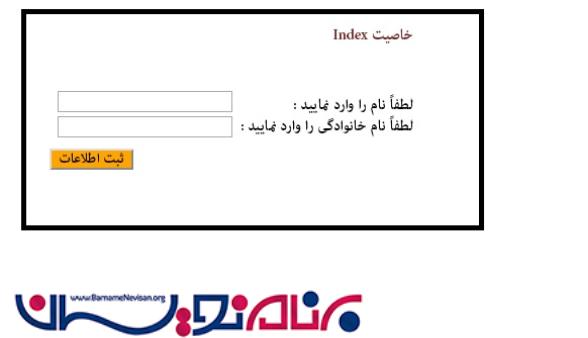
خروجی برنامه به شکل زیر می باشد:

- ASP.net
- 2k بازدید
- 4 تشکر