نحوه پیاده سازی الگوی Repository در MVC با استفاده از Entity Framework
دوشنبه 12 مرداد 1394در این مقاله نحوه پیاده سازی الگوی Repository در MVC با استفاده از فریم ورک Entity را با استفاده از مثالی با عنوان سیستم مدیریت کارمندان شرح خواهیم داد.

در ابتدا لازم است که مفهوم الگوی Repository (ریپوزیتوری) را درک نمایید.
الگوی Repository چیست؟
معنی لغوی رپوزیتوری مخزن و یا ذخیره کردن اطلاعات می باشد و شگردی جدید در برنامه نویسی محسوب می شود. در صورت تمایل می توانید آموزش کامل را دانلود نمایید.
الگوی Repository چه کاری انجام می دهد؟
الگوی Repository و Unit test (یونیت تست) در حقیقت لایه ای بین Data Access Layer و Bussiness Logic Layer می باشد، پیاده سازی این الگو شما را قادر خواهد کرد که برنامه های خود را در مقابل ذخیره داده ها و ساخت امکانات خودکار و یونیت تست ها ایمن و ایزوله وانعطاف پذیر نمایید و کد کمتری نوشته و بهره بیشتری از آن ببرید.
بهتر است اگر آشنایی اولیه ندارید سری به اینجا بزنید.
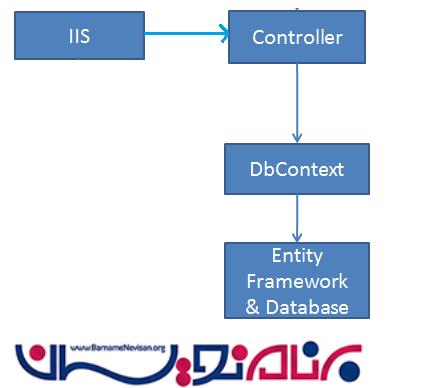
برنامه MVC بدون الگوی Repository :
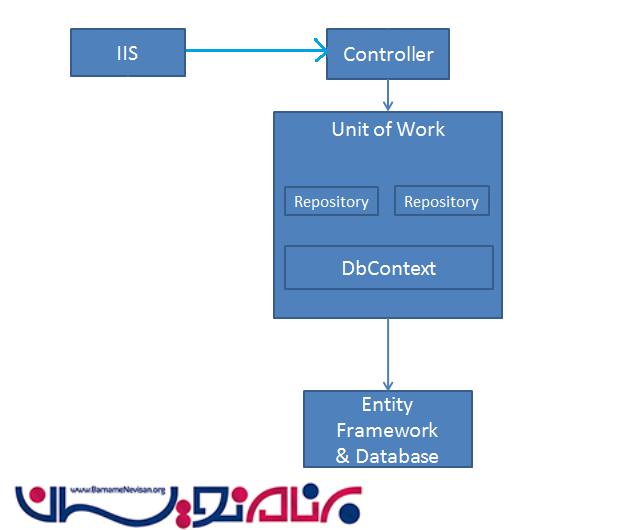
برنامه MVC با الگوی Repository :
حال الگوی Repository را به همراه یک مثال کاربردی خواهید دید.
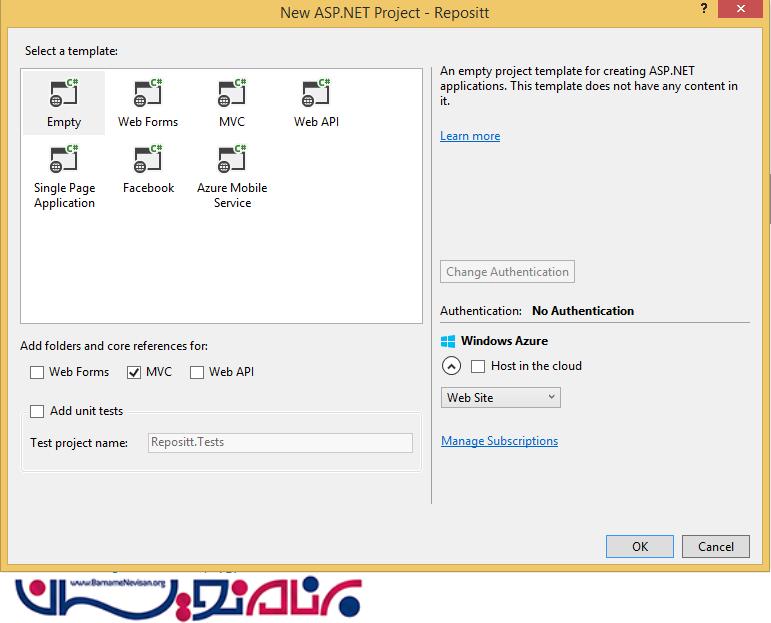
ویژوال استادیو را باز کرده و یک پروژه از نوع MVC ایجاد نمایید.

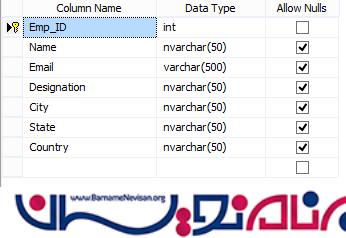
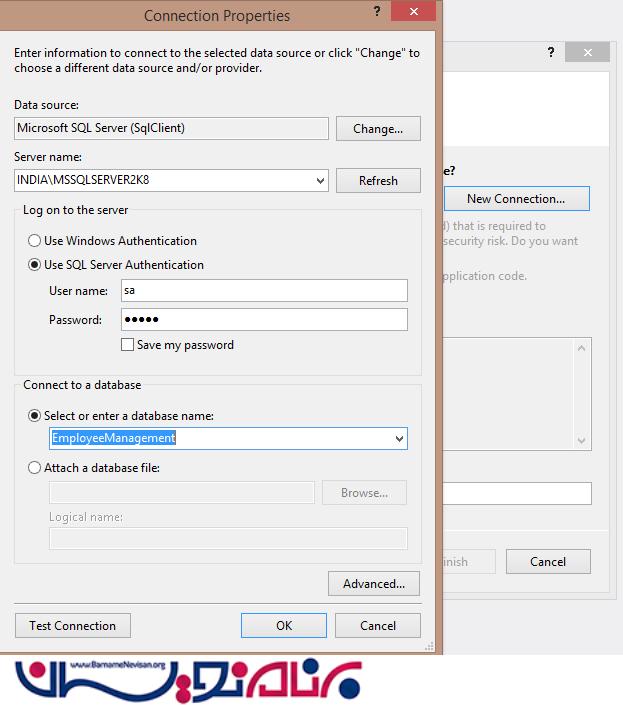
یک بانک اطلاعاتی بانام EmployeeManagement ساخته و جدولی با نام Employee با فیلدهای زیر بسازید.
کسانی که وقت کافی برای ساخت بانک و جداول ندارند می توانند فایل نصبی موجود در پوشه ضمیمه را نصب کنند سپس از این قسمت شروع به ساخت پروژه نمایند.
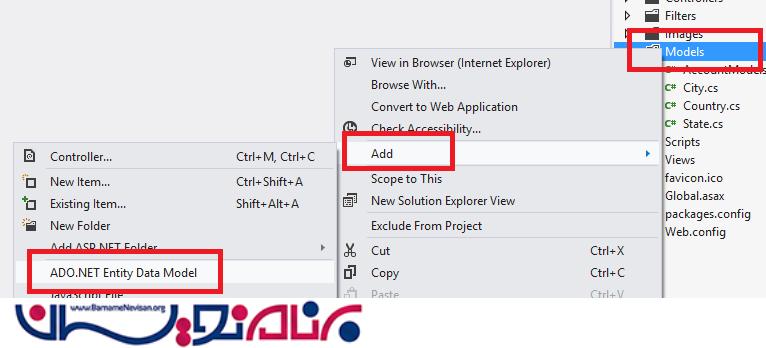
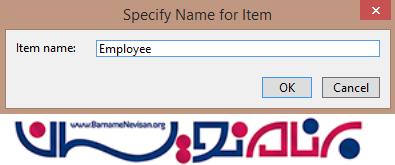
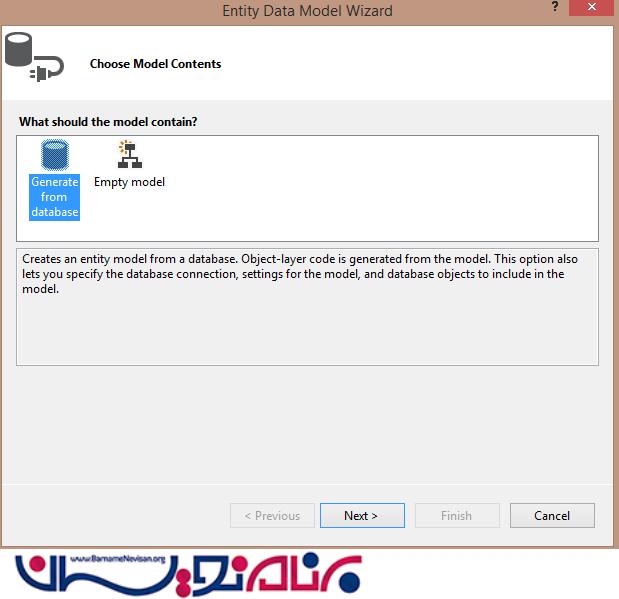
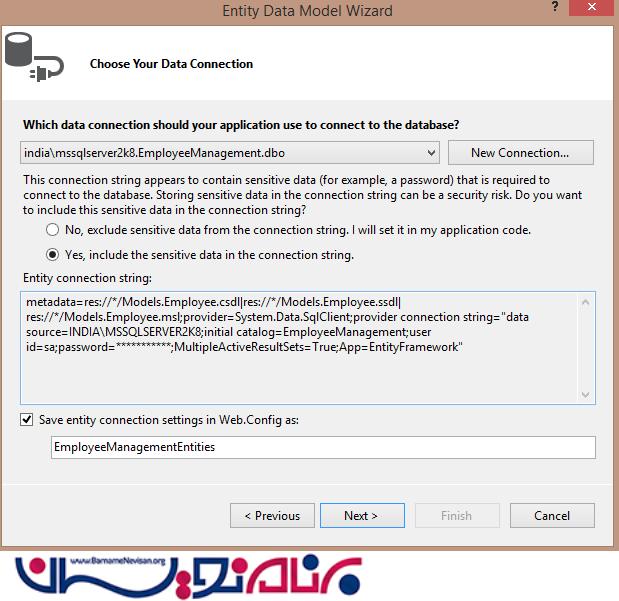
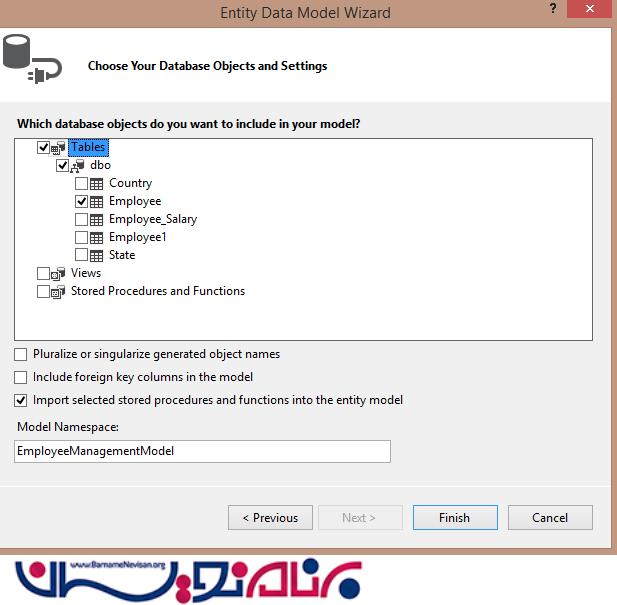
حالا مانند شکل مدل خود را از طریق Add ADO.NET Entity Data Model به برنامه اضافه می نماییم. برای این کار در Soloution Exxplorer روی Models راست کلیک کرده و Add ADO.NET Entity Data Model را کلیک می نماییم.
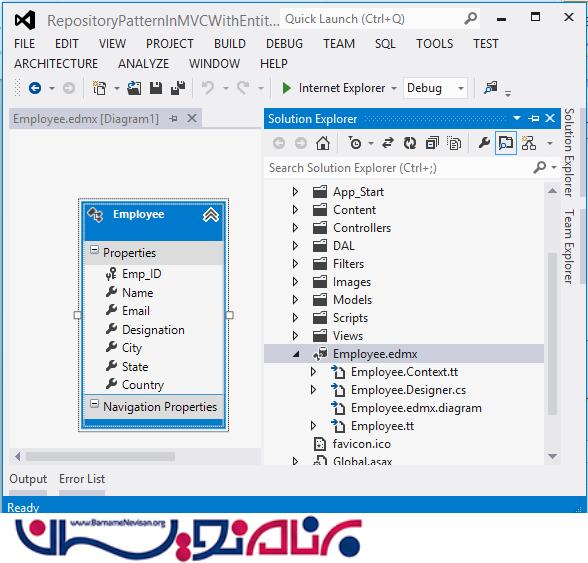
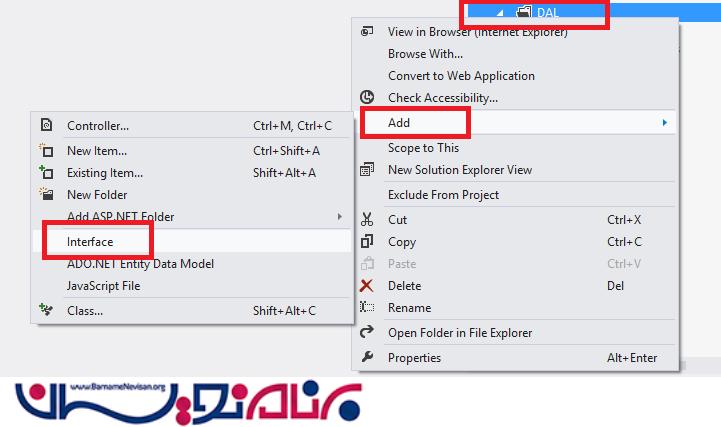
سپس یک پوشه با نام DAL می سازیم.
روی پوشه ساخته شده کلیک راست کرده و Add->Inteface را می زنیم. Inteface را IEmployeeRepository نامگذاری می نماییم.
کدهای زیر را در IEmployeeRepository کپی نمایید :
    public interface IEmployeeRepository : IDisposable
    {
        IEnumerable<Employee> GetAllEmployee();
        Employee GetEmployeeByID(int emp_ID);
        void InsertEmployee(Employee emp);
        void DeleteEmployee(int emp_ID);
        void UpdateEmployee(Employee emp);
        void Save();
    }
یک کلاس در DAL با نام EmployeeRepository ساخته و کدهای زیر را در آن کپی نمایید :
 public class EmployeeRepository : IEmployeeRepository, IDisposable
    {
        private EmployeeManagementEntities context;

        public EmployeeRepository(EmployeeManagementEntities context)
        {
            this.context = context;
        }

        public IEnumerable<Employee> GetAllEmployee()
        {
            return context.Employee.ToList();
        }

        public Employee GetEmployeeByID(int id)
        {
            return context.Employee.Find(id);
        }

        public void InsertEmployee(Employee emp)
        {
            context.Employee.Add(emp);
        }

        public void DeleteEmployee(int emp_ID)
        {
            Employee emp = context.Employee.Find(emp_ID);
            context.Employee.Remove(emp);
        }

        public void UpdateEmployee(Employee emp)
        {
            context.Entry(emp).State = EntityState.Modified;
        }

        public void Save()
        {
            context.SaveChanges();
        }

        private bool disposed = false;

        protected virtual void Dispose(bool disposing)
        {
            if (!this.disposed)
            {
                if (disposing)
                {
                    context.Dispose();
                }
            }
            this.disposed = true;
        }

        public void Dispose()
        {
            Dispose(true);
            GC.SuppressFinalize(this);
        }
    }
سپس در Soloution Explorer روی Controller کلیک راست کرده و یک Empty Controller با نام EmployeeController بسازید :
EmployeeController.cs
 public class EmployeeRepository : IEmployeeRepository, IDisposable
    {
        private EmployeeManagementEntities context;

        public EmployeeRepository(EmployeeManagementEntities context)
        {
            this.context = context;
        }

        public IEnumerable<Employee> GetAllEmployee()
        {
            return context.Employee.ToList();
        }

        public Employee GetEmployeeByID(int id)
        {
            return context.Employee.Find(id);
        }

        public void InsertEmployee(Employee emp)
        {
            context.Employee.Add(emp);
        }

        public void DeleteEmployee(int emp_ID)
        {
            Employee emp = context.Employee.Find(emp_ID);
            context.Employee.Remove(emp);
        }

        public void UpdateEmployee(Employee emp)
        {
            context.Entry(emp).State = EntityState.Modified;
        }

        public void Save()
        {
            context.SaveChanges();
        }

        private bool disposed = false;

        protected virtual void Dispose(bool disposing)
        {
            if (!this.disposed)
            {
                if (disposing)
                {
                    context.Dispose();
                }
            }
            this.disposed = true;
        }

        public void Dispose()
        {
            Dispose(true);
            GC.SuppressFinalize(this);
        }
    }
روی متد Index کلیک راست کرده و یک View برای آن ایجاد کنید.
Index.cshtml
@using PagedList.Mvc;
@model PagedList.IPagedList<Reposit.Models.Employee>
<link href="~/Content/PagedList.css" rel="stylesheet" type="text/css" />
@{
ViewBag.Title = "سیستم مدیریت کارمندان";
}
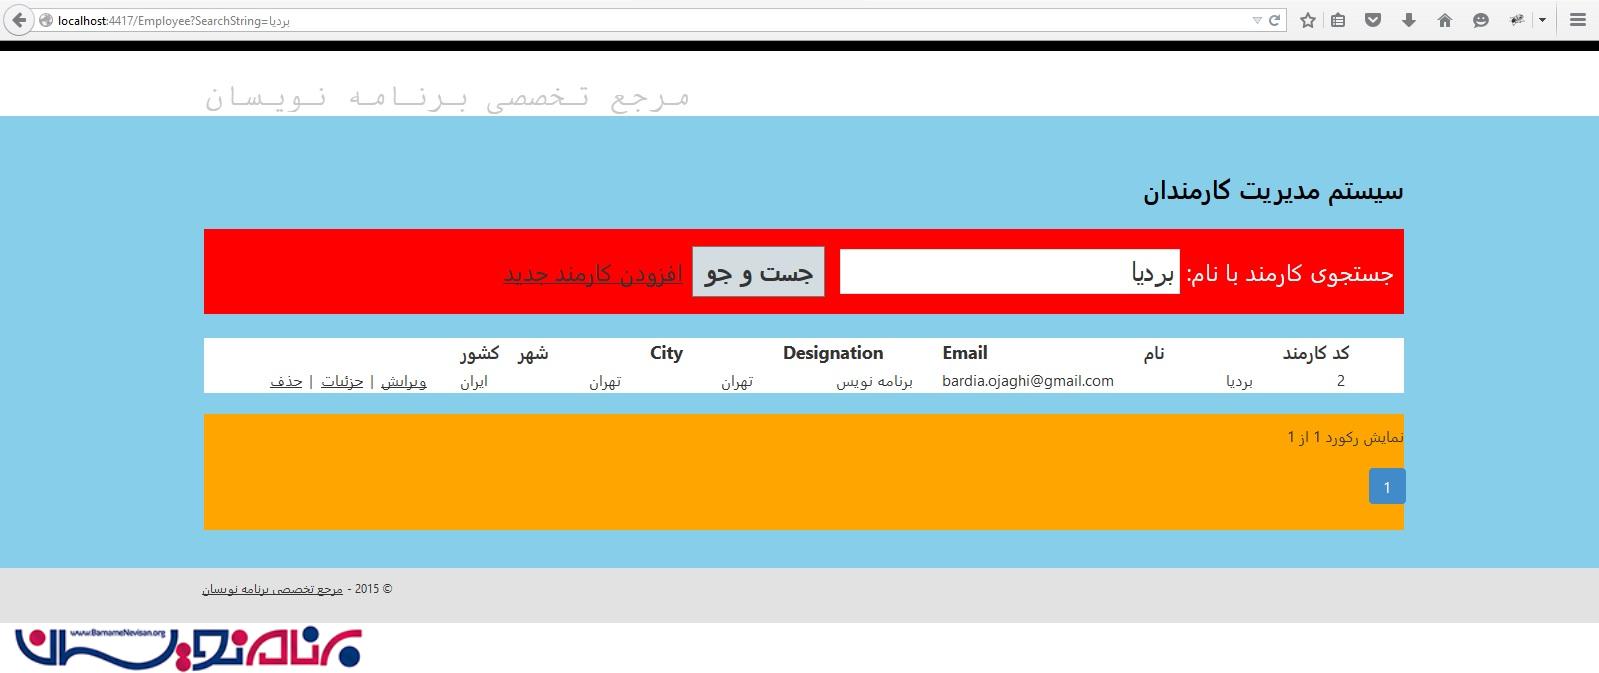
<h2>سیستم مدیریت کارمندان</h2>
@using (Html.BeginForm("Index", "Employee", FormMethod.Get))
{
<p style="background-color:red; color:white; font-size:16pt; padding:10px;">
جستجوی کارمند با نام: @Html.TextBox("SearchString", ViewBag.CurrentFilter as string)
<input type="submit" value="جست و جو" />
@Html.ActionLink("افزودن کارمند جدید", "Create")
</p>
}
<table style="background-color:white;">
<tr>
<th></th>
<th style="width: 100px;">
@Html.ActionLink("کد کارمند", "Index", new { sortOrder = ViewBag.NameSortParm, currentFilter = ViewBag.CurrentFilter })
</th>
<th>
@Html.ActionLink("نام", "Index", new { sortOrder = ViewBag.NameSortParm, currentFilter = ViewBag.CurrentFilter })
</th>
<th>
Email
</th>
<th>
Designation
</th>
<th>
City
</th>
<th>
@Html.ActionLink("شهر", "Index", new { sortOrder = ViewBag.NameSortParm, currentFilter = ViewBag.CurrentFilter })
</th>
<th>
@Html.ActionLink("کشور", "Index", new { sortOrder = ViewBag.NameSortParm, currentFilter = ViewBag.CurrentFilter })
</th>
<th style="width: 150px;"></th>
</tr>
@foreach (var item in Model)
{
<tr>
<td></td>
<td>
@Html.DisplayFor(modelItem => item.Emp_ID)
</td>
<td style="width:130px;">
@Html.DisplayFor(modelItem => item.Name)
</td>
<td>
@Html.DisplayFor(modelItem => item.Email)
</td>
<td style="width:140px;">
@Html.DisplayFor(modelItem => item.Designation)
</td>
<td style="width:120px;">
@Html.DisplayFor(modelItem => item.City)
</td>
<td style="width:120px;">
@Html.DisplayFor(modelItem => item.State)
</td>
<td>
@Html.DisplayFor(modelItem => item.Country)
</td>
<td style="width:270px;">
@Html.ActionLink("ویرایش", "Edit", new { id = item.Emp_ID }) |
@Html.ActionLink("جزئیات", "Details", new { id = item.Emp_ID }) |
@Html.ActionLink("حذف", "Delete", new { id = item.Emp_ID })
</td>
</tr>
}
</table>
<br />
<div style="background-color:orange; padding-left:15px; padding-top:10px;">
نمایش رکورد @(Model.PageCount < Model.PageNumber ? 0 : Model.PageNumber) از @Model.PageCount
@Html.PagedListPager(Model, page => Url.Action("Index", new { page, sortOrder = ViewBag.CurrentSort, currentFilter = ViewBag.CurrentFilter }))
</div>
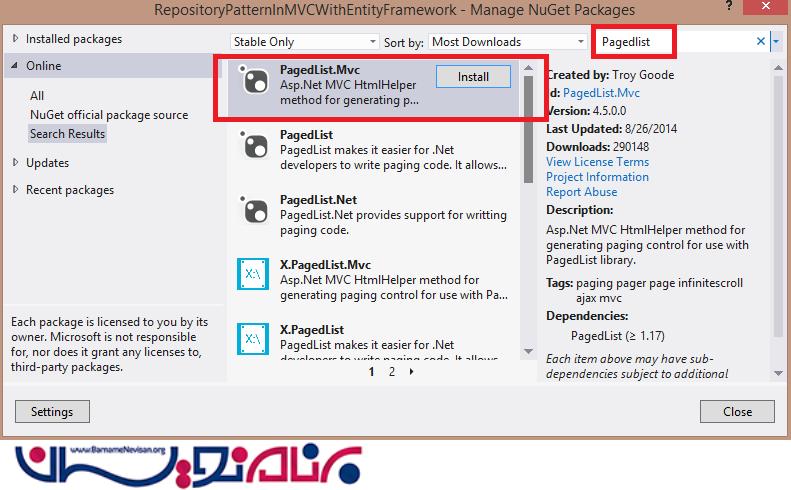
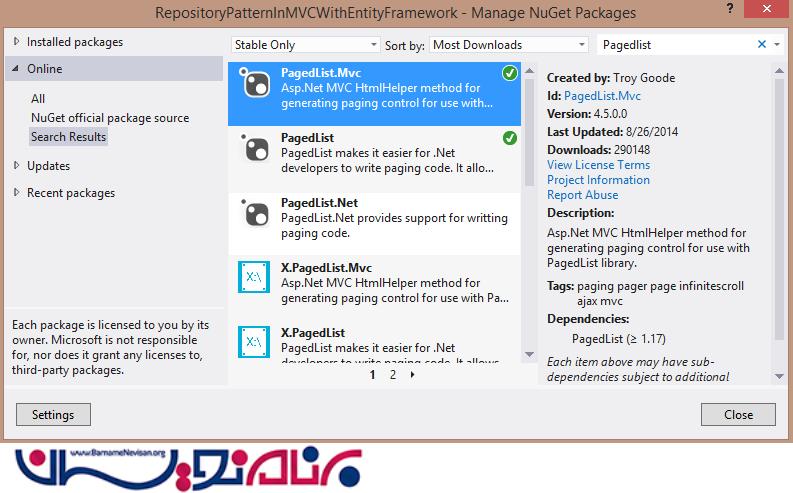
حالا وقت اضافه کردن Reference است. به روی نام پروژه کلیک راست کرده و Manage NuGet Packages را انتخاب کرده و Manage NuGet Packages را نصب نمایید.
حالا روی متد Detail کلیک راست کرده و یک ویو از نوع Detail با کلاس Employee ایجاد نمایید.
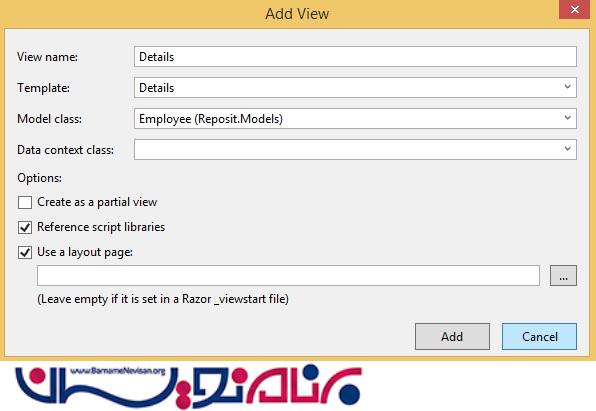
Detail.cshtml
@model Reposit.Models.Employee

<h2>Employee Details</h2>

<table>
    <tr>
        <td>@Html.DisplayNameFor(model => model.Emp_ID)</td>
        <td>@Html.DisplayFor(model => model.Emp_ID)</td>
    </tr>
    <tr>
        <td>@Html.DisplayNameFor(model => model.Name)</td>
        <td>@Html.DisplayFor(model => model.Name)</td>
    </tr>
    <tr>
        <td>@Html.DisplayNameFor(model => model.Email)</td>
        <td>@Html.DisplayFor(model => model.Email)</td>
    </tr>
    <tr>
        <td>@Html.DisplayNameFor(model => model.Designation)</td>
        <td>@Html.DisplayFor(model => model.Designation)</td>
    </tr>
    <tr>
        <td>@Html.DisplayNameFor(model => model.City)</td>
        <td>@Html.DisplayFor(model => model.City)</td>
    </tr>
    <tr>
        <td>@Html.DisplayNameFor(model => model.State)</td>
        <td>@Html.DisplayFor(model => model.State)</td>
    </tr>
    <tr>
        <td>@Html.DisplayNameFor(model => model.Country)</td>
        <td>@Html.DisplayFor(model => model.Country)</td>
    </tr>
    <tr style="background-color: orange; padding: 25px;">
        <td></td>
        <td>
            @Html.ActionLink("ویرایش", "Edit", new { id = Model.Emp_ID }) |
            @Html.ActionLink("بازگشت", "Index")
        </td>

    </tr>
</table>
روی متد Create کلیک راست کرده و یک View برای آن ایجاد کنید.
Create.cshtml
@model Reposit.Models.Employee

<script src="~/Scripts/jquery-1.7.1.min.js"></script>
<script src="~/Scripts/jquery.validate.min.js"></script>
<script src="~/Scripts/jquery.validate.unobtrusive.min.js"></script>

@using (Html.BeginForm())
{
    @Html.AntiForgeryToken()
    @Html.ValidationSummary(true)

    <fieldset>
        <legend>Employee</legend>

        <div class="editor-label">
            @Html.LabelFor(model => model.Name)
        </div>
        <div class="editor-field">
            @Html.EditorFor(model => model.Name)
            @Html.ValidationMessageFor(model => model.Name)
        </div>

        <div class="editor-label">
            @Html.LabelFor(model => model.Email)
        </div>
        <div class="editor-field">
            @Html.EditorFor(model => model.Email)
            @Html.ValidationMessageFor(model => model.Email)
        </div>

        <div class="editor-label">
            @Html.LabelFor(model => model.Designation)
        </div>
        <div class="editor-field">
            @Html.EditorFor(model => model.Designation)
            @Html.ValidationMessageFor(model => model.Designation)
        </div>

        <div class="editor-label">
            @Html.LabelFor(model => model.City)
        </div>
        <div class="editor-field">
            @Html.EditorFor(model => model.City)
            @Html.ValidationMessageFor(model => model.City)
        </div>

        <div class="editor-label">
            @Html.LabelFor(model => model.State)
        </div>
        <div class="editor-field">
            @Html.EditorFor(model => model.State)
            @Html.ValidationMessageFor(model => model.State)
        </div>

        <div class="editor-label">
            @Html.LabelFor(model => model.Country)
        </div>
        <div class="editor-field">
            @Html.EditorFor(model => model.Country)
            @Html.ValidationMessageFor(model => model.Country)
        </div>

        <p>
            <input type="submit" value="ثبت" />
        </p>
    </fieldset>
}

<div>
    @Html.ActionLink("بازگشت", "Index")
</div>
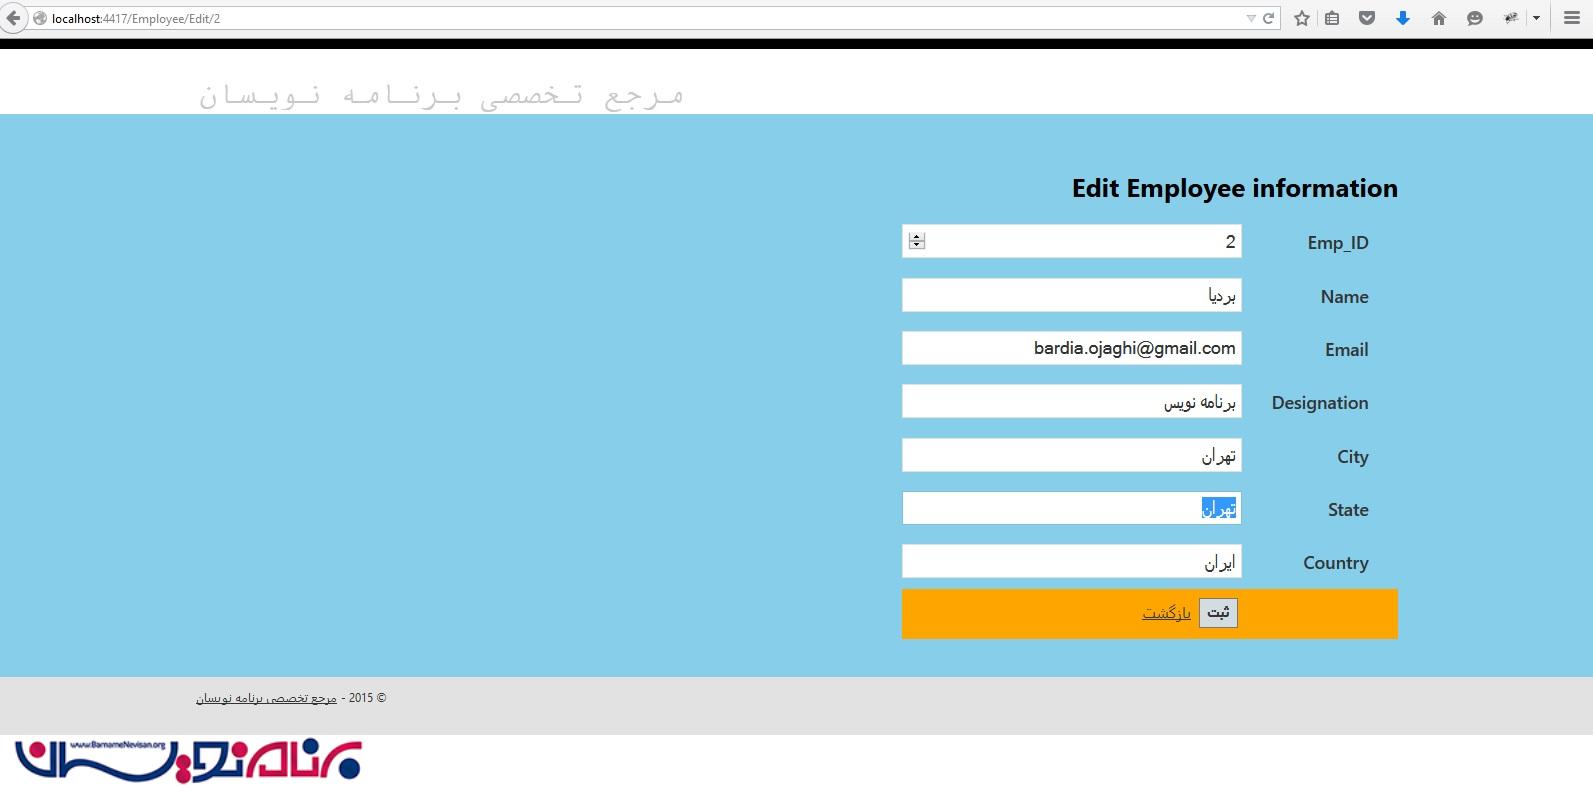
روی متد Edit.cshtml کلیک راست کرده و یک View برای آن ایجاد کنید.
Edit.cshtml
@model Reposit.Models.Employee

<script src="~/Scripts/jquery-1.7.1.min.js"></script>
<script src="~/Scripts/jquery.validate.min.js"></script>
<script src="~/Scripts/jquery.validate.unobtrusive.min.js"></script>
<h2>Edit Employee information</h2>

@using (Html.BeginForm())
{
    @Html.AntiForgeryToken()

    @Html.ValidationSummary(true)

    <table>
        <tr>
            <td>@Html.LabelFor(model => model.Emp_ID)</td>
            <td>
                @Html.EditorFor(model => model.Emp_ID, new { disabled = "disabled", @readonly = "readonly" })

                @Html.ValidationMessageFor(model => model.Emp_ID)
            </td>
        </tr>

        <tr>
            <td>
                @Html.LabelFor(model => model.Name)
            </td>
            <td>
                @Html.EditorFor(model => model.Name)
                @Html.ValidationMessageFor(model => model.Name)
            </td>
        </tr>

        <tr>
            <td>@Html.LabelFor(model => model.Email)</td>
            <td>
                @Html.EditorFor(model => model.Email)
                @Html.ValidationMessageFor(model => model.Email)
            </td>
        </tr>
        <tr>
            <td>@Html.LabelFor(model => model.Designation)</td>
            <td>
                @Html.EditorFor(model => model.Designation)
                @Html.ValidationMessageFor(model => model.Designation)
            </td>
        </tr>
        <tr>
            <td>@Html.LabelFor(model => model.City)</td>
            <td>
                @Html.EditorFor(model => model.City)
                @Html.ValidationMessageFor(model => model.City)
            </td>
        </tr>
        <tr>
            <td>@Html.LabelFor(model => model.State)</td>
            <td>
                @Html.EditorFor(model => model.State)
                @Html.ValidationMessageFor(model => model.State)
            </td>
        </tr>
        <tr>
            <td>@Html.LabelFor(model => model.Country)</td>
            <td>
                @Html.EditorFor(model => model.Country)
                @Html.ValidationMessageFor(model => model.Country)
            </td>
        </tr>
        <tr style="background-color: orange; padding: 25px;">
            <td></td>
            <td>
                <input type="submit" value="ثبت" />
                @Html.ActionLink("بازگشت", "Index")
            </td>
        </tr>
    </table>
}
روی متد Delete کلیک راست کرده و یک View برای آن ایجاد کنید.
Delete.cshtml
@model Reposit.Models.Employee

<h3>آیا از حذف اطمینان دارید ؟</h3>
<table>
    <tr>
        <td>@Html.DisplayNameFor(model => model.Emp_ID)</td>
        <td>@Html.DisplayFor(model => model.Emp_ID)</td>
    </tr>
    <tr>
        <td>@Html.DisplayNameFor(model => model.Name)</td>
        <td>@Html.DisplayFor(model => model.Name)</td>
    </tr>
    <tr>
        <td>@Html.DisplayNameFor(model => model.Email)</td>
        <td>@Html.DisplayFor(model => model.Email)</td>
    </tr>
    <tr>
        <td>@Html.DisplayNameFor(model => model.Designation)</td>
        <td>@Html.DisplayFor(model => model.Designation)</td>
    </tr>
    <tr>
        <td>@Html.DisplayNameFor(model => model.City)</td>
        <td>@Html.DisplayFor(model => model.City)</td>
    </tr>
    <tr>
        <td>@Html.DisplayNameFor(model => model.State)</td>
        <td>@Html.DisplayFor(model => model.State)</td>
    </tr>
    <tr>
        <td>@Html.DisplayNameFor(model => model.Country)</td>
        <td>@Html.DisplayFor(model => model.Country)</td>
    </tr>
</table>

@using (Html.BeginForm())
{
    @Html.AntiForgeryToken()

    <table>
        <tr style="background-color: orange; padding: 25px;">
            <td></td>
            <td>
                <input type="submit" value="حذف" />

                @Html.ActionLink("بازگشت", "Index")
            </td>

        </tr>
    </table>
}
حالا برنامه را اجرا نمایید.
این برنامه نمایش تمامی رکوردها با قابلیت Paging (صفحه بندی) و Sorting (مرتب سازی) را برای شما فراهم می کند.

- ASP.net MVC
- 7k بازدید
- 14 تشکر