ایجاد TabHost در اندروید
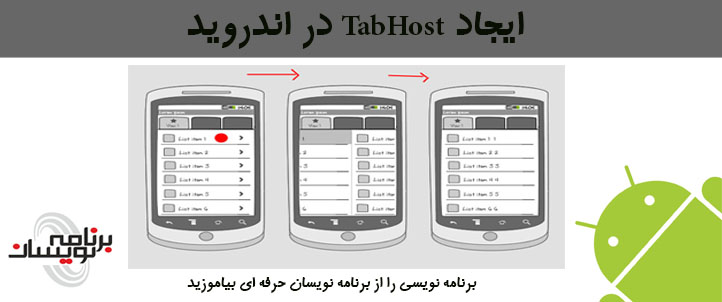
شنبه 14 آذر 1394در این مقاله قصد داریم یک Tabmenu ایجاد نماییم، هدف این مقاله ایجاد منوها به صورت tab مانند است که می توانند به هر تعدادی که شما نیاز دارید باشد و هر صفحه یک مقدار را نمایش دهد و علاوه بر آن می تواند آیکون هم داشته باشد.

در بعضی مواقع شما نیاز به وارد کردن و نمایش دادن اطلاعات زیادی در یک activity هستید، یک روش ساده استفاده از زبانه ها در فرم رابط خود است.
برای نمایش محتوای یک صفحه از شی FrameLayout استفاده می نماییم.
برای لایه xml و داخل activity خود از کد زیر استفاده می نماییم:
<TabHost xmlns:android="http://schemas.android.com/apk/res/android"
         android:id="@android:id/tabhost"
         android:layout_width="fill_parent"
         android:layout_height="fill_parent">
    <LinearLayout
            android:orientation="vertical"
            android:layout_width="fill_parent"
            android:layout_height="fill_parent">
        <TabWidget
                android:id="@android:id/tabs"
                android:layout_width="fill_parent"
                android:layout_height="wrap_content">

            <TextView
                    android:tag="tab0"
                    android:text="Tab 1"
                    android:background="@android:drawable/btn_star_big_on"
                    android:layout_width="wrap_content"
                    android:layout_height="fill_parent"
                    />
            <TextView
                    android:tag="tab1"
                    android:text="Tab 2"
                    android:layout_width="wrap_content"
                    android:layout_height="fill_parent"
                    />
            <TextView
                    android:tag="tab2"
                    android:text="Tab 3"
                    android:layout_width="wrap_content"
                    android:layout_height="fill_parent"
                    />

        </TabWidget>

        <FrameLayout
                android:id="@android:id/tabcontent"
                android:layout_width="fill_parent"
                android:layout_height="fill_parent">

            <TextView
                    android:text="تب اول"
                    android:layout_width="fill_parent"
                    android:layout_height="fill_parent" />
            <TextView
                    android:text="تب دوم"
                    android:layout_width="fill_parent"
                    android:layout_height="fill_parent" />
            <TextView
                    android:text="تب سوم"
                    android:layout_width="fill_parent"
                    android:layout_height="fill_parent" />

        </FrameLayout>
    </LinearLayout>
</TabHost>
یک TabHost می گذاریم، از یک Tabwidget برای قرار دادن تب ها که نام تب و آیکون مورد نظر آن است استفاده می نماییم. حالا از یک Framelayout استفاده می کنیم که این ابزار 3 Textview دارد که داخل این textView ها متن مورد نظر و هر چه قرار است داخل آن نمایش داده شود قرار می گیرد.
برای کلاس جاوا هم از کد زیر استفاده می نمایید:
import android.app.Activity;
import android.os.Bundle;
import java.util.HashMap;
import java.util.LinkedList;
import java.util.List;
import java.util.Map;

import android.app.Activity;
import android.content.Context;
import android.os.Bundle;
import android.view.View;
import android.widget.FrameLayout;
import android.widget.TabHost;
import android.widget.TabHost.TabContentFactory;
import android.widget.TabHost.TabSpec;
import android.widget.TabWidget;
import android.widget.TextView;

public class MyActivity extends Activity {
    /**
     * Called when the activity is first created.
     */
    @Override
    protected void onCreate(Bundle savedInstanceState) {
        super.onCreate(savedInstanceState);

        setContentView(R.layout.main);

        TabHost tabHost = (TabHost) findViewById(android.R.id.tabhost);
        tabHost.setup();

        final TabWidget tabWidget = tabHost.getTabWidget();
        final FrameLayout tabContent = tabHost.getTabContentView();

        // Get the original tab textviews and remove them from the viewgroup.
        TextView[] originalTextViews = new TextView[tabWidget.getTabCount()];
        for (int index = 0; index < tabWidget.getTabCount(); index++) {
            originalTextViews[index] = (TextView) tabWidget.getChildTabViewAt(index);
        }
        tabWidget.removeAllViews();

        // Ensure that all tab content childs are not visible at startup.
        for (int index = 0; index < tabContent.getChildCount(); index++) {
            tabContent.getChildAt(index).setVisibility(View.GONE);
        }

        // Create the tabspec based on the textview childs in the xml file.
        // Or create simple tabspec instances in any other way...
        for (int index = 0; index < originalTextViews.length; index++) {
            final TextView tabWidgetTextView = originalTextViews[index];
            final View tabContentView = tabContent.getChildAt(index);
            TabSpec tabSpec = tabHost.newTabSpec((String) tabWidgetTextView.getTag());
            tabSpec.setContent(new TabContentFactory() {
                @Override
                public View createTabContent(String tag) {
                    return tabContentView;
                }
            });
            if (tabWidgetTextView.getBackground() == null) {
                tabSpec.setIndicator(tabWidgetTextView.getText());
            } else {
                tabSpec.setIndicator(tabWidgetTextView.getText(), tabWidgetTextView.getBackground());
            }
            tabHost.addTab(tabSpec);
        }

//		tabHost.setCurrentTab(0);
    }
}
- Android
- 3k بازدید
- 4 تشکر
