سورس بازی Tic Tac Toe در اندروید
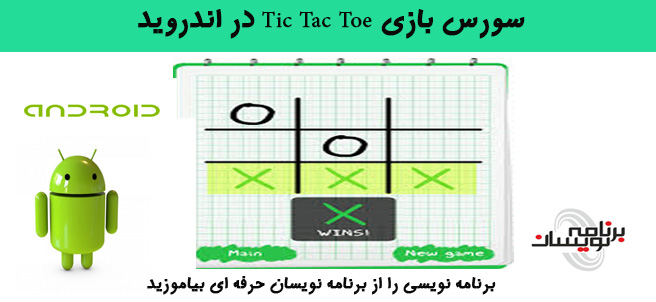
سه شنبه 24 آذر 1394در این مقاله می خواهیم سورس بازی Tic Tac Toe را در اندروید قرار دهیم.
قدم اول لایه xml است که در این لایه نام نرم افزار و قرار می دهیم:
<string name="app_name" >TicTacToefinal</string>

<string name="action_settings" >Settings </string>

<string name="hello_world" >Tic Tac Toe</string>
قدم دوم dimens.xml برای تنظیمات عکس و دکمه ها استفاده می شود:
<dimen name="activity_horizontal_margin">16dp</dimen>

<dimen name="activity_vertical_margin">16dp</dimen>

<dimen name="heading">50dp</dimen>

<dimen name="congo">35dp</dimen>
قدم سوم در پوشه ی value یک فایل xml می سازید و برای رنگ ها از کد زیر استفاده می نمایید:
<resources>

  <color name="player">#360ec5</color>

  <color name="gamecol">#e7d39e</color>

  <color name="bgwin">#000000</color>

  <color name="drawbg">#977897</color>

</resources>
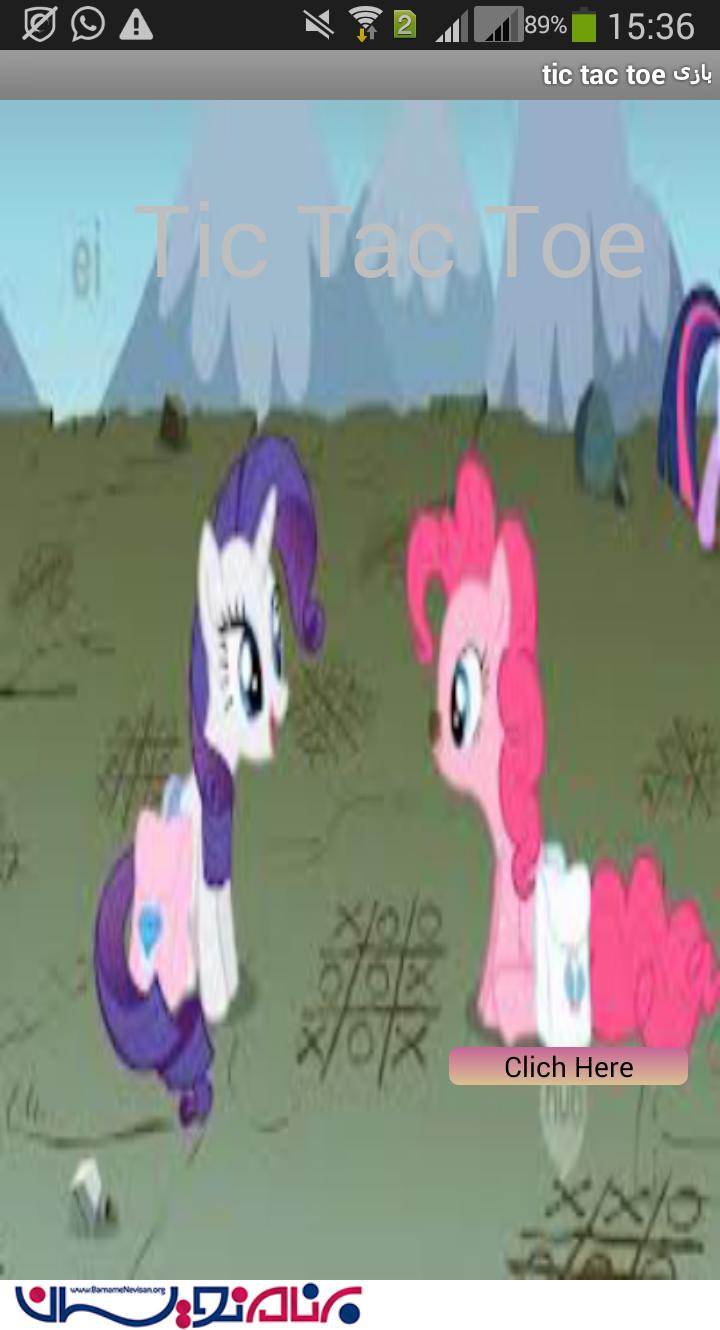
در لایه ی xml کد زیر را می نویسید:
<LinearLayout xmlns:android="http://schemas.android.com/apk/res/android"

    xmlns:tools="http://schemas.android.com/tools"

    android:layout_width="match_parent"

    android:layout_height="match_parent"

    android:paddingLeft="@dimen/activity_horizontal_margin"

    android:paddingRight="@dimen/activity_horizontal_margin"

    android:paddingTop="@dimen/activity_vertical_margin"

    android:paddingBottom="@dimen/activity_vertical_margin"

    tools:context=".MainActivity"

        android:background="@drawable/images">


  <TextView

      android:layout_width="wrap_content"

      android:layout_height="wrap_content"

      android:text="@string/hello_world"

      android:layout_marginLeft="50dp"

      android:paddingTop="20dp"

      android:textSize="@dimen/heading"

        />

  <Button

      android:layout_width="fill_parent"

      android:layout_height="wrap_content"

      android:text="Clich Here"

      android:layout_marginTop="400dp"

      android:layout_marginLeft="-100dp"

      android:background="@drawable/button_lay"

      android:id="@+id/clickHere"/>


</LinearLayout>
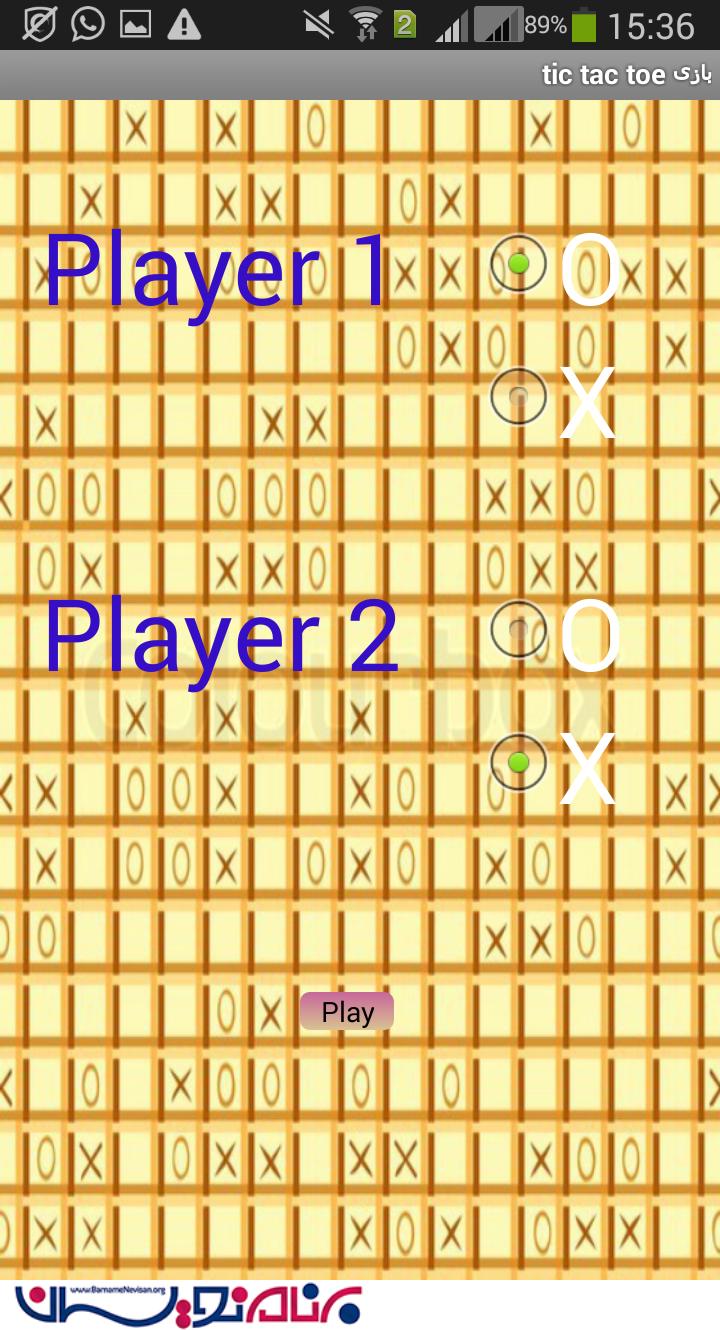
در لایه ی menu_layout قطعه کد زیر را قرار دهید:
<LinearLayout xmlns:android="http://schemas.android.com/apk/res/android"

              android:orientation="vertical"

              android:layout_width="match_parent"

              android:layout_height="match_parent"

              android:background="@drawable/menu_back" >

  <RelativeLayout

      android:layout_height="wrap_content"

      android:layout_width="fill_parent">


    <TextView

        android:layout_height="wrap_content"

        android:layout_width="wrap_content"

        android:text="Player 1 "

        android:textSize="@dimen/heading"

        android:layout_marginTop="50dp"

        android:layout_marginLeft="20dp"

        android:textColor="@color/player"

        android:id="@+id/t1"/>


    <RadioGroup

        android:layout_height="wrap_content"

        android:layout_width="fill_parent"

        android:id="@+id/player1"

        android:layout_marginTop="50dp"

        android:layout_marginLeft="240dp">


      <RadioButton

          android:layout_height="wrap_content"

          android:layout_width="wrap_content"

          android:text="O"

          android:textSize="@dimen/heading"

          android:checked="true"

          android:id="@+id/zero"/>


      <RadioButton

              android:layout_height="wrap_content"

              android:layout_width="wrap_content"

              android:text="X"

              android:textSize="@dimen/heading"

              android:id="@+id/cross"/>

    </RadioGroup>


  </RelativeLayout>


  <RelativeLayout

          android:layout_height="wrap_content"

          android:layout_width="fill_parent">


    <TextView

            android:layout_height="wrap_content"

            android:layout_width="wrap_content"

            android:text="Player 2 "

            android:textSize="@dimen/heading"

            android:layout_marginTop="50dp"

            android:layout_marginLeft="20dp"

            android:textColor="@color/player"

            android:id="@+id/t2"/>


    <RadioGroup

            android:layout_height="wrap_content"

            android:layout_width="fill_parent"

            android:id="@+id/player2"

            android:layout_marginTop="50dp"

            android:layout_marginLeft="240dp">


      <RadioButton

              android:layout_height="wrap_content"

              android:layout_width="wrap_content"

              android:text="O"

              android:textSize="@dimen/heading"

              android:id="@+id/zero"/>


      <RadioButton

              android:layout_height="wrap_content"

              android:layout_width="wrap_content"

              android:text="X"

              android:checked="true"

              android:textSize="@dimen/heading"

              android:id="@+id/cross"/>

    </RadioGroup>

  </RelativeLayout>


  <Button

      android:id="@+id/play"

      android:layout_height="wrap_content"

      android:layout_width="wrap_content"

      android:text="Play"

      android:layout_marginTop="80dp"

      android:layout_marginLeft="150dp"

      android:paddingLeft="10dp"

      android:paddingRight="10dp"

      android:background="@drawable/button_lay"/>


</LinearLayout>
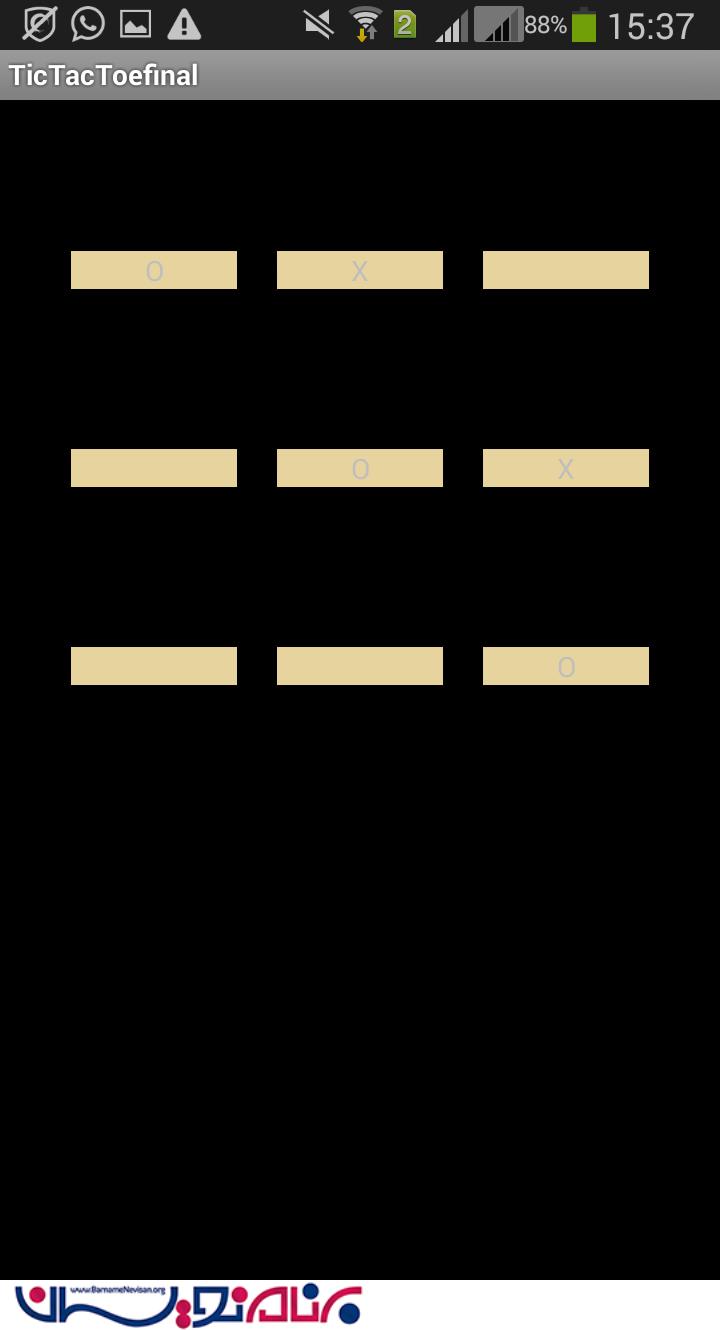
لایه بعدی نمایش gridview است که به صورت زیر خواهد بود:
<GridView xmlns:android="http://schemas.android.com/apk/res/android"

              android:orientation="vertical"

              android:layout_width="match_parent"

              android:layout_height="match_parent"

              android:id="@+id/gridview1"

              android:numColumns="3"

              android:layout_marginTop="30dp"

              android:layout_marginLeft="30dp"

              android:layout_marginRight="30dp"

              android:layout_marginBottom="30dp"

              android:gravity="center"

              android:horizontalSpacing="20dip"

              android:verticalSpacing="80dp"

              android:paddingTop="40dp"

             android:paddingBottom="40dp">

</GridView>
داخل gridview از یک textview استفاده می نماییم به صورت زیر:
<TextView xmlns:android="http://schemas.android.com/apk/res/android"

              android:orientation="vertical"

              android:layout_width="match_parent"

              android:layout_height="match_parent"

              android:background="@color/gamecol"

              android:id="@+id/txt"

              android:gravity="center">

</TextView>
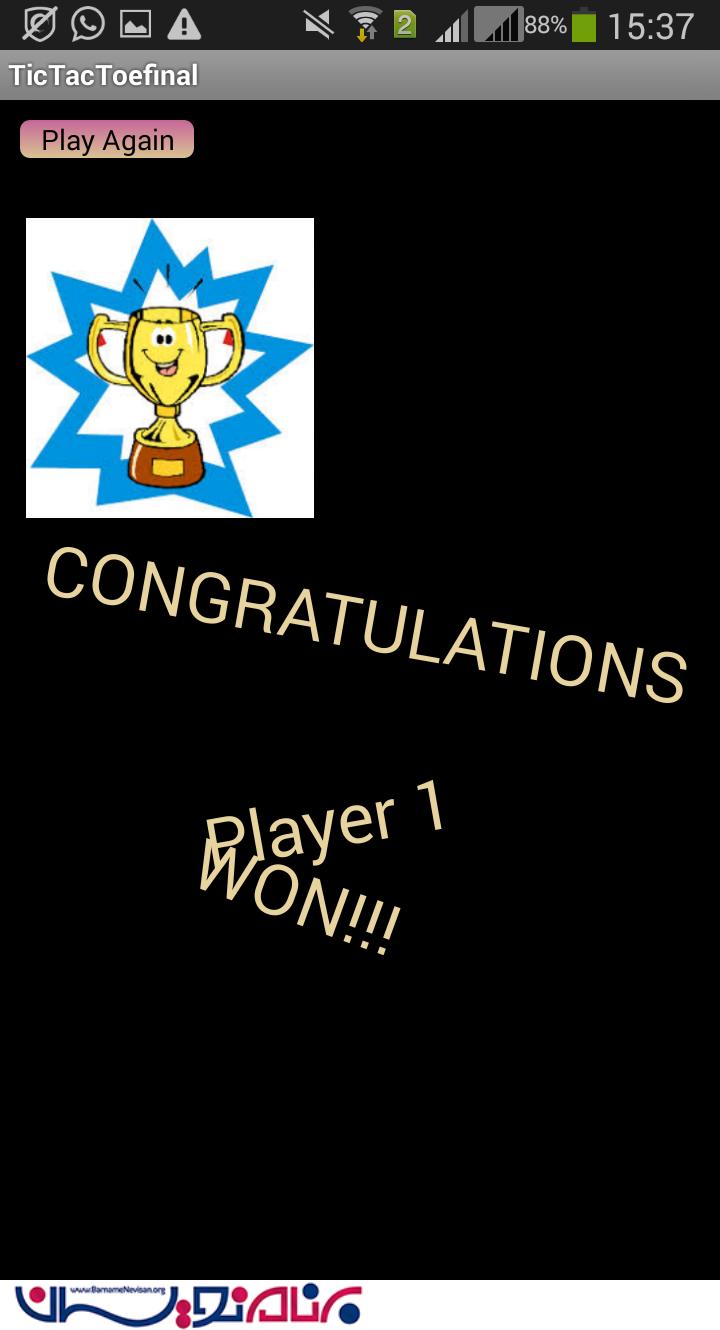
بعد از اتمام بازی برنده ی مسابقه مشخص خواهد شد:
<LinearLayout xmlns:android="http://schemas.android.com/apk/res/android"

              android:orientation="vertical"

              android:layout_width="match_parent"

              android:layout_height="match_parent"

              android:background="@color/bgwin">

  <Button

      android:layout_height="wrap_content"

      android:layout_width="wrap_content"

      android:text="Play Again"

      android:layout_marginTop="10dp"

      android:layout_marginLeft="10dp"

      android:background="@drawable/button_lay"

      android:paddingRight="10dp"

      android:paddingLeft="10dp"

      android:id="@+id/back"/>

  <ImageView

      android:id="@+id/trophy"

      android:layout_height="150dp"

      android:layout_width="150dp"

      android:layout_marginLeft="10dp"

      android:layout_marginTop="30dp"/>

  <TextView

      android:layout_height="wrap_content"

      android:layout_width="fill_parent"

      android:textColor="@color/gamecol"

      android:textSize="@dimen/congo"

      android:layout_marginLeft="20dp"

      android:text="CONGRATULATIONS"

      android:layout_marginTop="30dp"

        />

  <TextView

      android:layout_height="wrap_content"

      android:layout_width="fill_parent"

      android:textSize="@dimen/congo"

      android:layout_marginTop="40dp"

      android:layout_marginLeft="100dp"

      android:id="@+id/wintxt"

      android:textColor="@color/gamecol"

        />

  <TextView

      android:layout_height="wrap_content"

      android:layout_width="fill_parent"

      android:text="WON!!!"

      android:textSize="@dimen/congo"

      android:layout_marginLeft="90dp"

      android:layout_marginTop="30dp"

      android:textColor="@color/gamecol"/>


</LinearLayout>
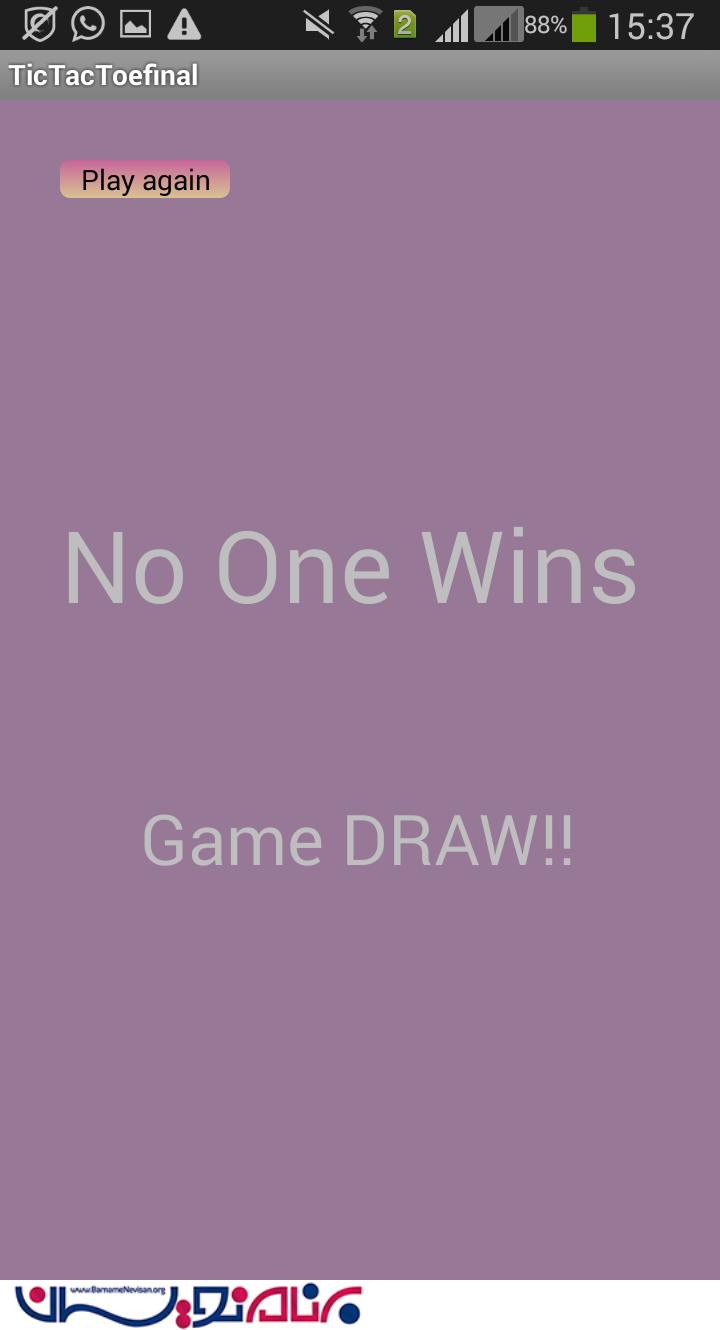
اگر هم کسی برنده نشد باید لایه به صورت زیر باشد:
<LinearLayout xmlns:android="http://schemas.android.com/apk/res/android"

              android:orientation="vertical"

              android:layout_width="match_parent"

              android:layout_height="match_parent"

              android:background="@color/drawbg">

  <Button

      android:layout_width="wrap_content"

      android:layout_height="wrap_content"

      android:text="Play again"

      android:background="@drawable/button_lay"

      android:paddingLeft="10dp"

      android:paddingRight="10dp"

      android:layout_marginLeft="30dp"

      android:layout_marginTop="30dp"

      android:id="@+id/drawBack"/>

  <TextView

      android:layout_width="fill_parent"

      android:layout_height="wrap_content"

      android:text="No One Wins"

      android:layout_marginTop="150dp"

      android:layout_marginLeft="30dp"

      android:textSize="@dimen/heading"/>

  <TextView

          android:layout_width="fill_parent"

          android:layout_height="wrap_content"

          android:text="Game DRAW!!"

          android:layout_marginTop="80dp"

          android:layout_marginLeft="70dp"

          android:textSize="@dimen/congo"/>

</LinearLayout>
برای زیباسازی دکمه ها باید داخل پوشه ی res/drawable باید از کد های زیر استفاده نمایید:
<selector xmlns:android="http://schemas.android.com/apk/res/android">

  <item android:state_enabled="false" >

    <shape android:shape="rectangle">

      <gradient

              android:startColor="#454545"

              android:endColor="#454545"

              android:angle="-90"

              android:type="linear"

                />

      <corners android:radius="5dp" />

    </shape>

  </item>


  <!-- pressed -->

  <item android:state_pressed="true" android:state_enabled="true" >

    <shape android:shape="rectangle">

      <gradient

              android:startColor="#64334C"

              android:endColor="#300019"

              android:angle="-90"

              android:type="linear"

                    />

      <corners android:radius="5dp" />

    </shape>

  </item>


  <!-- focused -->

  <item android:state_focused="true">

    <shape android:shape="rectangle">

      <gradient

              android:startColor="#C76699"

              android:endColor="#d9c292"

              android:angle="-90"

              android:type="linear"

                    />

      <corners android:radius="5dp" />

      <stroke android:width="2dp" android:color="#dddddd"/>

    </shape>

  </item>


  <!-- default -->

  <item>

    <shape android:shape="rectangle">

      <gradient

              android:startColor="#C76699"

              android:endColor="#d9c292"

              android:angle="-90"

              android:type="linear"

                    />

      <corners android:radius="5dp" />

    </shape>

  </item>


</selector>
حالا نوبت تعریف کلاس های جاوا است قدم اول کلاس MainActivity است:
import android.content.Context;

import android.content.Intent;

import android.os.Bundle;

import android.app.Activity;

import android.view.Menu;

import android.view.View;

import android.widget.Button;

import android.widget.RadioButton;

import android.widget.RadioGroup;


public class MainActivity extends Activity {

    Button b;

    RadioGroup g1;

    RadioGroup g2;

    RadioButton rd;

    String p1;

    String p2;

    Button click;

    final Context context=this;


    @Override

    protected void onCreate(Bundle savedInstanceState) {

        super.onCreate(savedInstanceState);

        setContentView(R.layout.activity_main);

        click=(Button)findViewById(R.id.clickHere);

        click.setOnClickListener(new View.OnClickListener() {

            @Override

            public void onClick(View v) {


                setContentView(R.layout.menu_layout);

                b=(Button)findViewById(R.id.play);

                g1=(RadioGroup)findViewById(R.id.player1);

                g2=(RadioGroup)findViewById(R.id.player2);


                b.setOnClickListener(new View.OnClickListener() {

                    @Override

                    public void onClick(View v) {

                        int sel=g1.getCheckedRadioButtonId();

                        rd=(RadioButton)findViewById(sel);

                        p1=rd.getText().toString();


                        sel=g2.getCheckedRadioButtonId();

                        rd=(RadioButton)findViewById(sel);

                        p2=rd.getText().toString();


                        Intent i=new Intent(context,Game.class);

                        i.putExtra("Player1",p1);

                        i.putExtra("Player2",p2);

                        startActivity(i);

                    }

                });

            }

        });


    }


    @Override

    public boolean onCreateOptionsMenu(Menu menu) {

        // Inflate the menu; this adds items to the action bar if it is present.

        getMenuInflater().inflate(R.menu.main, menu);

        return true;

    }


}
حالا کلاس Game که برای آن از یک آرایه استفاده می کنیم که به صورت زیر است:
import android.app.Activity;

import android.content.Context;

import android.content.Intent;

import android.os.Bundle;

import android.view.View;

import android.widget.*;


public class Game extends Activity {


    String p1;

    String p2;

    static int i=0;

    int j;

    GridView gridview;

    static final String[] symbols=new String[]{"","","","","","","","",""};

    int visitedp1[]={-1,-1,-1,-1,-1,-1,-1,-1,-1};

    int visitedp2[]={-1,-1,-1,-1,-1,-1,-1,-1,-1};


    final Context context=this;

    public void check(int visitedp1[], int visitedp2[])

    {

        int flag=0;

        String winner=null;


        //player1

        if((visitedp1[0]==1)&& (visitedp1[4]==1) &&(visitedp1[8]==1))

        {

            flag=1;

            winner="Player 1";

        }

        else if((visitedp1[2]==1)&& (visitedp1[4]==1) &&(visitedp1[6]==1))

        {

            flag=1;

            winner="Player 1";

        }

        else if((visitedp1[0]==1)&& (visitedp1[3]==1) &&(visitedp1[6]==1))

        {

            flag=1;

            winner="Player 1";

        }

        else if((visitedp1[1]==1)&& (visitedp1[4]==1) &&(visitedp1[7]==1))

        {

            flag=1;

            winner="Player 1";

        }

        else if((visitedp1[2]==1)&& (visitedp1[5]==1) &&(visitedp1[8]==1))

        {

            flag=1;

            winner="Player 1";

        }

        else if((visitedp1[0]==1)&& (visitedp1[1]==1) &&(visitedp1[2]==1))

        {

            flag=1;

            winner="Player 1";

        }

        else if((visitedp1[3]==1)&& (visitedp1[4]==1) &&(visitedp1[5]==1))

        {

            flag=1;

            winner="Player 1";

        }

        else if((visitedp1[6]==1)&& (visitedp1[7]==1) &&(visitedp1[8]==1))

        {

            flag=1;

            winner="Player 1";

        }


        //player2

        if((visitedp2[0]==1)&& (visitedp2[4]==1) &&(visitedp2[8]==1))

        {

            flag=1;

            winner="Player 2";

        }

        else if((visitedp2[2]==1)&& (visitedp2[4]==1) &&(visitedp2[6]==1))

        {

            flag=1;

            winner="Player 2";

        }

        else if((visitedp2[0]==1)&& (visitedp2[3]==1) &&(visitedp2[6]==1))

        {

            flag=1;

            winner="Player 2";

        }

        else if((visitedp2[1]==1)&& (visitedp2[4]==1) &&(visitedp2[7]==1))

        {

            flag=1;

            winner="Player 2";

        }

        else if((visitedp2[2]==1)&& (visitedp2[5]==1) &&(visitedp2[8]==1))

        {

            flag=1;

            winner="Player 2";

        }

        else if((visitedp2[0]==1)&& (visitedp2[1]==1) &&(visitedp2[2]==1))

        {

            flag=1;

            winner="Player 2";

        }

        else if((visitedp2[3]==1)&& (visitedp2[4]==1) &&(visitedp2[5]==1))

        {

            flag=1;

            winner="Player 2";

        }

        else if((visitedp2[6]==1)&& (visitedp2[7]==1) &&(visitedp2[8]==1))

        {

            flag=1;

            winner="Player 2";

        }


        if(flag==1)

        {

            Intent i=new Intent(context,Win.class);

            i.putExtra("winner",winner);

            startActivity(i);


        }

        if(i==8)

        {

            Intent gamedraw=new Intent(context,DrawGame.class);

            startActivity(gamedraw);

        }

    }

    TextView t;

    @Override

    protected void onCreate(Bundle savedInstanceState) {


        for(int k=0;k<9;++k)

        {

            visitedp1[k]=-1;

            visitedp2[k]=-1;

        }

        i=0;

        super.onCreate(savedInstanceState);

        setContentView(R.layout.game_layout);


        Intent intent = getIntent();

        p1=intent.getStringExtra("Player1");

        p2=intent.getStringExtra("Player2");


        if(p1.equalsIgnoreCase(p2))

        {

            Toast.makeText(context,"Both players cannot choose same symbol",2000).show();

            finish();

        }

        else

        {


            gridview=(GridView)findViewById(R.id.gridview1);


            ArrayAdapter<String> adapter=new ArrayAdapter<String>(this,R.layout.game_layout2,symbols);

            gridview.setAdapter(adapter);


            gridview.setOnItemClickListener(new AdapterView.OnItemClickListener() {

                @Override

                public void onItemClick(AdapterView<?> parent, View view, int position, long id) {

                    int flag=0;

                    t=(TextView)view.findViewById(R.id.txt);

                    for(j=0;j<9;++j)

                    {

                        if(visitedp1[position]==1 || visitedp2[position]==1)

                        {

                            flag=1;

                            Toast.makeText(context,"Invalid....",200).show();

                            break;

                        }

                    }

                    if(flag==0)

                    {


                       if(i%2==0)

                      {

                        //Toast.makeText(context,"Player1.....",50).show();

                          t.setText(p1);

                          visitedp1[position]=1;


                      }

                      else

                      {

                        //Toast.makeText(context,"Player2.....",50).show();

                        t.setText(p2);

                          visitedp2[position]=1;


                      }

                      check(visitedp1,visitedp2);

                      i=i+1;


                    }

                }

            });


        }

    }

}
منطق اولیه این کلاس تشخیص برنده ی بازی است.
حالا تعریف کلاس Win:
import android.app.Activity;

import android.content.Context;

import android.content.Intent;

import android.os.Bundle;

import android.view.View;

import android.widget.Button;

import android.widget.EditText;

import android.widget.ImageView;

import android.widget.TextView;


public class Win extends Activity {

    TextView winn;

    Button b;

    final Context context=this;

    ImageView im;

    @Override

    protected void onCreate(Bundle savedInstanceState) {

        super.onCreate(savedInstanceState);

        setContentView(R.layout.win_layout);

        Intent intent = getIntent();

        String win=intent.getStringExtra("winner");

        winn=(TextView)findViewById(R.id.wintxt);

        b=(Button)findViewById(R.id.back);

        im=(ImageView)findViewById(R.id.trophy);

        im.setImageResource(R.drawable.trophy);

        winn.setText(win);

        b.setOnClickListener(new View.OnClickListener() {

            @Override

            public void onClick(View v) {

             Intent i=new Intent(context,MainActivity.class);

             startActivity(i);

            }

        });

    }

}


Step 14:

Create a new activity and name it as "DrawGame". Add the following code to it:

package com.tictactoefinal;


import android.app.Activity;

import android.content.Context;

import android.content.Intent;

import android.os.Bundle;

import android.view.View;

import android.widget.Button;


public class DrawGame extends Activity {

    Button back;

    final Context context=this;

    @Override

    protected void onCreate(Bundle savedInstanceState) {

        super.onCreate(savedInstanceState);

        setContentView(R.layout.draw_layout);

        back=(Button)findViewById(R.id.drawBack);

        back.setOnClickListener(new View.OnClickListener() {

            @Override

            public void onClick(View v) {

                Intent i=new Intent(context,MainActivity.class);

                startActivity(i);

            }

        });

    }

}
و در پایان افزودن کلاس ها به فایل androidmanifest است:
<activity android:name=".Game"

                 android:label="Game"/>

<activity android:name=".Win"

          android:label="win"/>

<activity android:name=".DrawGame"

          android:label="Game Draw"/>
خروجی به صورت زیر است:
- Android
- 3k بازدید
- 3 تشکر
