افزودن افکت به تصاویر در اندروید
چهارشنبه 25 آذر 1394در این مقاله قصد داریم عکس هایی را که در گالری گوشی خود داریم را انتخاب نماییم و برای آن افکت قرار دهیم در این مقاله ما رنگی کردن تصاویر استفاده کرده ایم مثلا بنفش ، صورتی، و سایه سفید کردن تصویر و ... استفاده شده است.

برای این کار، شما اساسا نیاز به تغییر مقدار آلفا از تصویر، عمق و ترکیب رنگ های قرمز، آبی و سبز دارید.
قدم اول در activity خود قطعه کد زیر را بنویسید:
<LinearLayout xmlns:android="http://schemas.android.com/apk/res/android"
    xmlns:tools="http://schemas.android.com/tools"
    android:layout_width="match_parent"
    android:layout_height="match_parent"
    android:paddingLeft="@dimen/activity_horizontal_margin"
    android:paddingRight="@dimen/activity_horizontal_margin"
    android:paddingTop="@dimen/activity_vertical_margin"
    android:paddingBottom="@dimen/activity_vertical_margin"
    tools:context=".MainActivity"
    android:orientation="vertical">
    <Button
        android:layout_width="fill_parent"
        android:layout_height="wrap_content"
        android:text="Select a photo"
        android:id="@+id/gallery"/>
    <ImageView
        android:layout_height="300dp"
        android:layout_width="fill_parent"
        android:id="@+id/original_image"
        android:layout_marginTop="20dp"/>
    <Button
        android:text="Add Effects"
        android:id="@+id/effects_btn"
        android:layout_height="wrap_content"
        android:layout_width="wrap_content"
        android:paddingLeft="10dp"
        android:paddingRight="10dp"
        android:layout_marginTop="10dp"/>
</LinearLayout>
در مرحله ی بعدی به activity دوم می رویم که افکت ها را در آنجا قرار داده ایم که با زدن هر کدام تصویر ما تغییر می کند.
<TextView xmlns:android="http://schemas.android.com/apk/res/android"
          android:layout_width="fill_parent"
          android:layout_height="fill_parent"
          android:padding="10dp"
          android:textSize="20sp"
          android:background="#cd6959">
</TextView>
Activity دوم هم عکس تغییر یافته را در imageview خود نمایش می دهد. به صورت زیر:
<LinearLayout xmlns:android="http://schemas.android.com/apk/res/android"
              android:orientation="vertical"
              android:layout_width="match_parent"
              android:layout_height="match_parent">
    <ImageView
        android:layout_width="fill_parent"
        android:layout_height="fill_parent"
        android:id="@+id/view"
        android:layout_marginLeft="20dp"
        android:layout_marginRight="20dp"
        android:layout_marginTop="20dp"
        android:layout_marginBottom="20dp"
        />
</LinearLayout>
قدم بعدی کلاس جاوا است به صورت زیر:
import android.content.Intent;
import android.database.Cursor;
import android.graphics.Bitmap;
import android.graphics.BitmapFactory;
import android.net.Uri;
import android.os.Bundle;
import android.app.Activity;
import android.provider.MediaStore;
import android.util.Log;
import android.view.Menu;
import android.view.View;
import android.widget.Button;
import android.widget.ImageView;

public class MainActivity extends Activity {

    Button gallery;
    Bitmap image;
    ImageView original;
    Button effects;
    String picturePath;

    @Override
    protected void onCreate(Bundle savedInstanceState) {
        super.onCreate(savedInstanceState);
        setContentView(R.layout.activity_main);

        original=(ImageView)findViewById(R.id.original_image);
        effects=(Button)findViewById(R.id.effects_btn);

        gallery=(Button)findViewById(R.id.gallery);
        gallery.setOnClickListener(new View.OnClickListener() {
            @Override
            public void onClick(View v) {

                Intent intent = new   Intent(Intent.ACTION_PICK,android.provider.MediaStore.Images.Media.EXTERNAL_CONTENT_URI);
                startActivityForResult(intent, 1);
            }
        });

        effects.setOnClickListener(new View.OnClickListener() {
            @Override
            public void onClick(View v) {

                Intent i=new Intent(MainActivity.this,ListOfEffects.class);
                i.putExtra("image thumbnail path",picturePath);
                startActivity(i);
            }
        });
    }
    @Override
    protected void onActivityResult(int requestCode, int resultCode, Intent data) {
        super.onActivityResult(requestCode, resultCode, data);

        if(resultCode==RESULT_OK)
        {
            Uri selectedImage = data.getData();
            String[] filePath = { MediaStore.Images.Media.DATA };
            Cursor c = getContentResolver().query(selectedImage,filePath, null, null, null);
            c.moveToFirst();
            int columnIndex = c.getColumnIndex(filePath[0]);
             picturePath = c.getString(columnIndex);
            c.close();
            image = (BitmapFactory.decodeFile(picturePath));
            Log.i("path of image from gallery...............", picturePath + "");
            original.setImageBitmap(image);
        }
    }

    @Override
    public boolean onCreateOptionsMenu(Menu menu) {
        // Inflate the menu; this adds items to the action bar if it is present.
        getMenuInflater().inflate(R.menu.main, menu);
        return true;
    }
}
در کد بالا بازدن دکمه گالری نمایش داده می شود که با انتخاب کردن هر کدام از تصاویر به activity دوم می روید و با زدن هر کدام از افکت ها تصویر تغییر یافته و شما را به activity که تصویر تغییر کرده است می برد.
حالا باید یک کلاس به نام ListOfEffects بسازید به صورت زیر:
import android.app.Activity;
import android.app.ListActivity;
import android.content.Intent;
import android.os.Bundle;
import android.util.Log;
import android.view.View;
import android.widget.AdapterView;
import android.widget.ArrayAdapter;
import android.widget.ListView;
import java.util.ArrayList;
public class ListOfEffects extends ListActivity
{
ArrayList<String> effects= new ArrayList<String>();
String path;
String effect_choosen;
@Override
protected void onCreate(Bundle savedInstanceState) {
super.onCreate(savedInstanceState);
Intent i=getIntent();
path=i.getStringExtra("image thumbnail path");
Log.i("path of file in list of effects......", path);
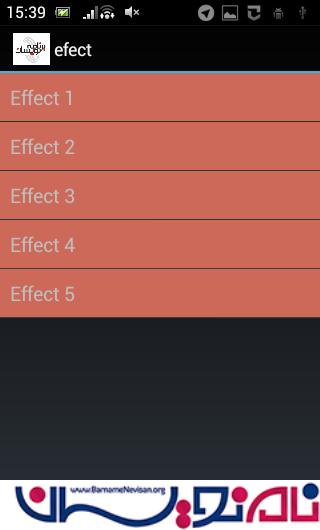
effects.add("Effect 1");
effects.add("Effect 2");
effects.add("Effect 3");
effects.add("Effect 4");
effects.add("Effect 5");
setListAdapter(new ArrayAdapter<String>(this, R.layout.list_of_effects,effects));
ListView listView = getListView();
listView.setTextFilterEnabled(true);
listView.setOnItemClickListener(new AdapterView.OnItemClickListener() {
@Override
public void onItemClick(AdapterView<?> parent, View view, int position, long id) {
//applyEffects(path);
effect_choosen=effects.get(position);
Log.i("Effect choosen................",effect_choosen);
applyEffects();
}
});
}
void applyEffects()
{
Intent i=new Intent(ListOfEffects.this, EffectAdded.class);
i.putExtra("path",path);
i.putExtra("effect",effect_choosen);
startActivity(i);
}
}
کد بالا یک لیست درست می کند و افکت های مورد نظر را به آن اضافه می کند.حالا درست کردن کلاسEffectsAdded
import android.app.Activity;
import android.content.Intent;
import android.graphics.Bitmap;
import android.graphics.BitmapFactory;
import android.graphics.BlurMaskFilter;
import android.graphics.Canvas;
import android.graphics.Color;
import android.graphics.Paint;
import android.graphics.PorterDuff;
import android.os.Bundle;
import android.util.Log;
import android.widget.ImageView;

public class EffectAdded extends Activity {
    String path;
    String effect_choosen;
    ImageView changed;
    Bitmap out;

    @Override
    protected void onCreate(Bundle savedInstanceState) {
        super.onCreate(savedInstanceState);
        setContentView(R.layout.final_view);

        Intent i=getIntent();
        path=i.getStringExtra("path");
        effect_choosen=i.getStringExtra("effect");

        changed=(ImageView)findViewById(R.id.view);

        Log.i("path of file in effects added.....................", path);
        Log.i("effect chosen in effects added.....................", effect_choosen);

        Bitmap thumbnail = (BitmapFactory.decodeFile(path));

        if(effect_choosen.equalsIgnoreCase("Effect 1"))
        {
           out=addEffect(thumbnail,5,5.0,6.0,0.0);  //red,blue,no green
        }
        else if(effect_choosen.equalsIgnoreCase("Effect 2"))
        {
            out=addEffect(thumbnail,5,5.0,0.0,10.0);  //red,green,no blue
        }
        else if(effect_choosen.equalsIgnoreCase("Effect 3"))
        {
            out=addEffect(thumbnail,5,0.0,10.0,0.0);  //only green
        }
        else if(effect_choosen.equalsIgnoreCase("Effect 4"))
        {
            out=addEffect(thumbnail,15,5.0,0.0,10.0);  //red,green,no blue, depth increased
        }
        else if(effect_choosen.equalsIgnoreCase("Effect 5"))
        {
            out=addEffect(thumbnail,5,10.0,0.0,0.0);  //only red
        }

        changed.setImageBitmap(out);
    }

    public static Bitmap addEffect(Bitmap src, int depth, double red, double green, double blue) {

        int width = src.getWidth();
        int height = src.getHeight();

        Bitmap finalBitmap = Bitmap.createBitmap(width, height, src.getConfig());

        final double grayScale_Red = 0.3;
        final double grayScale_Green = 0.59;
        final double grayScale_Blue = 0.11;

        int channel_aplha, channel_red, channel_green, channel_blue;
        int pixel;

        for(int x = 0; x < width; ++x) {
            for(int y = 0; y < height; ++y) {

                pixel = src.getPixel(x, y);
                channel_aplha = Color.alpha(pixel);
                channel_red = Color.red(pixel);
                channel_green = Color.green(pixel);
                channel_blue = Color.blue(pixel);

                channel_blue = channel_green = channel_red = (int)(grayScale_Red * channel_red + grayScale_Green * channel_green + grayScale_Blue * channel_blue);

                channel_red += (depth * red);
                if(channel_red > 255)
                {
                    channel_red = 255;
                }
                channel_green += (depth * green);
                if(channel_green > 255)
                {
                    channel_green = 255;
                }
                channel_blue += (depth * blue);
                if(channel_blue > 255)
                {
                    channel_blue = 255;
                }

                finalBitmap.setPixel(x, y, Color.argb(channel_aplha, channel_red, channel_green, channel_blue));
            }
        }
        return finalBitmap;
    }
}
در کلاس بالا یک عرض و ارتفاع می گیرد ، ما باید پیکسل به پیکسل عکس را بگیریم تا بتوانیم افکت مورد نظر را بر روی آن تاثیر بگذاریم.
در این کلاس از یک متغییر int استفاده کرده ایم که الفا،قرمز ،سبز ، آبی را برای آن می توان از بازه ی 0 تا 255 یک عدد انتخاب نماییم ، مثلا برای اینکه قرمز و آبی باشد و سبز نباشد از ترکیب قرمز و آبی رنگ بنفش ایجاد می شود به صورت زیر خواهد بود:
out=addEffect(thumbnail,5,5.0,6.0,0.0);
و بعد داخل Androidmanifest هم باید کلاس های مورد نظر را تعریف نمایید
<manifest xmlns:android="http://schemas.android.com/apk/res/android"
    package="com.chhavi.imageeffectfinal"
    android:versionCode="1"
    android:versionName="1.0" >

    <uses-sdk
        android:minSdkVersion="7"
        android:targetSdkVersion="16" />

    <application
        android:allowBackup="true"
        android:icon="@drawable/ic_launcher"
        android:label="@string/app_name"
        android:theme="@style/AppTheme" >
        <activity
            android:name="com.chhavi.imageeffectfinal.MainActivity"
            android:label="@string/app_name" >
            <intent-filter>
                <action android:name="android.intent.action.MAIN" />

                <category android:name="android.intent.category.LAUNCHER" />
            </intent-filter>
        </activity>

        <activity android:name=".ListOfEffects"
                  android:label="Choose Effect"/>

        <activity android:name=".EffectAdded"
                  android:label="Final Image"/>
    </application>

</manifest>
حالا خروجی به صورت زیر خواهد بود:


- Android
- 2k بازدید
- 2 تشکر