ساخت قطب نما در اندروید
سه شنبه 8 دی 1394در این مقاله قصد داریم یک قطب نما یا همان قبله نما در اندروید بسازیم.البته برخی از دستگاه ها مثل Huawei Y300 و Lenovo P700i سنسورهای حرکتی را پشتیبانی نمی کند بنابراین این کد ها مورد نیاز نخواهد بود.

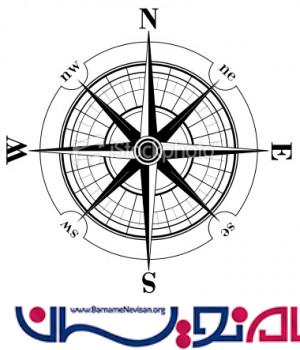
ابتدا نیاز به یک تصویر قطب نما دارید به صورت زیر:
در کلاس java زیر قطعه کد زیر را قرار دهید:
import android.app.Activity;
import android.hardware.Sensor;
import android.hardware.SensorEvent;
import android.hardware.SensorEventListener;
import android.hardware.SensorManager;
import android.os.Bundle;
import android.view.animation.Animation;
import android.view.animation.RotateAnimation;
import android.widget.ImageView;
import android.widget.TextView;

public class MainActivity extends Activity implements SensorEventListener {

	// define the display assembly compass picture
	private ImageView image;

	// record the compass picture angle turned
	private float currentDegree = 0f;

	// device sensor manager
	private SensorManager mSensorManager;

	TextView tvHeading;

	@Override
	protected void onCreate(Bundle savedInstanceState) {
		super.onCreate(savedInstanceState);
		setContentView(R.layout.activity_main);

		// our compass image
		image = (ImageView) findViewById(R.id.imageViewCompass);

		// TextView that will tell the user what degree is he heading
		tvHeading = (TextView) findViewById(R.id.tvHeading);

		// initialize your android device sensor capabilities
		mSensorManager = (SensorManager) getSystemService(SENSOR_SERVICE);
	}

	@Override
	protected void onResume() {
		super.onResume();

		// for the system's orientation sensor registered listeners
		mSensorManager.registerListener(this, mSensorManager.getDefaultSensor(Sensor.TYPE_ORIENTATION),
				SensorManager.SENSOR_DELAY_GAME);
	}

	@Override
	protected void onPause() {
		super.onPause();

		// to stop the listener and save battery
		mSensorManager.unregisterListener(this);
	}

	@Override
	public void onSensorChanged(SensorEvent event) {

		// get the angle around the z-axis rotated
		float degree = Math.round(event.values[0]);

		tvHeading.setText("Heading: " + Float.toString(degree) + " degrees");

		// create a rotation animation (reverse turn degree degrees)
		RotateAnimation ra = new RotateAnimation(
				currentDegree,
				-degree,
				Animation.RELATIVE_TO_SELF, 0.5f,
				Animation.RELATIVE_TO_SELF,
				0.5f);

		// how long the animation will take place
		ra.setDuration(210);

		// set the animation after the end of the reservation status
		ra.setFillAfter(true);

		// Start the animation
		image.startAnimation(ra);
		currentDegree = -degree;

	}

	@Override
	public void onAccuracyChanged(Sensor sensor, int accuracy) {
		// not in use
	}
}
ما از متد sensormanager استفاده کرده ایم، و برای حرکت جهات با استفاده از این متد تشخیص می دهد که گوشی شما در چه جهتی قرار گرفته است و با توجه به آن زاویه و مکان را مشخص می نماید البته این عکس با استفاده از انیمیشن هم حرکت می کند به جهتی که تشخیص داده شده است.
در activity مورد نظر قطعه کد زیر را قرار می دهیم:
<RelativeLayout xmlns:android="http://schemas.android.com/apk/res/android"
    android:layout_width="match_parent"
    android:layout_height="match_parent"
    android:background="#fff" >

    <TextView
        android:id="@+id/tvHeading"
        android:layout_width="wrap_content"
        android:layout_height="wrap_content"
        android:layout_centerHorizontal="true"
        android:layout_marginBottom="40dp"
        android:layout_marginTop="20dp"
        android:text="Heading: 0.0" />

    <ImageView
        android:id="@+id/imageViewCompass"
        android:layout_width="wrap_content"
        android:layout_height="wrap_content"
        android:layout_below="@+id/tvHeading"
        android:layout_centerHorizontal="true"
        android:src="@drawable/img_compass" />

</RelativeLayout>
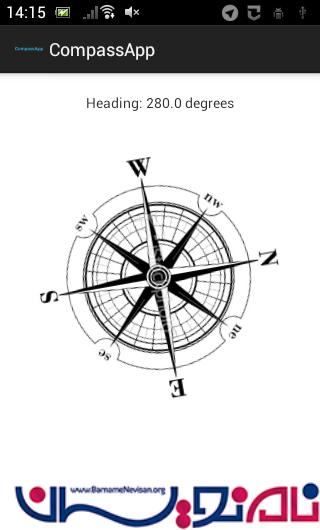
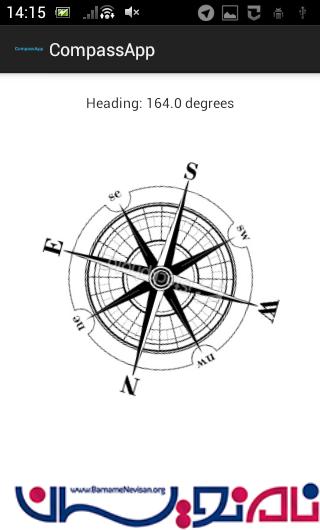
حال خروجی به صورت زیر خواهد بود:

- Android
- 5k بازدید
- 2 تشکر