ارسال response (پاسخ) به صورت دوره ای از سرور با استفاده از SignalR در MVC
شنبه 20 شهریور 1395در این مقاله قصد داریم با استفاده از SignalR در ASP.NET MVC از توابع read time استفاده کنیم .این به آن معنا است که سرور محتوا و داده ها را بلافاصله به سمت کاربر ارسال می کند ، و بدون آن که منتظر ایجاد درخواست جدیدی باشید.
 به صورت دوره ای از سرور با استفاده از SignalR در MVC")
مقدمه
در مقاله قبلی ، مشاهده می کنید که چگونه پیام ها را انتقال می دهیم و با استفاده از SignalR hub اطلاع رسانی می کنیم .SignalR تکنولوژی است که به ما قابلیت اضافه کردن توابع real time به برنامه را می دهد. در این مقاله قصد داریم به این مسئله بپردازیم
شرح مسئله
کاربر یک درخواست را به سرور ارسال می کند، به محض این که سرور درخواست را دریافت کند یک پیام به کاربر (اعتبار سنجی درخواست) ارسال می کند.بعد از چند میلی ثانیه تاخیر، سرور پیامی را به عنوان(پردازش درخواست)به کاربر ارسال می کند .پس از 200 میلی ثانیه سرور یه پیام به عنوان (آماده سازی خروجی) به کاربر ارسال می شود و در آخر خروجی نمایش داده می شود .
آزمایش کدها
این آزمایش در مقاله قبلی به طور کامل توضیح داده شده و در این قسمت مروری سریعی انجام می دهیم .
تغیرات حاصل شده در فایلHomeController.cs :
using System.Collections.Generic;
using System.Linq;
using System.Threading.Tasks;
using System.Web.Hosting;
using System.Web.Mvc;
using WebApplication1.Models;

namespace WebApplication1.Controllers
{
    public class HomeController : Controller
    {
        List<Employee> empList;

        //Fetch Employee Records
        public ActionResult Index()
        {
            return View();
        }
        [HttpGet]
        public ActionResult GetAllEmployeeRecords()
        {
            using (var context = new EmployeeContext())
            {
                empList = context
                .Employees
                .ToList();
            }
            return PartialView("_EmployeeList", empList);
        }


        //Insert Employee Record
        public ActionResult Insert()
        {
            return View();
        }
        [HttpPost]
        public ActionResult Insert(Employee employee)
        {
            EmployeeHub.NotifyCurrentEmployeeInformationToAllClients("Validating Request");

            HostingEnvironment.QueueBackgroundWorkItem(cancellationToken => ProcessingEmployee(employee));

            return RedirectToAction("Index");
        }

        private ActionResult ProcessingEmployee(Employee employee)
        {
            Task.Delay(300);
            EmployeeHub.NotifyCurrentEmployeeInformationToAllClients("Processing Request");

            HostingEnvironment.QueueBackgroundWorkItem(cancellationToken => ProcessEmployee(employee));

            return RedirectToAction("Index");
        }

        private void ProcessEmployee(Employee employee)
        {
            Task.Delay(200);
            if (ModelState.IsValid)
            {
                //Insert into Employee table
                using (var context = new EmployeeContext())
                {
                    context.Employees.Add(employee);
                    context.SaveChanges();
                }
                //Once the record is inserted , then notify all the subscribers (Clients)
                EmployeeHub.NotifyCurrentEmployeeInformationToAllClients("Preparing Output");
            }
        }
    }
}
برای درک بهتر تغیرات حاصل شده در کدها. قطعه کد ها را مورد بررسی قرار می دهیم.
[HttpPost]
public ActionResult Insert(Employee employee)
{
    EmployeeHub.NotifyCurrentEmployeeInformationToAllClients("Validating Request");

    HostingEnvironment.QueueBackgroundWorkItem(cancellationToken => ProcessingEmployee(employee));

    return RedirectToAction("Index");
}
به محض این که سرور درخواست کاربر را دریافت می کند یک پیام به hub ارسال می کند.
EmployeeHub.NotifyCurrentEmployeeInformationToAllClients("Validating Request")
با استفاده از متد HostingEnvironment.QueueBackgroundWorkItem برنامه ریزی سرور عمل بعدی را در زمینه مستقل از هر درخواست اجرا می شود. در آخر عملیات را بر روی زمینه thread صف بندی می کنیم.
HostingEnvironment.QueueBackgroundWorkItem در .NET 4.5.2 موجود است ، ما در این مقاله از .NET 4.6.1 استفاده می کنیم.اگر میخواهید با نسخه های قبلی کار کنید میتوانید از BackgroundTaskManager استفاده کنید .
تغییرات حاصل شده در فایل EmployeeHub.cs :
using Microsoft.AspNet.SignalR;
using Microsoft.AspNet.SignalR.Hubs;

namespace WebApplication1
{
    public class EmployeeHub : Hub
    {
        public static void NotifyCurrentEmployeeInformationToAllClients(string message)
        {
            IHubContext context = GlobalHost.ConnectionManager.GetHubContext<EmployeeHub>();

            // the update client method will update the connected client about any recent changes in the server data
            context.Clients.All.updatedClients(message);
        }
    }
}
این متد مانند متد در مقاله قبلی است که تنها تفاوت آنها این است که این متد پیام ارسال می کند.
تغیرات حاصل شده در فایل: Index.cshtml
@model IList<SignalR.Models.Employee>
@{
    ViewBag.Title = "Index";
}
<link href="~/Content/bootstrap/css/bootstrap.min.css" rel="stylesheet" />
<link href="~/Content/bootstrap.min.css" rel="stylesheet" />

<div dir="rtl">
        <h1 style="color: green">برنامه نویسان</h1>

        <table border="1">
            <tr>
                <td>
                    <h1 style="color:blueviolet">افزودن کاربر</h1>
                    <table border="1">
                        <tr>
                            <td>شماره</td>
                            <td><input id="txtEmployeeId" type="text" /></td>
                        </tr>
                        <tr>
                            <td>نام کاربر</td>
                            <td><input id="txtEmployeeName" type="text" /></td>
                        </tr>
                        <tr>
                            <td>ایمیل</td>
                            <td><input id="txtEmail" type="text" /></td>
                        </tr>
                        <tr>
                            <td>شماره موبایل</td>
                            <td><input id="txtMobile" type="text" /></td>
                        </tr>
                    </table>
                    <table border="1">
                        <tr>
                            <td><button id="btnPostEmployee" onclick="InsertEmployee()">افزودن کاربر</button></td>
                        </tr>
                    </table>
                </td>
            </tr>
        </table>
    <br /><br />
    <div id="dataTable"></div>
    </div>

@section JavaScript{

    <script src="~/scripts/jquery.signalR-2.2.1.min.js"></script>
    <script src="/signalr/hubs"></script>
    <script type="text/javascript">

        $(function () {
            // Create a proxy to signalr hub on web server. It reference the hub.
            var notificationFromHub = $.connection.employeeHub;

            // Connect to signalr hub
            $.connection.hub.start().done(function () {
                FetchEmployees();
            });

            // Notify to client with the recent updates
            notificationFromHub.client.updatedClients = function (serverResponse) {
                alert(serverResponse);
                FetchEmployees();
            };
        });

        function FetchEmployees() {
            var model = $('#dataTable');
                $.ajax({
                    url: '/home/GetAllEmployeeRecords',
                    contentType: 'application/html ; charset:utf-8',
                    type: 'GET',
                    dataType: 'html'
                })
                    .success(function (result)
                    {
                       model.empty().append(result);

                    })
        }

        // Insert Employee Record
        function InsertEmployee()
        {
                var employee = {
                    EmployeeID: $('#txtEmployeeId').val(),
                    EmployeeName: $('#txtEmployeeName').val(),
                    EmailAdress: $('#txtEmail').val(),
                    MobileNumber: $('#txtMobile').val(),
                };

                    $.ajax({
                    url: '/home/Insert',
                    type: 'POST',
                    data: JSON.stringify(employee),
                    contentType: "application/json;charset=utf-8",
                    success: function (data) {
                        alert(data);
                    },
                    error: function () {
                        alert('Employee not Added');
                    }
                });
        }

    </script>
}
در این فایل ، دکمه ویرایش ، حذف و توابع Ajax را حذف کرده ایم.
حال برنامه را اجرا می کنیم.
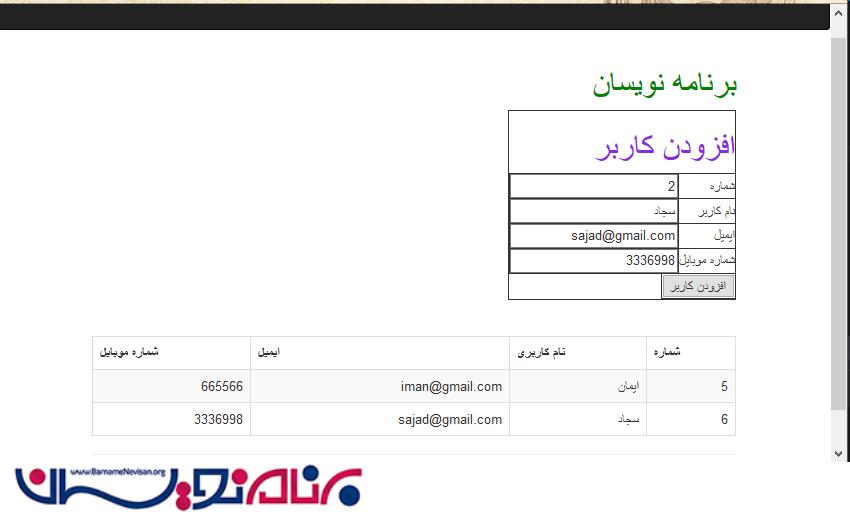
به محض این که بر روی افزودن کلیک کرده می شود یک کاربر اضافه می شود .
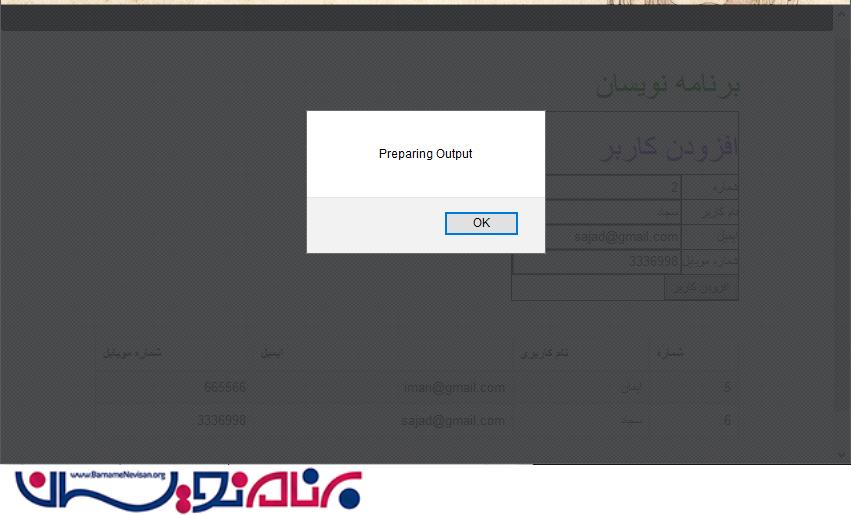
پس از این که بر روی OK کلیک شد نتیجه نمایش داده می شود.
آموزش asp.net mvc

- ASP.net MVC
- 2k بازدید
- 5 تشکر