ایجاد Android Card Flip Animation با استفاده از Gesture Event (بخش اول)
سه شنبه 13 مهر 1395در این مقاله ، نحوه ساخت یک Xamarin Android flip card animation در بین بخش های برنامه را خواهیم آموخت. برای ساخت این برنامه از Gesture Event ها بهره می گیریم.
")
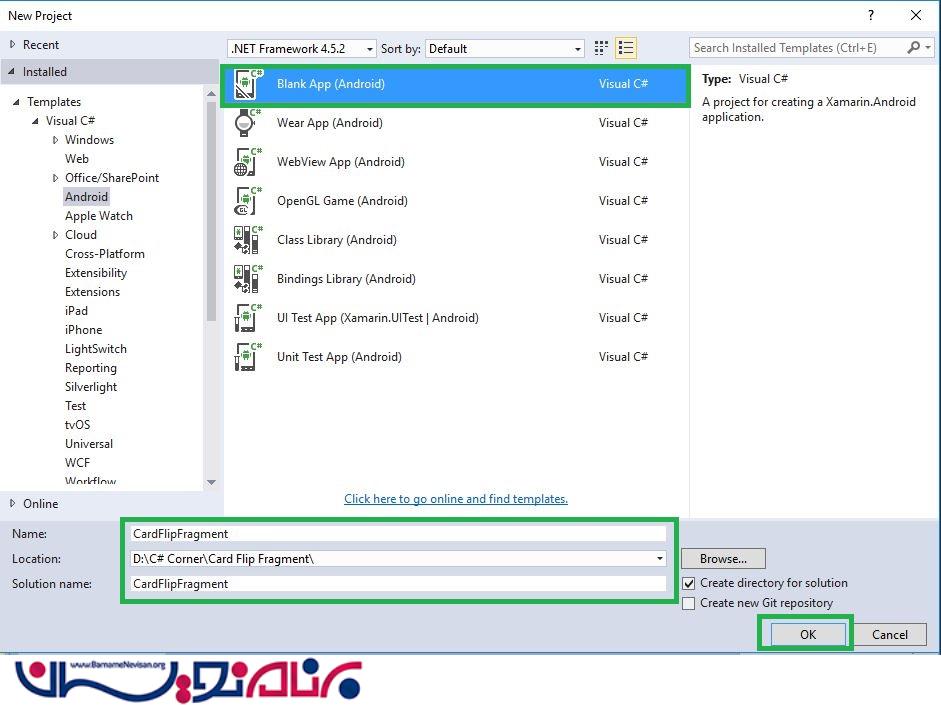
مرحله 1-از طریق مسیر زیر، یک پروژه جدید ایجاد کنید.
Visual Studio->New Project->Templates->Visual C#->Android->Blank App
یک نام و همچنین مسیر ذخیره سازی دلخواه برای پروژه انتخاب کنید.
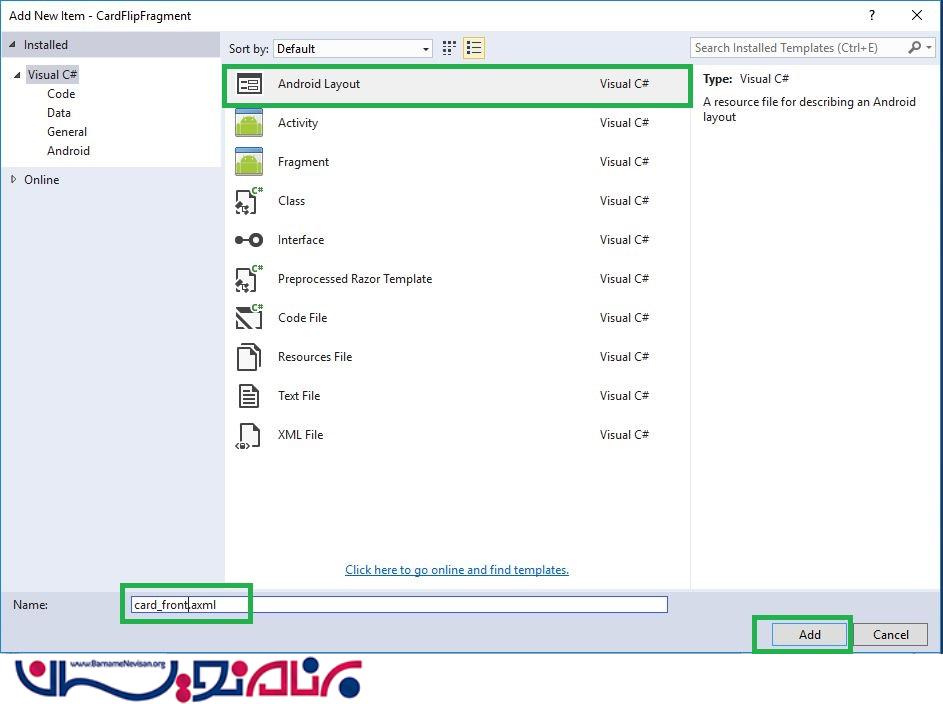
مرحله 2- به مسیر Solution Explorer-> Project Name->Resources->Layout بروید و یک Android Layout به نام Card_Front.axml به برنامه اضافه کنید.
مرحله 3- به مسیر Solution Explorer-> Project Name-> Resources-> Layout-> Main.axml بروید. در بخش Design View، کدهای زیر را وارد نمایید.
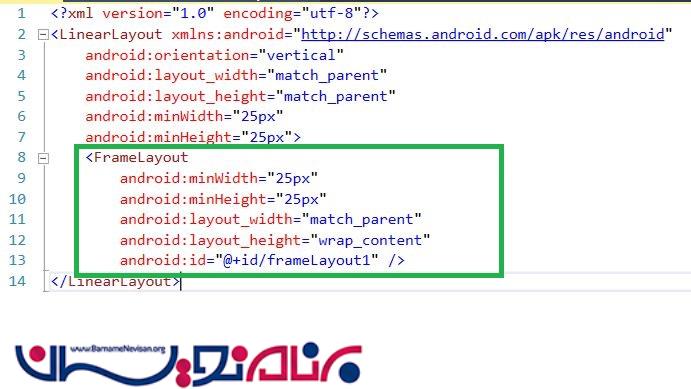
کد XAML
<?xml version="1.0" encoding="utf-8"?>
   <LinearLayout xmlns:android="http://schemas.android.com/apk/res/android"
      android:orientation="vertical"
      android:layout_width="match_parent"
      android:layout_height="match_parent"
      android:minWidth="25px"
      android:minHeight="25px">
   <FrameLayout
      android:minWidth="25px"
      android:minHeight="25px"
      android:layout_width="match_parent"
      android:layout_height="match_parent"
      android:id="@+id/frameLayout1" />
   </LinearLayout>
مرحله 4- به مسیر Solution Explorer-> Project Name-> Resources-> layout->Card_Front.axml بروید.
مرحله 5- از نوار ابزار، یک Image VIew به درون صفحه بکشید و بیاورید.
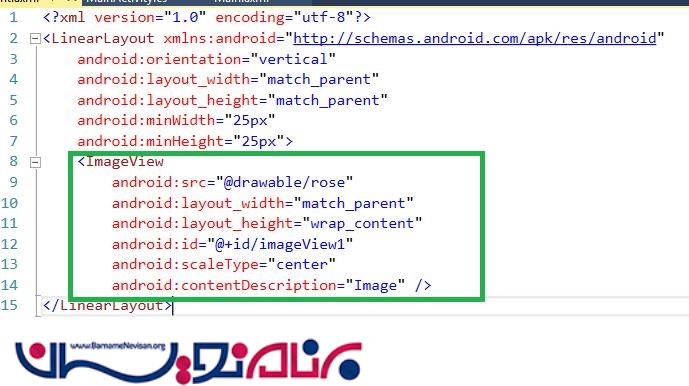
کد AXML
<?xml version="1.0" encoding="utf-8"?>
<LinearLayout xmlns:android="http://schemas.android.com/apk/res/android"
      android:orientation="vertical"
      android:layout_width="match_parent"
      android:layout_height="match_parent"
      android:minWidth="25px"
      android:minHeight="25px">
   <ImageView
      android:src="@drawable/rose"
      android:layout_width="match_parent"
      android:layout_height="wrap_content"
      android:id="@+id/imageView1"
      android:scaleType="center"
      android:contentDescription="Image" />
</LinearLayout>
مرحله 6- صفحه ی MainActivity.cs را باز کنید و یک متغیر Gesture ایجاد کنید.
GestureDetector gesturedetector;
مرحله 7- در درون Oncreate()، یک gesture event و یک Fragment transaction ایجاد کنید.
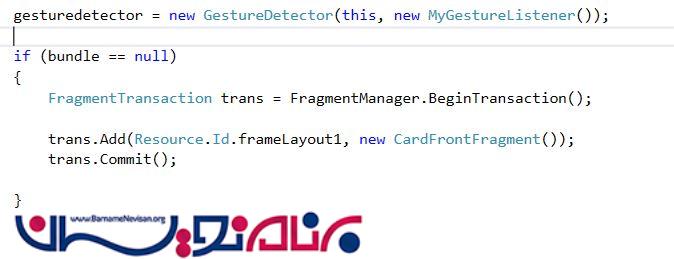
کد #C
    gesturedetector = new GestureDetector(this, new MyGestureListener(this));
    if (bundle == null)
    {
        FragmentTransaction trans = FragmentManager.BeginTransaction();
        trans.Add(Resource.Id.frameLayout1, new CardFrontFragment());
        trans.Commit();
    }
مرحله 8- یک کلاس به نام CardFrontFragment ایجاد کنید.
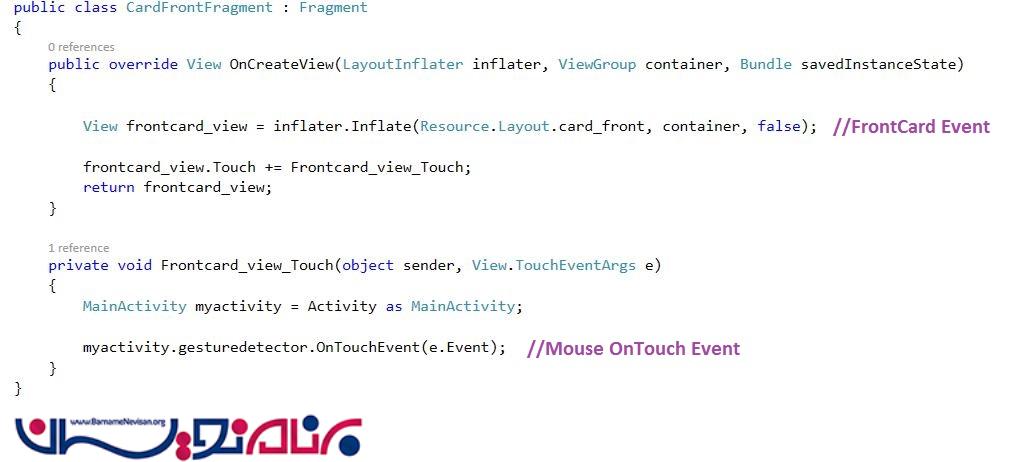
کد #C
    public class CardFrontFragment: Fragment
    {
        public override View OnCreateView(LayoutInflater inflater, ViewGroup container, Bundle savedInstanceState)
        {
            View frontcard_view = inflater.Inflate(Resource.Layout.card_front, container, false);
            frontcard_view.Touch += Frontcard_view_Touch;
            return frontcard_view;
        }
        private void Frontcard_view_Touch(object sender, View.TouchEventArgs e) {
            MainActivity myactivity = Activity as MainActivity;
            myactivity.gesturedetector.OnTouchEvent(e.Event);
        }
    }
مرحله 9- در زیر CardFrontFragment.class یک کلاس دیگر برای MyGestureListener ایجاد کنید. ما در اینجا gesture را به وسیله رویداد کلیک، DoubleClick(), scroll(), LongPress(), OnFling() تعریف می کنیم.
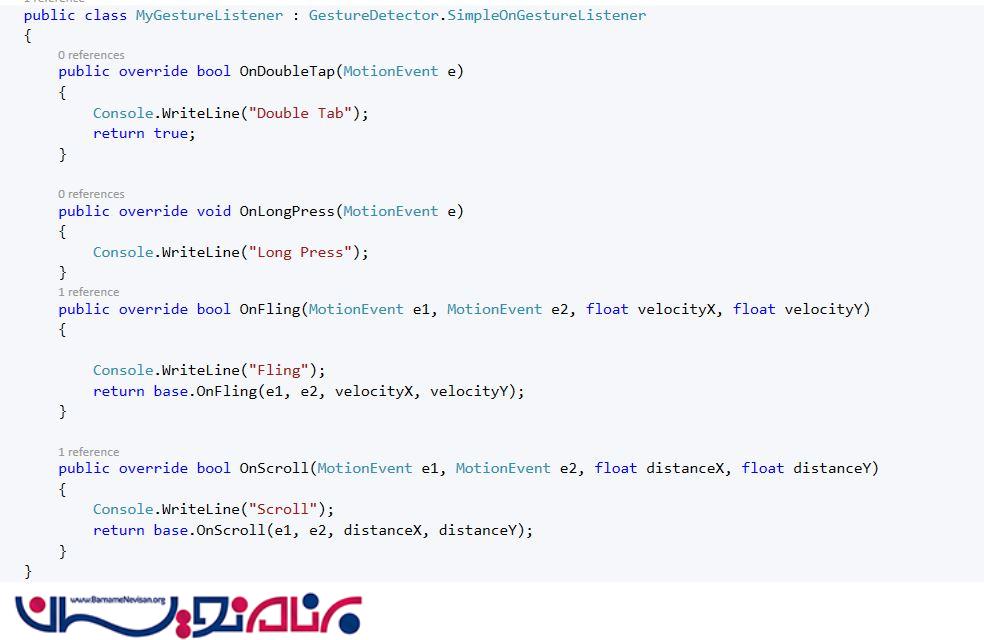
کد #C
    public class MyGestureListener: GestureDetector.SimpleOnGestureListener {
        public override bool OnDoubleTap(MotionEvent e) {
            Console.WriteLine("Double Tab");
            return true;
        }
        public override void OnLongPress(MotionEvent e) {
            Console.WriteLine("Long Press");
        }
        public override bool OnFling(MotionEvent e1, MotionEvent e2, float velocityX, float velocityY) {
            Console.WriteLine("Fling");
            return base.OnFling(e1, e2, velocityX, velocityY);
        }
        public override bool OnScroll(MotionEvent e1, MotionEvent e2, float distanceX, float distanceY) {
            Console.WriteLine("Scroll");
            return base.OnScroll(e1, e2, distanceX, distanceY);
        }
    }
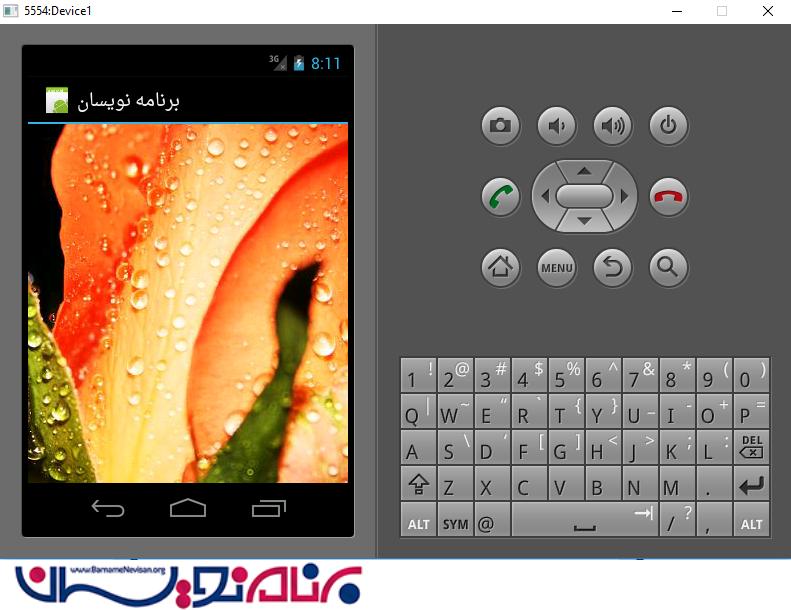
مرحله 10-برنامه را اجرا کنید تا خروجی را ببینید.

- Xamarin
- 1k بازدید
- 2 تشکر