ساخت label و edittext شناور با استفاده از متریال دیزاین در اندروید
دوشنبه 9 مرداد 1396در این مقاله قصد داریم یک فرم ثبت نام ایجاد نماییم که برای هر کدام از edittext ها یک لیبل شناور دارد و زمانی که شما روی دکمه کلیک می نمایید با کلیک آن حالا یک اتورایز انجام می شود.

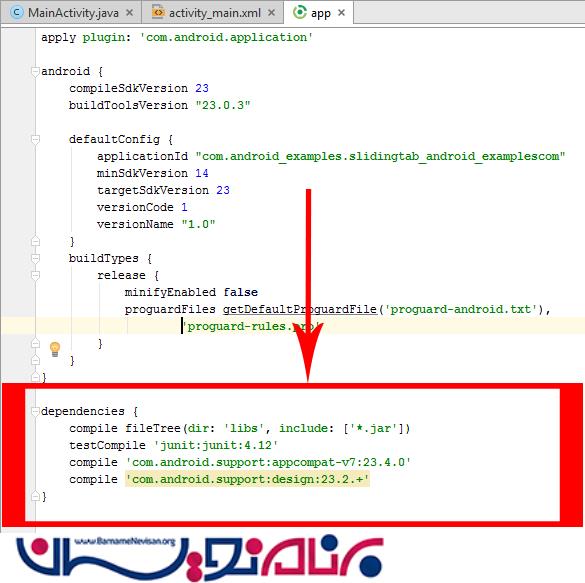
ابتدا باید در قسمت خود grdle قطعه کدی را اضافه نمایید به صورت زیر

و قطعه کد زیر را اضافه نمایید
compile 'com.android.support:appcompat-v7:24.0.0'
compile 'com.android.support:design:24.0.0'
باید مانند تصویر زیر باشد
حالا باید در کلاس زیر قطعه کد زیر را قرار دهید:
import android.support.design.widget.TextInputLayout;
import android.support.v7.app.AppCompatActivity;
import android.os.Bundle;
import android.text.TextUtils;
import android.view.View;
import android.widget.Button;
import android.widget.EditText;

public class MainActivity extends AppCompatActivity {

    TextInputLayout textInputLayout1,textInputLayout2;
    EditText edittext1, edittext2;
    Button button1;
    String value1,value2 ;

    @Override
    protected void onCreate(Bundle savedInstanceState) {
        super.onCreate(savedInstanceState);
        setContentView(R.layout.activity_main);

        textInputLayout1= (TextInputLayout) findViewById(R.id.TextInputLayout1);

        edittext1= (EditText) findViewById(R.id.edittext1);

        textInputLayout2= (TextInputLayout) findViewById(R.id.TextInputLayout2);

        edittext2= (EditText) findViewById(R.id.edittext2);

        button1 = (Button)findViewById(R.id.button);

        button1.setOnClickListener(new View.OnClickListener() {
            @Override
            public void onClick(View view) {

                value1 = edittext1.getText().toString() ;
                value2 = edittext2.getText().toString() ;

                if(TextUtils.isEmpty(value1)){

                    textInputLayout1.setError("Please Enter Your UserName");

                }  else {

                    textInputLayout1.setError(null);

                }

                if(TextUtils.isEmpty(value2)){

                    textInputLayout2.setError("Please Enter Your Password");

                }  else {

                    textInputLayout2.setError(null);
                }

            }
        });
    }
}
در قسمت layout قطعه کد زیر را بنویسید:
<LinearLayout xmlns:android="http://schemas.android.com/apk/res/android"
    xmlns:tools="http://schemas.android.com/tools"
    android:layout_width="match_parent"
    android:layout_height="match_parent"
    android:paddingBottom="@dimen/activity_vertical_margin"
    android:paddingLeft="@dimen/activity_horizontal_margin"
    android:paddingRight="@dimen/activity_horizontal_margin"
    android:paddingTop="@dimen/activity_vertical_margin"
    tools:context="com.android_examples.floatinglabeledittext_android_examplescom.MainActivity"
    android:orientation="vertical">

    <android.support.design.widget.TextInputLayout
        android:id="@+id/TextInputLayout1"
        android:layout_width="match_parent"
        android:layout_height="wrap_content">
        <EditText
            android:id="@+id/edittext1"
            android:layout_width="match_parent"
            android:layout_height="wrap_content"
            android:hint="Enter UserName" />
    </android.support.design.widget.TextInputLayout>

    <android.support.design.widget.TextInputLayout
        android:id="@+id/TextInputLayout2"
        android:layout_width="match_parent"
        android:layout_height="wrap_content">

        <EditText
            android:id="@+id/edittext2"
            android:layout_width="match_parent"
            android:layout_height="wrap_content"
            android:hint="Enter Password"
            android:layout_below="@+id/TextInputLayout1"
            android:layout_alignParentLeft="true"
            android:layout_alignParentStart="true" />

    </android.support.design.widget.TextInputLayout>

    <Button
        android:layout_width="fill_parent"
        android:layout_height="wrap_content"
        android:text="Click HERE TO TEST THIS APP"
        android:id="@+id/button"
        android:layout_centerVertical="true"
        android:layout_centerHorizontal="true" />

</LinearLayout>
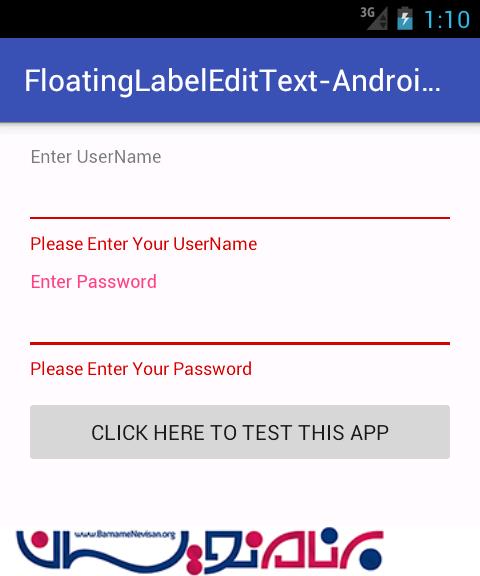
خروجی به صورت زیر خواهد بود:

- Android
- 3k بازدید
- 3 تشکر