ساخت بک گراند مانند اینستاگرام در اندروید
یکشنبه 19 شهریور 1396در این مقاله قصد داریم یک سورس آموزشی قرار دهیم که یک بک گراند مثل اینستاگرام ایجاد نماییم که رنگ های آن مانند یک رنگین کمان عوض می شود و تغییر رنگ می دهد سورس آن را برای شما قرار می دهیم.

در این جا از یک انیمیشن ما استفاده می کنیم که رنگ ها را شیب می دهد و هر کدام از آن ها در حال عوض شدن است.
ابتدا یک پروژه ی جدید اضافه می نماییم.
روی این پوشه راست کلیک نماییم drawable folder –>New -> Drawable Resource File
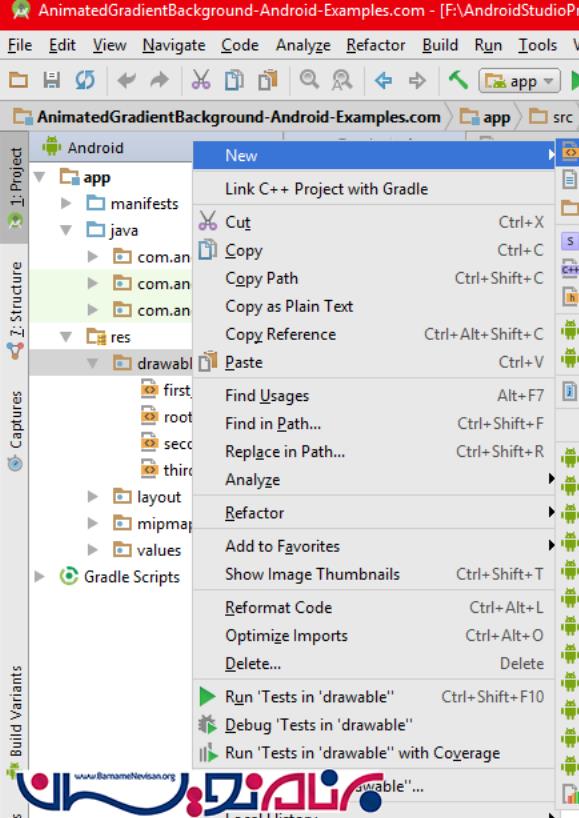
حالا باید 3 تا فایل xml را ایجاد نماییم:
کد مربوط به xml اول:
<?xml version="1.0" encoding="utf-8"?>
<shape xmlns:android="http://schemas.android.com/apk/res/android">
    <gradient
        android:angle="225"
        android:startColor="#4facfe"
        android:endColor="#00f2fe"/>
</shape>
کد مربوط به xml دوم
<?xml version="1.0" encoding="utf-8"?>
<shape xmlns:android="http://schemas.android.com/apk/res/android">
    <gradient
        android:angle="45"
        android:startColor="#43e97b"
        android:endColor="#38f9d7"/>
</shape>
کد مربوط به xml سوم:
<?xml version="1.0" encoding="utf-8"?>
<shape xmlns:android="http://schemas.android.com/apk/res/android">
    <gradient
        android:angle="135"
        android:startColor="#fa709a"
        android:endColor="#fee140"/>
</shape>
در قسمت فوتر هم باید قطعه کد زیر را قرار دهید:
<animation-list xmlns:android="http://schemas.android.com/apk/res/android">
    <item
        android:drawable="@drawable/first_gradient"
        android:duration="3500" />

    <item
        android:drawable="@drawable/second_gradient"
        android:duration="3500" />

    <item
        android:drawable="@drawable/third_gradient"
        android:duration="3500" />

</animation-list>
حالا در قسمت main قطعه کد زیر را قرا دهید:
<?xml version="1.0" encoding="utf-8"?>
<android.support.constraint.ConstraintLayout xmlns:android="http://schemas.android.com/apk/res/android"
    xmlns:app="http://schemas.android.com/apk/res-auto"
    xmlns:tools="http://schemas.android.com/tools"
    android:layout_width="match_parent"
    android:layout_height="match_parent"
    tools:context="com.android_examples.animatedgradientbackground_android_examplescom.MainActivity"
    android:background="@drawable/root_calling_gradient"
    android:id="@+id/MainRootLayout"
    android:padding="20dp">

    <TextView
        android:layout_width="wrap_content"
        android:layout_height="wrap_content"
        android:text="Android Animated Gradient Background Tutorial"
        android:textColor="#fff"
        android:textStyle="bold"
        android:textSize="20dp"
        android:textAlignment="center"
        app:layout_constraintBottom_toBottomOf="parent"
        app:layout_constraintLeft_toLeftOf="parent"
        app:layout_constraintRight_toRightOf="parent"
        app:layout_constraintTop_toTopOf="parent" />

</android.support.constraint.ConstraintLayout>
در کلاس جاوا هم باید دو شی زیر را ایجاد نمایید:
ConstraintLayout constraintLayout;
AnimationDrawable animationDrawable ;
و باید به لایه ی مربوطه Asign کرد
constraintLayout = (ConstraintLayout) findViewById(R.id.MainRootLayout);
animationDrawable = (AnimationDrawable) constraintLayout.getBackground();

animationDrawable.setEnterFadeDuration(2500);

animationDrawable.setExitFadeDuration(4500);

animationDrawable.start();
کد کامل مربوطه به کلاس
package com.android_examples.animatedgradientbackground_android_examplescom;
import android.graphics.drawable.AnimationDrawable;
import android.support.constraint.ConstraintLayout;
import android.support.v7.app.AppCompatActivity;
import android.os.Bundle;

public class MainActivity extends AppCompatActivity {

    ConstraintLayout constraintLayout;
    AnimationDrawable animationDrawable ;

    @Override
    protected void onCreate(Bundle savedInstanceState) {

        super.onCreate(savedInstanceState);

        setContentView(R.layout.activity_main);

        constraintLayout = (ConstraintLayout) findViewById(R.id.MainRootLayout);

        animationDrawable = (AnimationDrawable) constraintLayout.getBackground();

        animationDrawable.setEnterFadeDuration(2500);

        animationDrawable.setExitFadeDuration(4500);

        animationDrawable.start();

    }
}
کد کامل مربوط به لایه:
<?xml version="1.0" encoding="utf-8"?>
<android.support.constraint.ConstraintLayout xmlns:android="http://schemas.android.com/apk/res/android"
    xmlns:app="http://schemas.android.com/apk/res-auto"
    xmlns:tools="http://schemas.android.com/tools"
    android:layout_width="match_parent"
    android:layout_height="match_parent"
    tools:context="com.android_examples.animatedgradientbackground_android_examplescom.MainActivity"
    android:background="@drawable/root_calling_gradient"
    android:id="@+id/MainRootLayout"
    android:padding="20dp">

    <TextView
        android:layout_width="wrap_content"
        android:layout_height="wrap_content"
        android:text="Android Animated Gradient Background Tutorial"
        android:textColor="#fff"
        android:textStyle="bold"
        android:textSize="20dp"
        android:textAlignment="center"
        app:layout_constraintBottom_toBottomOf="parent"
        app:layout_constraintLeft_toLeftOf="parent"
        app:layout_constraintRight_toRightOf="parent"
        app:layout_constraintTop_toTopOf="parent" />

</android.support.constraint.ConstraintLayout>
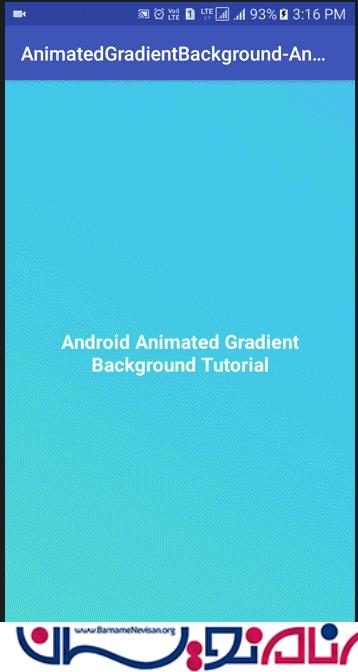
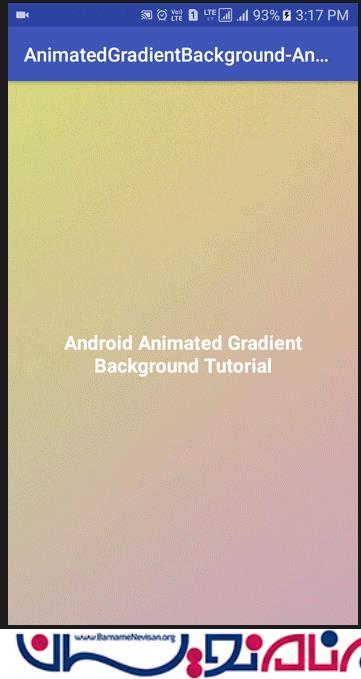
خروجی کار به صورت زیر است:

- Android
- 4k بازدید
- 4 تشکر