عملیات CRUD با استفاده ازEntity Framework در Windows Form
پنجشنبه 20 مهر 1396در این مقاله ما قصد داریم نحوه انجام عملیات CRUD را در یک برنامه Windows Forms را به صورت گام به گام و تصویری و طرح یک مثال با استفاده از Entity Framework به شما آموزش بدهیم.

گام اول)
ابتدا ما باید پایگاه داده و جدول را در SQL Server ایجاد کنیم.لطفا اسکریپت های مربوطه را برای ایجاد پایگاه داده و جدول که در زیر امده است را برای ساخت پایگاه داده و جداول اجرا کنید.
اسکریپت پایگاه داده
create database StudentInformation;
Go;
اسکریپت جدول
CREATE TABLE [dbo].[StudentDetails](
    [Id] [int] IDENTITY(1,1) NOT NULL,
    [Name] [varchar](50) NULL,
    [Age] [int] NULL,
    [City] [varchar](50) NULL,
    [Gender] [varchar](50) NULL,
 CONSTRAINT [PK_StudentDetails] PRIMARY KEY CLUSTERED
(
    [Id] ASC
)WITH (PAD_INDEX  = OFF, STATISTICS_NORECOMPUTE  = OFF, IGNORE_DUP_KEY = OFF, ALLOW_ROW_LOCKS  = ON, ALLOW_PAGE_LOCKS  = ON) ON [PRIMARY]
) ON [PRIMARY]
در اینجا ، ما از نسخه SQL Server 2008 SP1 استفاده میکنیم.
گام دوم)
یک پروژه Windows application در Visual Studio ایجاد می کنیم.مانند تصویر زیر:


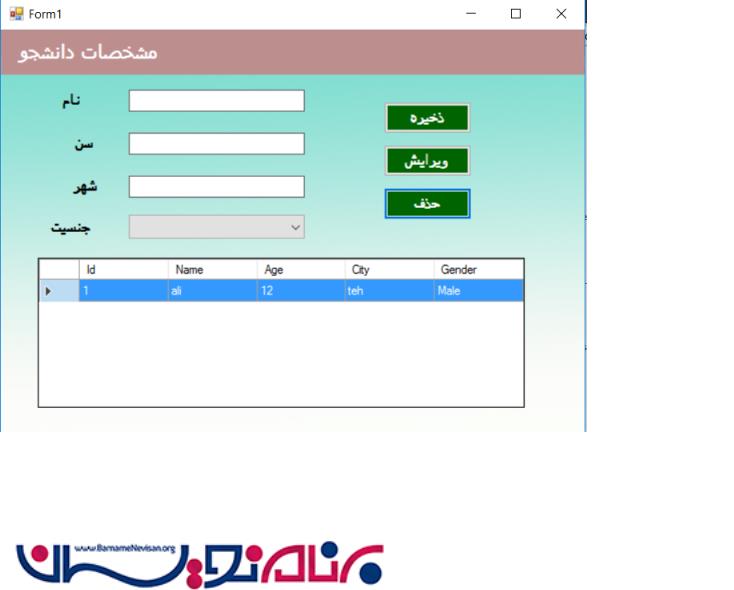
گام سوم)
یک فرم بر حسب نیاز خود طراحی کنید.ما در اینجا از label ها ، text-box ها ، combo-box ها ، GridView و buttonها استفاده کرده ایم.
به تصویر زیر دقت کنید:

توجه)در این جا id یک lable پنهان است.
گام چهارم)
ADO.NET Entity model را به پروژه خود اضافه کنید.برای افزودن آن بر روی solution کلیک کرده و به Add - > New Item بروید و Data را در سمت چپ انتخاب کنید و سپس گزینه Ado.Net Entity Model را انتخاب کنید.
مانند تصویر زیر:


گام پنجم)
شما الان Entity Model افزوده شده به Solution Explorer خود را مشاهده می کنید.

گام ششم)
سپس ، ما کلاس دلخواه خود را برای اتصال و نمایش مقادیر ایجاد می کنیم.
توجه)
فراموش نکنید که نوع کلاس ها را از نوع public تعریف کنید.سپس شما می توانید به این کلاس در خارج از کلاس دسترسی پیدا کنید.
کد زیر را مرجع خود قرار دهید:
using System;
using System.Collections.Generic;
using System.Linq;
using System.Text;

namespace WindowsFormsApplication1.Models
{
   public class StudentInformation
    {
        public int Id { get; set; }
        public string Name { get; set; }
        public int? Age { get; set; }
        public string City { get; set; }
        public string Gender { get; set; }
    }
}
گام هفتم)
زمانیکه form در حال بارگزاری است باید جزئیات دانش آموزان را به Data GridView متصل ( bind ) کنیم و همچنین باید مقادیر جنسیت را به combo-box متصل (bind) کنیم.
کدهای زیر را مرجع کار خود قرار دهید:
private void Form1_Load(object sender, EventArgs e)  // Form load Method
       {
           cmbGender.Items.Add("Male");   // Adding values for Gender Combobox
           cmbGender.Items.Add("Female");
           Display();   // calling Display Method for Bind the Student Details in Datagridview
       }

       public void Display()   // Display Method is a common method to bind the Student details in datagridview after save,update and delete operation perform.
       {
           using (StudentInformationEntities _entity=new StudentInformationEntities())
           {
               List<StudentInformation> _studentList = new List<StudentInformation>();
               _studentList = _entity.StudentDetails.Select(x => new StudentInformation
               {
                   Id=x.Id,
                   Name=x.Name,
                   Age=x.Age,
                   City=x.City,
                   Gender=x.Gender
               }).ToList();
               dataGridView1.DataSource = _studentList;
           }
       }
گام هشتم)
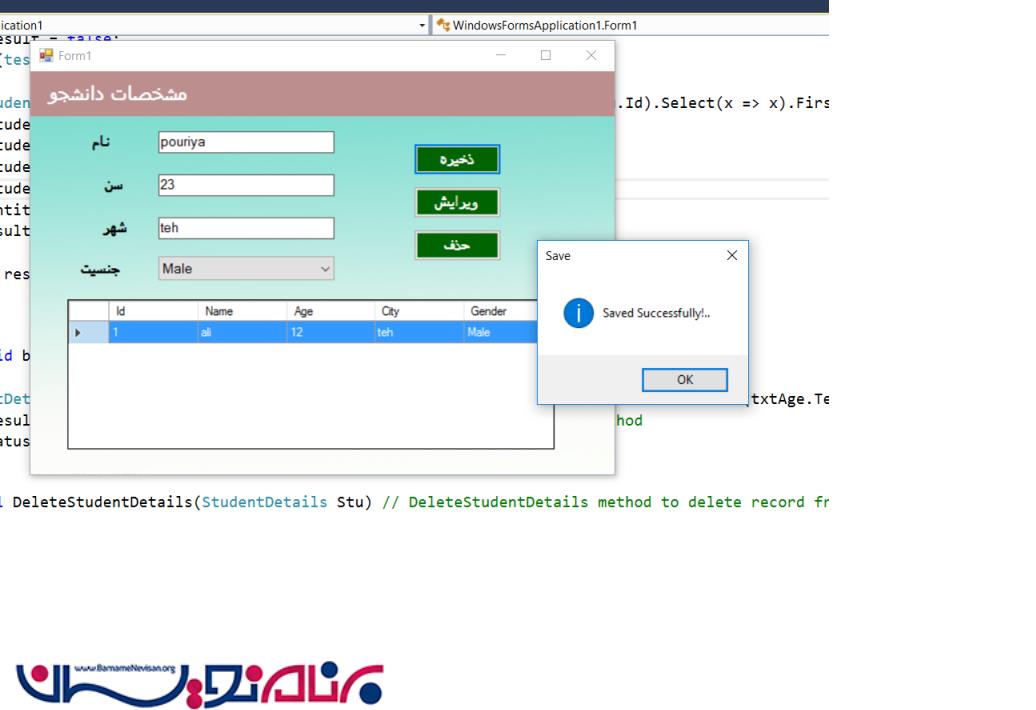
حالا ، اجازه دهید کدهای مربوط به دکمه Save را بنویسیم.
روی دکمه "Save" کلیک کنید و کد زیر را بنویسید."SaveStudentDetails" یک متد برای به روز رسانی entity است.
در اینجا ما مقادیر ورودی (نام ، سن ، شهر ، جنسیت) را به کلاس StudentDetails متصل میکنیم و این ها را به متد SaveStudentDetails پاس میدهیم و موجودیت را ذخیره میکنیم.
private void btnSave_Click(object sender, EventArgs e)   // Save button click event
        {
            StudentDetail stu = new StudentDetail();
            stu.Name = txtName.Text;
            stu.Age = Convert.ToInt32(txtAge.Text);
            stu.City = txtCity.Text;
            stu.Gender = cmbGender.SelectedItem.ToString();
            bool result = SaveStudentDetails(stu); // calling SaveStudentDetails method to save the record in table.Here passing a student details object as parameter
            ShowStatus(result, "Save");
        }
        public bool SaveStudentDetails(StudentDetail Stu) // calling SaveStudentMethod for insert a new record
        {
            bool result = false;
            using (StudentInformationEntities _entity = new StudentInformationEntities())
            {
                _entity.StudentDetails.AddObject(Stu);
                _entity.SaveChanges();
                result = true;
            }
            return result;
        }
توجه )
ما در این برنامه عملیات اعتبار سنجی را انجام نداده ایم ، اگر مایل بودین خودتان در اینحا انجام بدهید.

ویرایش و حذف
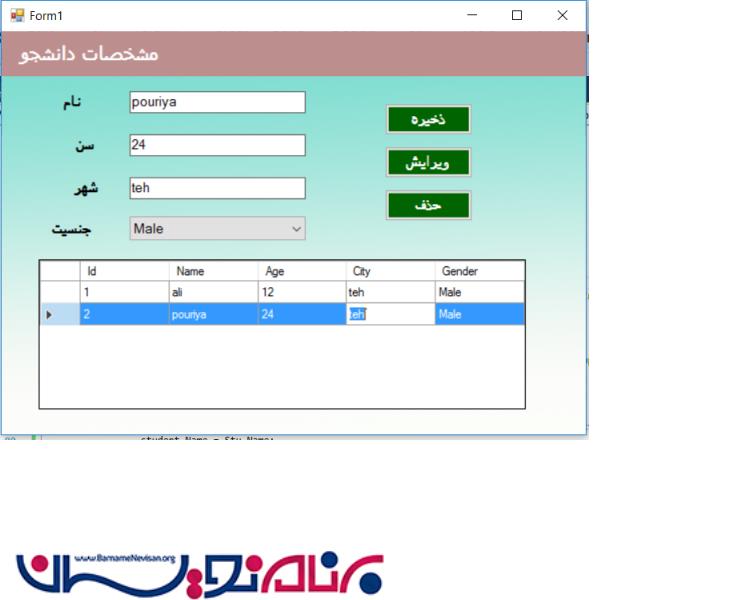
کار بعدی نوشتن کدهای مربوط به عملیات حذف و ویرایش است.
برای به روز رسانی رکورد، ما باید رکورد را در datagridview انتخاب کنیم.در اینجا ، ما یک رویداد کلیک سلولی (cell click) برای datagridview برای دریافت مقادیر از datagridview به فیلد ها نوشته ایم.
لطفا کدهای زیر را مرجع کارخود قرار دهید.
توجه
ما باید برای به روز رسانی و حذف رکورد ها را از datagridview انتخاب کنیم.این رویداد به ما کمک می کند که رکورد ها را بدست آوریم.
private void dataGridView1_CellClick(object sender, DataGridViewCellEventArgs e) //Calling Datagridview cell click to Update and Delete
       {
           if (dataGridView1.Rows.Count > 0)
           {
               foreach (DataGridViewRow row in dataGridView1.SelectedRows) // foreach datagridview selected rows values
               {
                   lblID.Text = row.Cells[0].Value.ToString();
                   txtName.Text = row.Cells[1].Value.ToString();
                   txtAge.Text = row.Cells[2].Value.ToString();
                   txtCity.Text = row.Cells[3].Value.ToString();
                   cmbGender.SelectedItem = row.Cells[4].Value.ToString();
               }
           }
       }
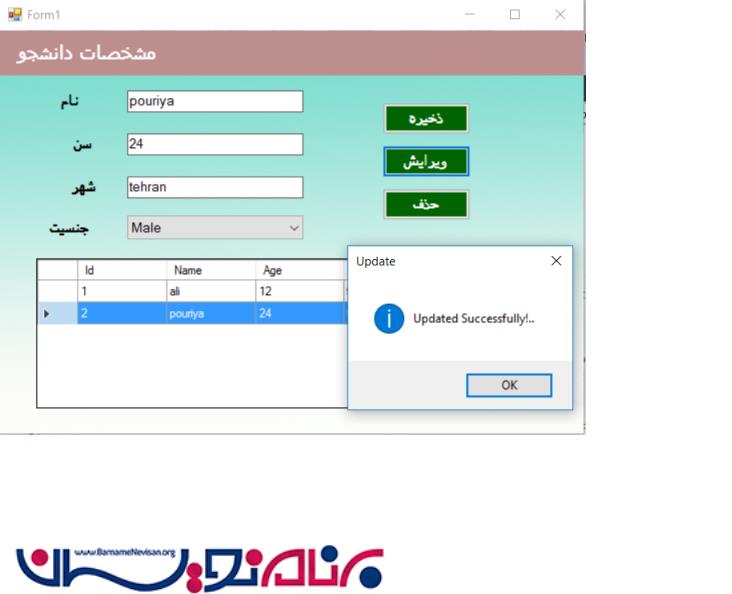
کدهای زیر مربوط به بروز رسانی است.
private void btnUpdate_Click(object sender, EventArgs e) // Update button click event
       {
           StudentDetail stu = SetValues(Convert.ToInt32(lblID.Text), txtName.Text, Convert.ToInt32(txtAge.Text), txtCity.Text, cmbGender.SelectedItem.ToString()); // Binding values to StudentInformationModel
           bool result = UpdateStudentDetails(stu); // calling UpdateStudentDetails Method
           ShowStatus(result, "Update");
       }
       public bool UpdateStudentDetails(StudentDetail Stu) // UpdateStudentDetails method for update a existing Record
       {
           bool result = false;
           using (StudentInformationEntities _entity = new StudentInformationEntities())
           {
               StudentDetail _student = _entity.StudentDetails.Where(x => x.Id == Stu.Id).Select(x => x).FirstOrDefault();
               _student.Name = Stu.Name;
               _student.Age = Stu.Age;
               _student.City = Stu.City;
               _student.Gender = Stu.Gender;
               _entity.SaveChanges();
               result = true;
           }
           return result;
       }
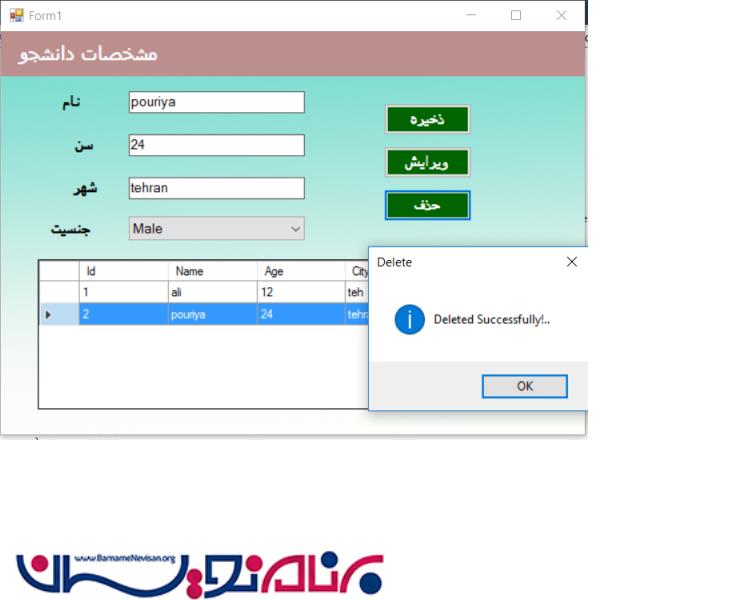
کدهای زیر مربوط به حذف است.
private void btnDelete_Click(object sender, EventArgs e) //Delete Button Event
       {
           StudentDetail stu = SetValues(Convert.ToInt32(lblID.Text), txtName.Text, Convert.ToInt32(txtAge.Text), txtCity.Text, cmbGender.SelectedItem.ToString()); // Binding values to StudentInformationModel
           bool result = DeleteStudentDetails(stu); //Calling DeleteStudentDetails Method
           ShowStatus(result, "Delete");
       }
       public bool DeleteStudentDetails(StudentDetail Stu) // DeleteStudentDetails method to delete record from table
       {
           bool result = false;
           using (StudentInformationEntities _entity = new StudentInformationEntities())
           {
               StudentDetail _student = _entity.StudentDetails.Where(x => x.Id == Stu.Id).Select(x => x).FirstOrDefault();
               _entity.StudentDetails.DeleteObject(_student);
               _entity.SaveChanges();
               result = true;
           }
           return result;
       }
عملیات حذف و بروز رسانی را تست کنید.
لطفا برخی از متدهای داخلی که ما در اینجا استفاده کرده ایم را بررسی کنید.
public StudentDetail SetValues(int Id, string Name, int age, string City, string Gender) //Setvalues method for binding field values to StudentInformation Model class
      {
          StudentDetail stu = new StudentDetail();
          stu.Id = Id;
          stu.Name = Name;
          stu.Age = age;
          stu.City = City;
          stu.Gender = Gender;
          return stu;
      }

      public void ShowStatus(bool result, string Action) // validate the Operation Status and Show the Messages To User
      {
          if (result)
          {
              if (Action.ToUpper() == "SAVE")
              {
                  MessageBox.Show("Saved Successfully!..", "Save", MessageBoxButtons.OK, MessageBoxIcon.Information);
              }
              else if (Action.ToUpper() == "UPDATE")
              {
                  MessageBox.Show("Updated Successfully!..", "Update", MessageBoxButtons.OK, MessageBoxIcon.Information);
              }
              else
              {
                  MessageBox.Show("Deleted Successfully!..", "Delete", MessageBoxButtons.OK, MessageBoxIcon.Information);
              }
          }
          else
          {
              MessageBox.Show("Something went wrong!. Please try again!..", "Error", MessageBoxButtons.OK, MessageBoxIcon.Warning);
          }
          ClearFields();
          Display();
      }

      public void ClearFields() // Clear the fields after Insert or Update or Delete operation
      {
          txtName.Text = "";
          txtAge.Text = "";
          txtCity.Text = "";
          cmbGender.SelectedIndex = -1;
      }
امیدوارم این مقاله برای شما مفید بوده باشد.

- C#.net
- 4k بازدید
- 4 تشکر