چگونگی ایجاد یک application چند زبانه در asp.net
شنبه 3 آبان 1393در این مقاله یاد می گیریم چگونه یک application چند زبانه در asp.net ایجاد کنیم

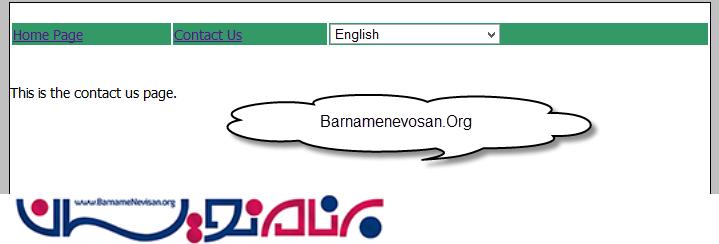
به عکس های زیر نگاه کنید:
همان طور که مشاهده می کنید عکس ها ی بالا نشان دهنده این واقعیت است که می توان application های چند زبانه ایجاد کرد اما چگونه:
مرحله یک:
یک master page به نام site1.master ایجاد کنید و منو را طراحی کنید و برای انتخاب زبان از یک dropdown استفاده کنید.
<%@ Master Language="C#" AutoEventWireup="true" CodeBehind="Site1.master.cs" Inherits="MultilanguageSample.Site1" %>
<!DOCTYPE html>
<html xmlns="http://www.w3.org/1999/xhtml">
<head runat="server">
    <title></title>
    <style type="text/css">
        html {
            font-family: Tahoma;
            font-size: 14px;
            font-style: normal;
            background-color: Silver;
        }

        .Content {
            margin: auto;
            width: 700px;
            background-color: white;
            border: Solid 1px black;
        }
        .auto-style1 {
            width: 100%;
        }
    </style>
    <asp:ContentPlaceHolder ID="head" runat="server">
    </asp:ContentPlaceHolder>
</head>
<body>
    <form id="form1" runat="server">
        <div class="Content">
        <br />
            <table class="auto-style1">
                <tr>
                    <td style="background-color: #339966"> <a href="Default.aspx">
                <asp:Label ID="Label1" meta:resourcekey="menuItemDefault" runat="server" Text="Home"></asp:Label>
            </a></td>
                    <td style="background-color: #339966; " ><a href="Contact.aspx">
            <asp:Label ID="Label2" meta:resourcekey="menuItemContact" runat="server" Text="ContactUs"></asp:Label>
        </a></td>
                    <td style="background-color: #339966;"><asp:DropDownList ID="DropDownList_Language" runat="server" Height="20px" Width="170px"
            OnSelectedIndexChanged="DropDownList_Language_SelectedIndexChanged" AutoPostBack="true">
            <asp:ListItem Value="en-US">English</asp:ListItem>
            <asp:ListItem Value="sv-SE">Swedish</asp:ListItem>
        </asp:DropDownList></td>
                </tr>
            </table>
        <br />
        <br />

        <div>
            <asp:ContentPlaceHolder ID="ContentPlaceHolder1" runat="server">
            </asp:ContentPlaceHolder>
        </div>
        </div>
    </form>
</body>
</html>
مرحله دو:
نوشتن code behind به شکل زیر است:
using System;
using System.Collections.Generic;
using System.Linq;
using System.Web;
using System.Web.UI;
using System.Web.UI.WebControls;

namespace MultilanguageSample
{
    public partial class Site1 : System.Web.UI.MasterPage
    {

        protected void Page_Load(object sender, EventArgs e)
        {
            if (Session["language"] != null && !IsPostBack)
            {
                DropDownList_Language.ClearSelection();
                DropDownList_Language.Items.FindByValue(Session["language"].ToString()).Selected = true;
            }
        }
        protected void DropDownList_Language_SelectedIndexChanged(object sender, EventArgs e)
        {
            switch (DropDownList_Language.SelectedValue)
            {
                case "en-US": this.SetMyNewCulture("en-US");
                    break;
                case "sv-SE": this.SetMyNewCulture("sv-SE");
                    break;
                default:
                    break;
            }
            Response.Redirect(Request.Path);
        }

        private void SetMyNewCulture(string culture)
        {
            Session["language"] = culture;
        }
    }
}
توجه:در این جا میتوانید با استفاده از JavaScript انتخاب زبان کاربر را در cookie یا Local Storage در HTML5 ذخیره کنید.
مرحله سه:
یک فولدر به نام “App_LocalResources اضافه کنید و recource ها مثل Site.master.resx برای زبان انگلیسی و Site1.Master.sv. resx را برای زبان سوئدی اضافه کنید.
توجه:برای حفظ مراقبت بیشتر برای هر صفحه فایل resource را جداگانه نگه دارید.

مرحله چهار:
متد زیر را به فایل global.asax اضافه کنید.
void Application_AcquireRequestState(object sender, EventArgs e)
{
      HttpContext context = HttpContext.Current;
      if (context.Session["language"] != null)
      {
            Thread.CurrentThread.CurrentUICulture = new CultureInfo(context.Session["language"].ToString().Trim());
            Thread.CurrentThread.CurrentCulture = new CultureInfo(context.Session["language"].ToString().Trim());
      }
}
این متد برای گرفتن وضعیت فعلی session استفاده می شود.
مرحله پنج:
resource key را در lable صدا کنید.
<asp:Label ID="Label1" meta:resourcekey="menuItemDefault" runat="server" Text="Home"></asp:Label>
شما همچنین می توانید فایل recource را در c# همانند زیر صدا بزنید:
    protected void Page_Load(object sender, EventArgs e)
    {
    lblMsg.Text = GetLocalResourceObject("lblMsgHome.Text").ToString();

    }
- ASP.net
- 3k بازدید
- 10 تشکر
