تغییر عکس با کلیک روی دکمه توسط ImageView در اندروید
شنبه 2 آبان 1394در این مقاله می خواهیم در مورد اینکه چگونه می شود با یک دکمه یک عکس را تغییر داد توسط ImageView با استفاده از رویداد دکمه در اندروید صحبت نماییم.

یک پروژه ی جدید بسازید و داخل xml را به صورت زیر پر نمایید:
<?xml version="1.0" encoding="utf-8"?>
<RelativeLayout xmlns:android="http://schemas.android.com/apk/res/android"
                xmlns:tools="http://schemas.android.com/tools"
                android:layout_width="match_parent"
                android:layout_height="match_parent" android:background="#86ffeded">

    <TextView
            android:id="@+id/textView1"
            android:textSize="20dp"
            android:textColor="#FF0000"
            android:layout_width="wrap_content"
            android:layout_height="wrap_content"
            android:layout_alignParentTop="true"
            android:layout_centerHorizontal="true"
            android:layout_marginTop="110dp"
            android:text="مرجع تخصصی برنامه نویسان" />

    <ImageView
            android:id="@+id/imageView1"
            android:layout_width="60dp"
            android:layout_height="60dp"
            android:layout_centerVertical="true"
            android:layout_centerHorizontal="true"
            android:src="@drawable/home1" android:background="#ffeffcf3"/>

    <Button
            android:id="@+id/button1"
            android:layout_width="wrap_content"
            android:layout_height="wrap_content"
            android:layout_alignParentBottom="true"
            android:layout_centerHorizontal="true"
            android:layout_marginBottom="80dp"
            android:text="تغییر عکس" />

</RelativeLayout>
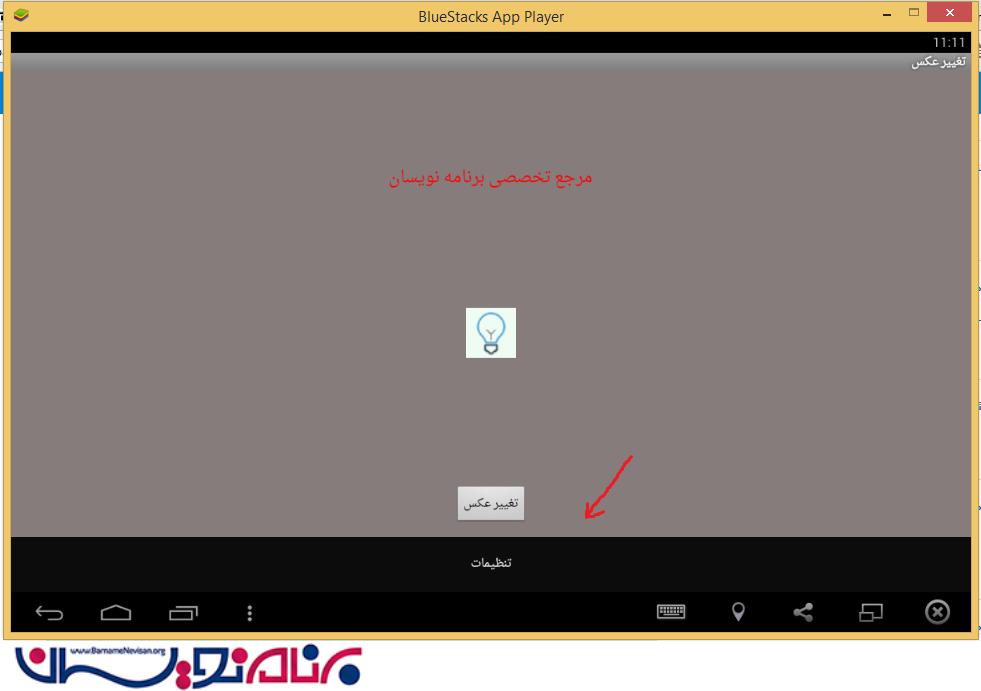
یک Iamgeview در صفحه قرار داده ایم با یک دکمه که قرار است توسط دکمه این این عکس تغییر داده شود.
داخل کلاس جاوا کد های زیر را قرار دهید:
    public class MainActivity extends AppCompatActivity {
        ImageView img;
        Button b;
        int flag = 0;

        @Override
        public void onCreate(Bundle savedInstanceState) {
            super.onCreate(savedInstanceState);
            setContentView(R.layout.activity_main);

            img = (ImageView) findViewById(R.id.imageView1);
            b = (Button) findViewById(R.id.button1);

            b.setOnClickListener(new View.OnClickListener() {

                @Override
                public void onClick(View v) {
                    // TODO Auto-generated method stub

                    if (flag == 0) {
                        img.setImageResource(R.drawable.home1);
                        flag = 1;
                    } else if (flag == 1) {
                        img.setImageResource(R.drawable.home2);
                        flag = 2;
                    } else if (flag == 2) {
                        img.setImageResource(R.drawable.home3);
                        flag = 0;
                    }
                }
            });
        }

        @Override
        public boolean onCreateOptionsMenu(Menu menu) {
            // Inflate the menu; this adds items to the action bar if it is present.
            getMenuInflater().inflate(R.menu.menu_main, menu);
            return true;
        }

        @Override
        public boolean onOptionsItemSelected(MenuItem item) {
            // Handle action bar item clicks here. The action bar will
            // automatically handle clicks on the Home/Up button, so long
            // as you specify a parent activity in AndroidManifest.xml.
            int id = item.getItemId();

            //noinspection SimplifiableIfStatement
            if (id == R.id.action_settings) {
                return true;
            }

            return super.onOptionsItemSelected(item);
        }
    }
ابتدا در متد OnCreate باید activity مورد نظر را بنویسید، بعد imageview و button را تعریف نمایید و برای خود button یک رویداد OnClickListner بسازید
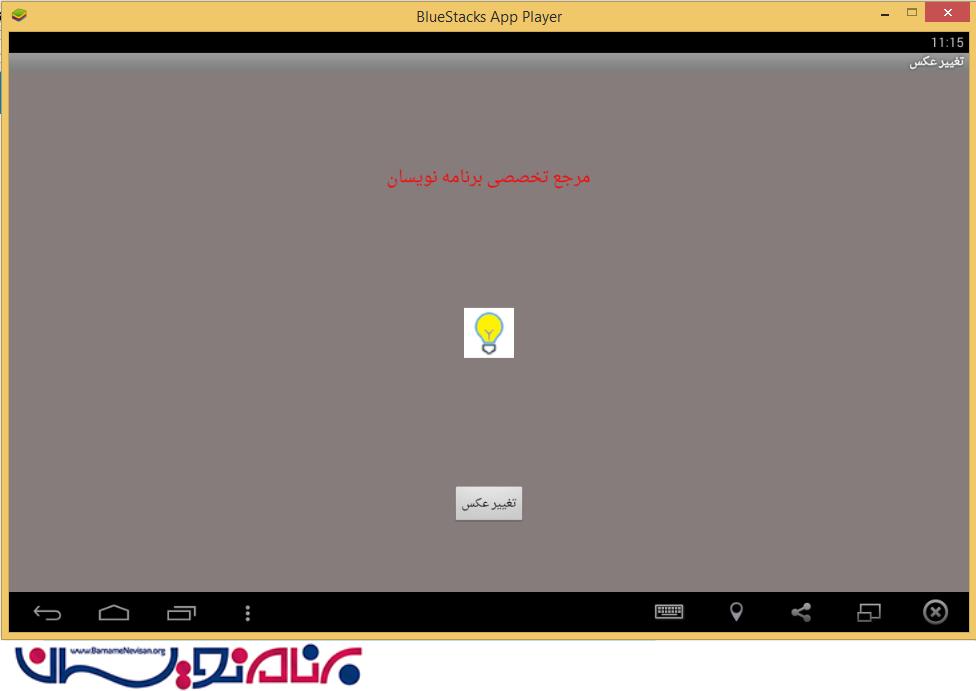
یک متغییر int به نام flag تعریف نمایید و یک شرط بنویسید، اگر 0 بود عکس اولو اگر 1 بود عکس دوم و اگر 3 بود عکس سوم نمایش داده شود.
یک ContexMenu هم در این نمونه قرار داده شده است که از متد onCreateOptionsMenu استفاده می کند.
پوشه ی منو را در فایل res بسازید و xml مورد نظر را در آن قرار دهید
<menu xmlns:android="http://schemas.android.com/apk/res/android"
    xmlns:tools="http://schemas.android.com/tools"
    tools:context="com.example.stoarage.MainActivity" >

    <item
        android:id="@+id/action_settings"
        android:orderInCategory="100"
        android:showAsAction="never"
        android:title="تنظیمات"/>

</menu>
ContexMenu به صورت زیر اجرا می شود:
با زدن دکمه ی سه نقطه وارد ContexMenu خواهید شد.
عکس ها را باید در پوشه ی drawable برنامه قرار دهید.
خروجی به صورت زیر خواهد شد:
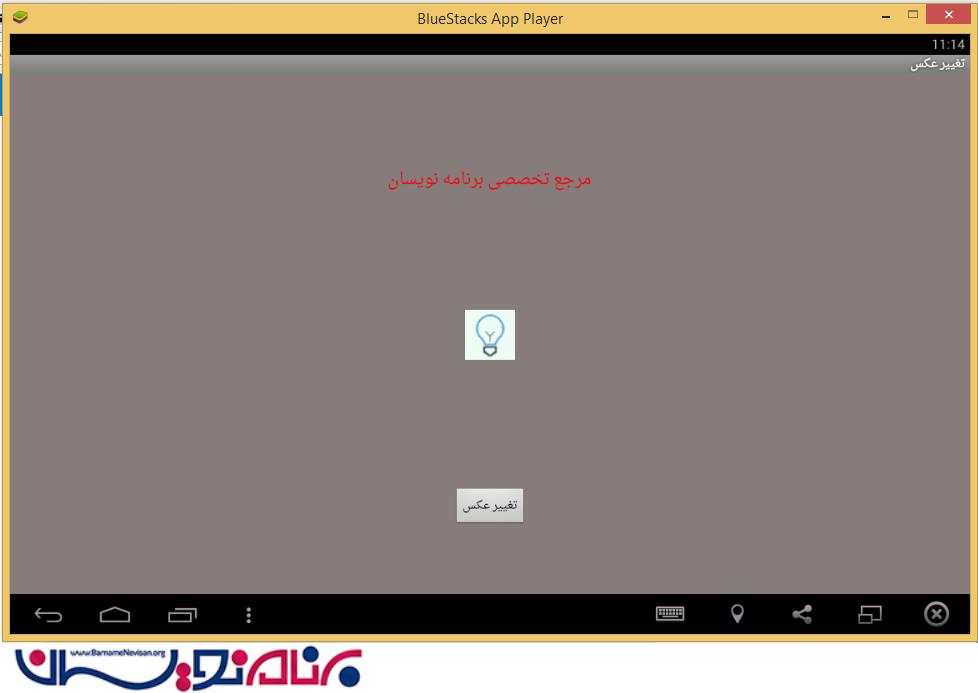
با زدن دکمه عکس دوم در ImageView قرار می گیرد:

- Android
- 6k بازدید
- 1 تشکر