کار با دوربین و برش تصویر در اندروید
دوشنبه 30 آذر 1394در این مقاله قصد داریم با استفاده از دوربین گوشی یک عکس بگیریم و آن عکس مورد نظر را بتوانیم برش دهیم و استفاده نماییم.

اول از همه شما باید با زدن دکمه بتوانید به دوربین وصل شوید و یک عکس بگیرید و زمانی که عکس گرفته شد بتوانید آن عکس مورد نظر را برش زنید.
بعد از عکس گرفتن شما تصویر مورد نظر را داخل یک imageview قرار می دهید پس به یک imageview هم نیاز دارید.
پس نیاز دارید اول از همه دوربین را باز نمایید با استفاده از intent دوربین به صورت زیر:
public void onClick(View v) {

                Intent cameraIntent = new Intent(android.provider.MediaStore.ACTION_IMAGE_CAPTURE);

                startActivityForResult(cameraIntent, CAMERA_REQUEST);
حالا شما از یک activityresault استفاده می نمایید
شما برای نمایش تصویر از یک کلاس bitmap استفاده نمایید.
if (requestCode == CAMERA_REQUEST && resultCode == RESULT_OK) {

            Bitmap photo = (Bitmap) data.getExtras().get("data");

            imageView.setImageBitmap(photo);

        }
قدم اول درست کردن فایل activity به صورت زیر است:
<RelativeLayout xmlns:android="http://schemas.android.com/apk/res/android"


              android:layout_width="fill_parent"

              android:layout_height="fill_parent"
              android:background="#80BFFF">


  <Button android:id="@+id/button1"

          android:layout_width="wrap_content"

          android:layout_height="wrap_content"

          android:text="Click">

  </Button>


  <ImageView

          android:id="@+id/imageView1"

          android:layout_height="fill_parent"

          android:layout_width="fill_parent"

          android:layout_centerHorizontal="true">

  </ImageView>


  <ImageView

          android:id="@+id/imageView2"

          android:layout_height="fill_parent"

          android:layout_width="fill_parent"

          android:layout_centerHorizontal="true">

  </ImageView>


  <Button android:id="@+id/button2"

          android:layout_width="wrap_content"

          android:layout_height="wrap_content"

          android:text="Crop"

          android:layout_alignParentBottom="true">

  </Button>


</RelativeLayout>
قدم دوم ایجاد کلاس جاوا به صورت زیر است:
import android.app.Activity;

import android.content.Intent;

import android.graphics.Bitmap;

import android.os.Bundle;

import android.view.View;

import android.widget.Button;

import android.widget.ImageView;


public class MainActivity extends Activity {

    private static final int CAMERA_REQUEST = 1888;

    ImageView imageView,imageView2;


    Bitmap photo;

    Button crop;

    @Override

    public void onCreate(Bundle savedInstanceState) {

        super.onCreate(savedInstanceState);

        setContentView(R.layout.activity_main);

       imageView = (ImageView)this.findViewById(R.id.imageView1);

        imageView2 = (ImageView)this.findViewById(R.id.imageView1);

        Button photoButton = (Button) this.findViewById(R.id.button1);

      crop=(Button)findViewById(R.id.button2);

       photoButton.setOnClickListener(new View.OnClickListener() {


            @Override

            public void onClick(View v) {

                Intent cameraIntent = new Intent(android.provider.MediaStore.ACTION_IMAGE_CAPTURE);

                startActivityForResult(cameraIntent, CAMERA_REQUEST);

            }

        });


    }


    protected void onActivityResult(int requestCode, int resultCode, Intent data) {

        if (requestCode == CAMERA_REQUEST && resultCode == RESULT_OK) {

          photo = (Bitmap) data.getExtras().get("data");

            imageView.setImageBitmap(photo);

         }

        performcrop();

    }


    private void performcrop() {

    crop.setOnClickListener(new View.OnClickListener() {

        @Override

        public void onClick(View view) {

            Bitmap croppedBmp = Bitmap.createBitmap(photo, 0, 0, photo.getWidth(),photo.getHeight()-30);

            imageView2.setImageBitmap(croppedBmp);


        }

    });

    }

    }
ابتدا باید اول ابزار های خود را تعریف نمایید در اول کد خود و برای دکمه هایی که تعریف کرده اید برای هر کدام رویداد بنویسید
مثلا برای دکمه ی که عکس می گیرد باید یک intent برای دروبین بنویسید.
مرحله ی بعدی باید برای عکس مورد نظر که استفاده کرده اید یک رویداد برای دکمه ی crop کردن بنویسید:
که با استفاده از bitmap یک ارتفاع و یک width مورد نظر به تصویر مورد نظر بدهید و عکس مورد نطر را برش می زند و داخل یک imageviw آن را قرارمی دهید.
و در آخر داخل فایل androidmanifest قطعه کد زیر را قرار می دهید.
<?xml version="1.0" encoding="utf-8"?>

<manifest xmlns:android="http://schemas.android.com/apk/res/android"

    package="com.capture"

    android:versionCode="1"

    android:versionName="1.0" >


    <uses-permission android:name="android.permission.CAMERA" />

    <uses-feature android:name="android.hardware.camera" />

    <uses-feature android:name="android.hardware.camera.autofocus" />


    <uses-sdk

        android:minSdkVersion="7"

        android:targetSdkVersion="16" />


    <application

        android:allowBackup="true"

        android:icon="@drawable/ic_launcher"

        android:label="@string/app_name"

        android:theme="@style/AppTheme" >

        <activity

            android:name="com.capture.MainActivity"

            android:label="@string/app_name" >

            <intent-filter>

                <action android:name="android.intent.action.MAIN" />


                <category android:name="android.intent.category.LAUNCHER" />

            </intent-filter>

        </activity>

    </application>


</manifest>
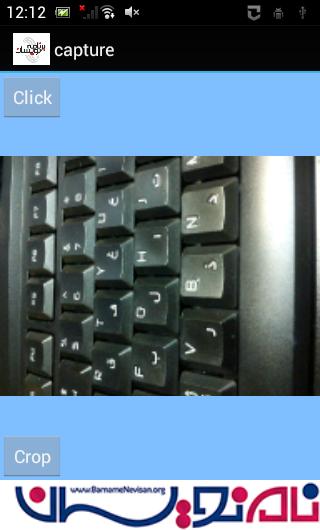
خروجی به صورت زیر خواهد بود:


- Android
- 3k بازدید
- 1 تشکر