واکشی اطلاعات Kendo Grid برای Angular 2 با استفاده از Web API
شنبه 4 دی 1395در مقاله مطالبی را در مورد چگونگی واکشی داده ها(Data Binding) درKendo Grid برای Angular 2 با استفاده از ASP.Net Web API شرح خواهیم داد و در ادامه با ارائه یک مثال ، آن را بصورت مرحله به مرحله بررسی کرده و توضیح خواهیم داد .

معرفی :
برای توضیح این کار ، با استفاده از ASP.Net Web API ما یک سرویس RESTful get ایجاد میکنیم که برای بارگذاری داده ها در Kendo grid برای Angular 2 مورد استفاده قرار میگیرد .
پیش نیاز ها :
برای فهم این مقاله ، یک پیش زمینه ذهنی در مورد ASp.Net Web API , Kendo UI و Angular 2 Framework باید داشته باشید .
در این مقاله مطالب زیر را بررسی خواهیم کرد :
1. ایجا یک برنامه ASP.Net Web API
2. ایجاد یک Controller
3. تست REST API
4. ایجاد یک Kendo UI برای Angular 2
5. پیاده سازی واکشی داده ها در Kendo Grid برای Angular 2
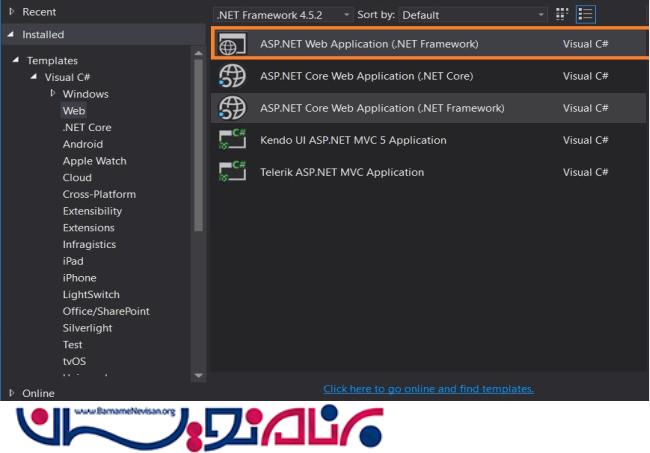
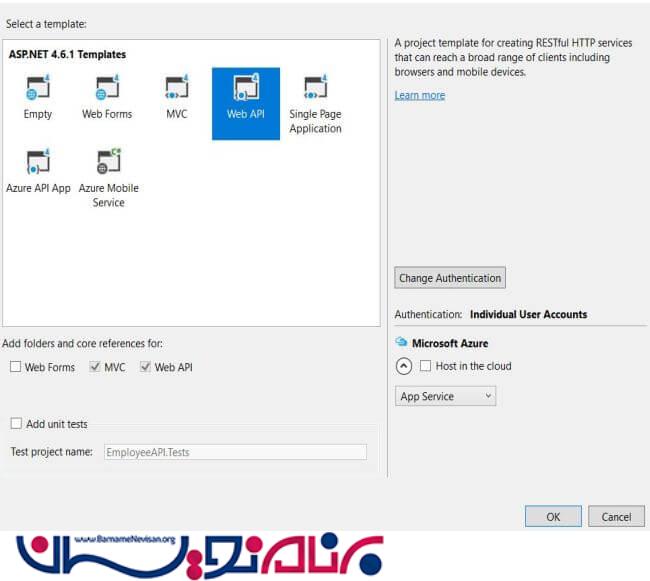
• ایجاد یک برنامه ASP.Net Web API :
برای ایجاد یک برنامه ASP.Net Web API از یک Web Template نصب شده بر روی Visual Studio استفاده میکنیم . در این مورد ، ما نام برنامه را EmployeeAPI میگذاریم .
ایجاد کلاس های model :
در Solution Explorer ، روی فولدر models کلیک راست کرده و یک کلاس با نام Employee.cs به آن Add کنید :
public class Employee
    {
        public Employee(int Id, string Name, string Designation)
        {
            this.EmployeeID = Id;
            this.EmployeeName = Name;
            this.Designation = Designation;

        }
        public int EmployeeID { get; set; }
        public string EmployeeName { get; set; }
        public string Designation { get; set; }
    }
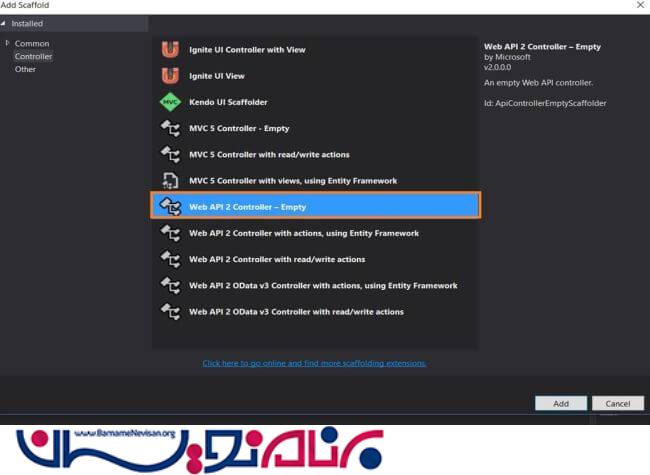
ایجاد Controller :
روی فولدر Controlle کلیک راست کرده و یک Web API 2- Empty controller جدید به آن اضافه کنید ، و نام آن را EmployeeController.cs قرار دهید ، همانطور که در زیر نشان داده شده است :
EmployeeController.cs :
[RoutePrefix("api/Employee")]
    public class EmployeeController : ApiController
    {
        [HttpGet]
        [AllowAnonymous]
        [Route("EmployeeList")]
        public HttpResponseMessage GetEmployee()
        {
            try
            {
                List<Employee> EmpLists = new List<Employee>();
                EmpLists.Add(new Employee(1, "Govind Raj", "Business Analyst"));
                EmpLists.Add(new Employee(2, "Krishn Mahato", "Development"));
                EmpLists.Add(new Employee(3, "Bob Ross", "Testing"));
                EmpLists.Add(new Employee(4, "Steve Davis", "Development"));
                EmpLists.Add(new Employee(5, "Dave Tucker", "Infrastructure"));
                EmpLists.Add(new Employee(6, "James Anderson", "HR"));
                return Request.CreateResponse(HttpStatusCode.OK, EmpLists, Configuration.Formatters.JsonFormatter);
            }
            catch (Exception ex)
            {
                return Request.CreateResponse(HttpStatusCode.OK, ex.Message, Configuration.Formatters.JsonFormatter);
            }
        }
    }
این Controller دارای یک Action Method با نام GetEmployee میباشد که لیستی از کارمندان را باز خواهد گرداند .
تست REST API :
همانطور که در تصویر زیر نمایش داده شده است برای تست API از POSTMAN/Fiddler استفاده خواهیم کرد .
• /api/Employee/EmployeeList/~
• از نوع GET
ایجاد یک Kendo UI برای برنامه Angular2 :
برای ایجاد و پیکربندی Kendo UI در Angular 2 به این مقاله مراجعه کنید .
• پیاده سازی واکشی داده ها در Kendo Grid برای Angular 2 :
در این مقاله ، چگونگی ایجاد و پیکربندی Kendo Grid را برای Angular2 مشاهده کردید . حال ما قصد استفاده از پیکربندی مشابهی را داریم اما با اعمال تغییرات در Grid DataSource , که از RESTful Service ها استفاده میکند .
به کد زیر توجه فرمایید ، این کد ها در src/app/app.module.ts میباشد :
import { BrowserModule } from '@angular/platform-browser';
import { NgModule } from '@angular/core';
import { FormsModule } from '@angular/forms';
import { GridModule } from '@progress/kendo-angular-grid';
import { HttpModule } from '@angular/http';
import { AppComponent } from './app.component';


@NgModule({
    declarations: [
        AppComponent
    ],
    imports: [
        BrowserModule,
        FormsModule,
        HttpModule,
        GridModule,
    ],
    providers: [],
    bootstrap: [AppComponent]
})
export class AppModule { }
app.component.ts :
import { Component, ViewChild, Input, OnInit, Injectable } from '@angular/core';
import { Http } from '@angular/http';
import { Observable, BehaviorSubject } from 'rxjs/Rx';

import {
    GridComponent,
    GridDataResult,
    DataStateChangeEvent
} from '@progress/kendo-angular-grid';


/* Example service */
@Injectable()
export class EmployeeService extends BehaviorSubject<GridDataResult> {
    private BASE_URL: string = 'http://localhost:1237/api/Employee/EmployeeList';


    constructor(private http: Http) {
        super(null);
    }

    public query(): void {
        this.getEmployee()
            .subscribe(x =>
                super.next(x));
    }


    private getEmployee(): Observable<GridDataResult>{
        return this.http
            .get(`${this.BASE_URL}`)
            .map(response => response.json())
            .map(response => (<GridDataResult>{
                data: response,
                total: parseInt(response.length,10)
            }));

    }

}
@Component({
    providers: [EmployeeService],
    selector: 'app-root',
    template: `
      <kendo-grid
          [data]="view | async"
        >
        <kendo-grid-column field="EmployeeID" width="200"></kendo-grid-column>
        <kendo-grid-column field="EmployeeName" width="200"></kendo-grid-column>
        <kendo-grid-column field="Designation"  width="500" [sortable]="false">
        </kendo-grid-column>
      </kendo-grid>
  `
})

export class AppComponent {
    private view: Observable<GridDataResult>;

    @ViewChild(GridComponent) private grid: GridComponent;
    constructor(private service: EmployeeService) {
        this.view = service;
        this.service.query();
    }


}
Index.html :
<!doctype html>
<html>
<head>
    <meta charset="utf-8">
    <title>KendoAngular</title>
    <base href="/">

    <meta name="viewport" content="width=device-width, initial-scale=1">
    <link rel="icon" type="image/x-icon" href="favicon.ico">
</head>
<body>

    <app-root>Loading...

    </app-root>
</body>
</html>
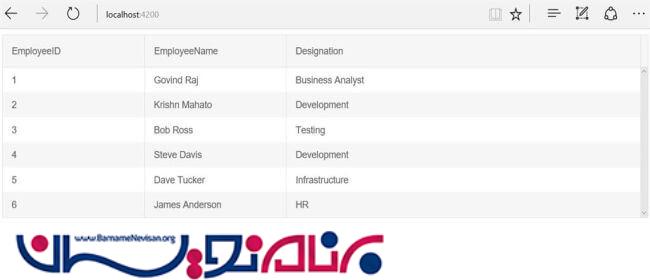
نتیجه همانند زیر خواهد شد :
نتیجه گیری :
در این مقاله ما چگونگی واکشی داده ها در Kendo Grid را برای Angular 2 با استفاده از ASP.Net Web API آموختیم . امیدواریم که این مقاله برای شما مفید واقع شده باشد .
آموزش angular

- AngularJs
- 2k بازدید
- 5 تشکر