ایجاد بارکد با استفاده از کتابخانه ZXing در اندروید
دوشنبه 11 اردیبهشت 1396در این مقاله قصد داریم یک برنامه ای بسازیم که بتوانیم با وارد کردن اطلاعات یک بار کد برای ما تولید می کند این بار کد از کتابخانه ی zxing استفاده می کند، این برنامه اطلاعات ما را گرفته و بعد از آن یک بار کد ایجاد می کند.

در بعضی از سایت ها اگر دیده باشید آدرس خود را به صورت بار کد تولید می کنند یعنی شما آدرس خود را قرار می دهید و با استفاده از این کتابخانه شما می توانید یک بار کد تحویل بگیرید:
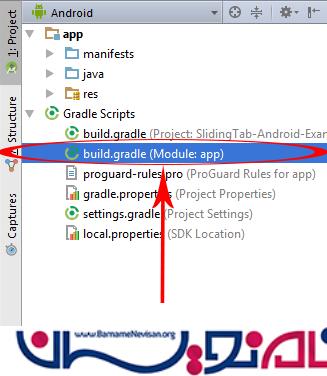
ابتدا buil.gradle را باز نمایید:
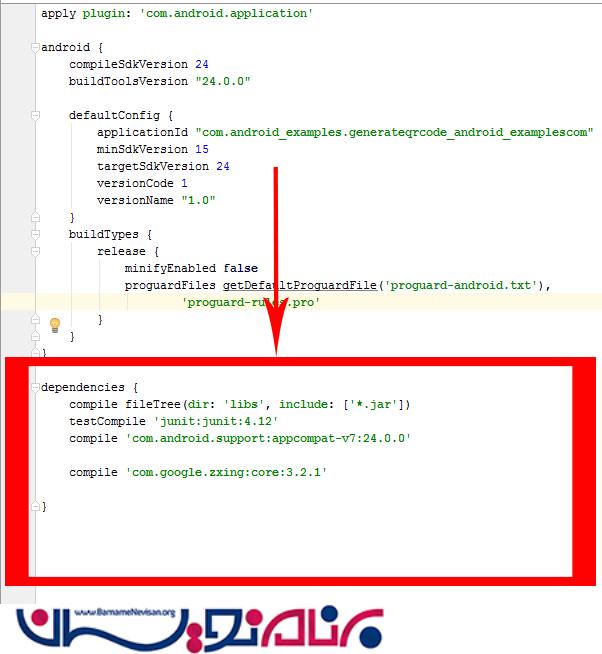
باید قطعه کد زیر را اضافه کنید
dependencies {
 compile fileTree(dir: 'libs', include: ['*.jar'])
 testCompile 'junit:junit:4.12'
 compile 'com.android.support:appcompat-v7:24.0.0'

 compile 'com.google.zxing:core:3.2.1'

}
به صورت زیر خواهد بود:
داخل کد اصلی مان قطعه کد زیر را قرار دهید:
import android.graphics.Bitmap;
import android.graphics.drawable.Drawable;
import android.net.Uri;
import android.support.v7.app.AppCompatActivity;
import android.os.Bundle;
import android.view.View;
import android.widget.Button;
import android.widget.EditText;
import android.widget.ImageView;
import com.google.zxing.BarcodeFormat;
import com.google.zxing.MultiFormatWriter;
import com.google.zxing.WriterException;
import com.google.zxing.common.BitMatrix;

public class MainActivity extends AppCompatActivity {

    ImageView imageView;
    Button button;
    EditText editText;
    String EditTextValue ;
    Thread thread ;
    public final static int QRcodeWidth = 500 ;
    Bitmap bitmap ;
    @Override
    protected void onCreate(Bundle savedInstanceState) {
        super.onCreate(savedInstanceState);
        setContentView(R.layout.activity_main);

        imageView = (ImageView)findViewById(R.id.imageView);
        editText = (EditText)findViewById(R.id.editText);
        button = (Button)findViewById(R.id.button);

        button.setOnClickListener(new View.OnClickListener() {
            @Override
            public void onClick(View view) {

                EditTextValue = editText.getText().toString();

                try {
                    bitmap = TextToImageEncode(EditTextValue);

                    imageView.setImageBitmap(bitmap);

                } catch (WriterException e) {
                    e.printStackTrace();
                }

            }
        });
    }


    Bitmap TextToImageEncode(String Value) throws WriterException {
        BitMatrix bitMatrix;
        try {
            bitMatrix = new MultiFormatWriter().encode(
                    Value,
                    BarcodeFormat.DATA_MATRIX.QR_CODE,
                    QRcodeWidth, QRcodeWidth, null
            );

        } catch (IllegalArgumentException Illegalargumentexception) {

            return null;
        }
        int bitMatrixWidth = bitMatrix.getWidth();

        int bitMatrixHeight = bitMatrix.getHeight();

        int[] pixels = new int[bitMatrixWidth * bitMatrixHeight];

        for (int y = 0; y < bitMatrixHeight; y++) {
            int offset = y * bitMatrixWidth;

            for (int x = 0; x < bitMatrixWidth; x++) {

                pixels[offset + x] = bitMatrix.get(x, y) ?
                        getResources().getColor(R.color.QRCodeBlackColor):getResources().getColor(R.color.QRCodeWhiteColor);
            }
        }
        Bitmap bitmap = Bitmap.createBitmap(bitMatrixWidth, bitMatrixHeight, Bitmap.Config.ARGB_4444);

        bitmap.setPixels(pixels, 0, 500, 0, 0, bitMatrixWidth, bitMatrixHeight);
        return bitmap;
    }
    }
داخل لایه ی layout قطعه کد زیر را قرار دهید:
<RelativeLayout xmlns:android="http://schemas.android.com/apk/res/android"
    xmlns:tools="http://schemas.android.com/tools"
    android:layout_width="match_parent"
    android:layout_height="match_parent"
    tools:context="com.android_examples.generateqrcode_android_examplescom.MainActivity"
    android:background="#FFF8E1">

    <EditText
        android:layout_width="fill_parent"
        android:layout_height="wrap_content"
        android:id="@+id/editText"
        android:layout_alignParentTop="true"
        android:layout_centerHorizontal="true"
        android:hint="Enter Text Here"
        android:gravity="center"
        />

    <Button
        android:layout_width="fill_parent"
        android:layout_height="wrap_content"
        android:text="CLICK HERE TO generate qr code"
        android:id="@+id/button"
        android:layout_below="@+id/editText"
        android:layout_centerHorizontal="true" />

    <ImageView
        android:layout_width="wrap_content"
        android:layout_height="wrap_content"
        android:id="@+id/imageView"
        android:layout_centerHorizontal="true"
        android:layout_below="@+id/button"
        />

</RelativeLayout>
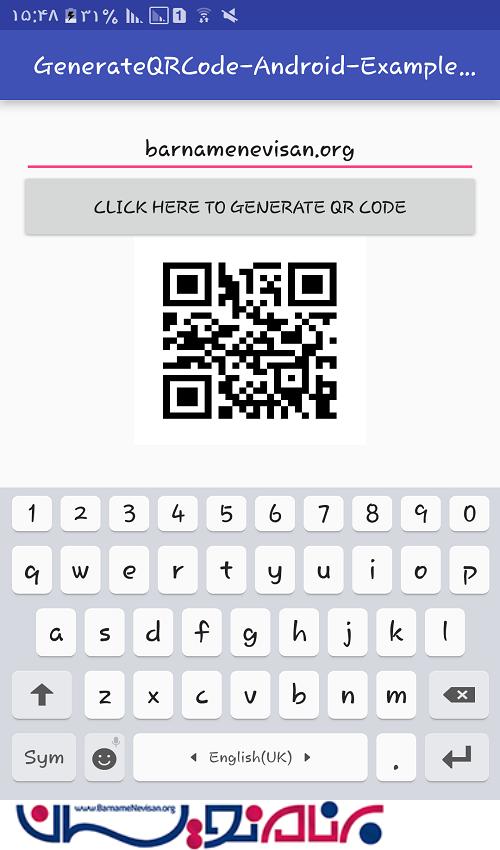
خروجی به صورت زیر خواهد بود:

- Android
- 3k بازدید
- 4 تشکر